
Smart 360 Photo Turntable with ESP32, ESPHome & Home Assistant
Build a Smart 360 Photo Turntable powered by ESP32, ESPHome, and Home Assistant for automated product photography. Perfect for smooth, consistent, and hands-free image capture.
I recently built the Motorized Photo / Video Turntable for taking 360° videos of dev boards and other electronics. It looked fine with the original Arduino Nano, but since I pretty much use the ESP32 for everything these days (naturally, it’s ESPBoards after all), I decided to rebuild it around an ESP32, ESPHome, and Home Assistant for a smarter and more flexible setup (you’ll see why soon...).

To keep it practical, I added a tactile push button for quick local control. Anjd the result is a WiFi-connected turntable that integrates well with automated product spins, timelapse rigs, or just making camera work hands-free.
Original Design Reference #
The foundation for this build came from a great minimalist design using a Stepper motor, a 608 bearing, and a 3D-printed frame. Super clean and effective!
🔗 Motorized Turntable with 608 Bearing – Printables

Big thanks to the original designer - this made a perfect base for hacking in smarter control.
What I Changed #
🧠 Hardware Upgrade #
- Swapped out the Arduino Nano for an ESP32 (naturally).
- Added a momentary push button for manual triggering - useful for quick spins during setup or demos.
📲 Smart Control #
- Flashed the ESP32 with ESPHome for seamless integration.
- Hooked it into Home Assistant, exposing controls for:
- Start / Stop buttons
- Home button
- Speed Control

I went with ESPHome + Home Assistant specifically because it makes speed control super intuitive - just throw in a slider in the Home Assistant UI, no custom frontend needed.
The setup is now fully controllable over WiFi, while keeping a physical button for local fallback.
Required Parts #
Here’s what I used to keep things simple and avoid a full redesign - I wanted a ready-to-use device, not another half-finished prototype. That’s why I went with plug-and-play parts and... plenty of hot glue. 😄
🧩 Mechanical #

3D printed turntable base + casing

608 Bearings
⚙️ Electronics #
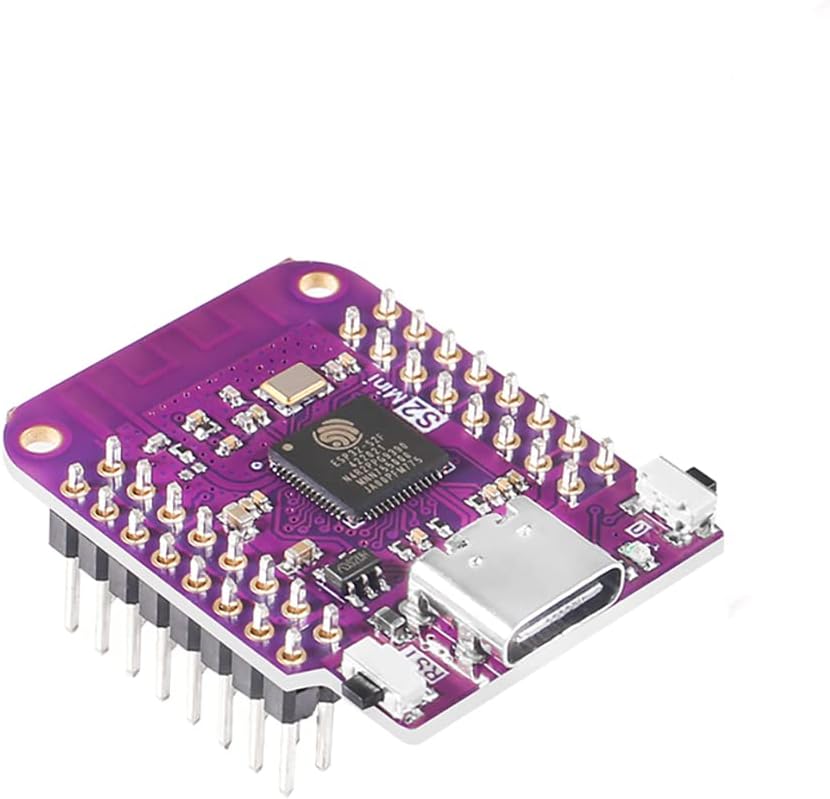
ESP32 Development Board
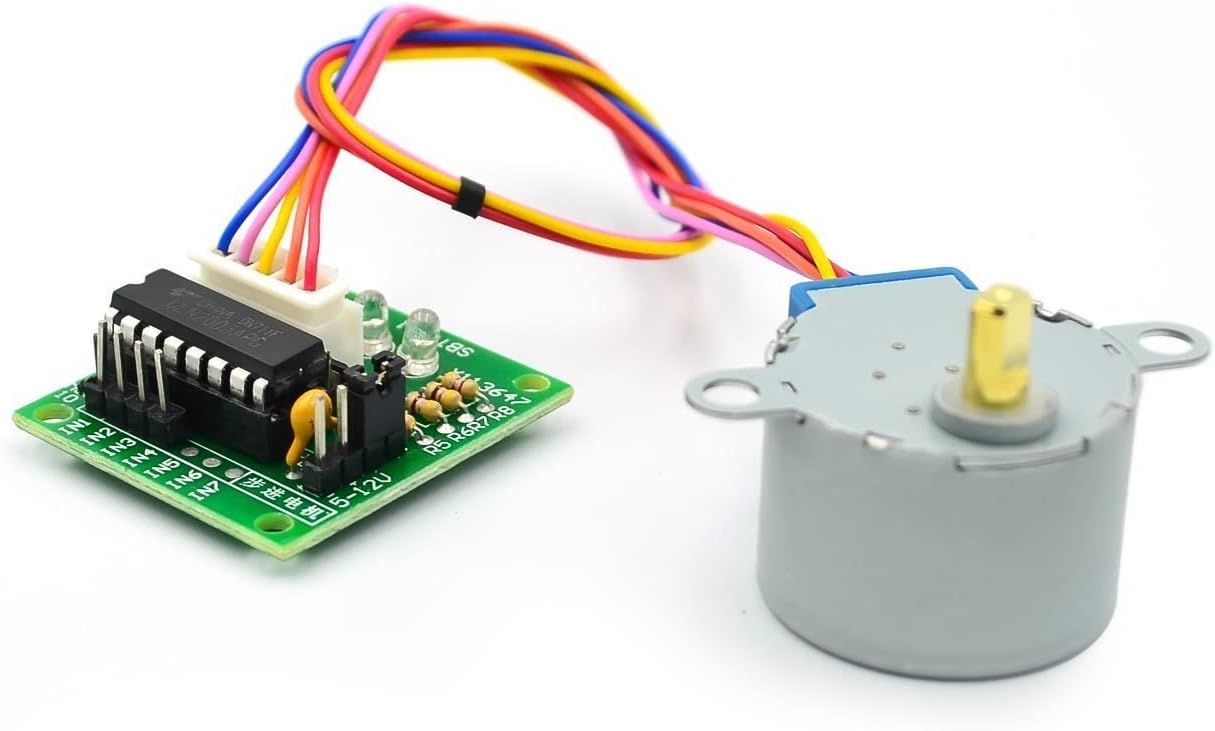
Stepper Motor (28BYJ-48) + ULN2003 Driver Board

Power Socket

Push Button
🔌 Wiring & Power #
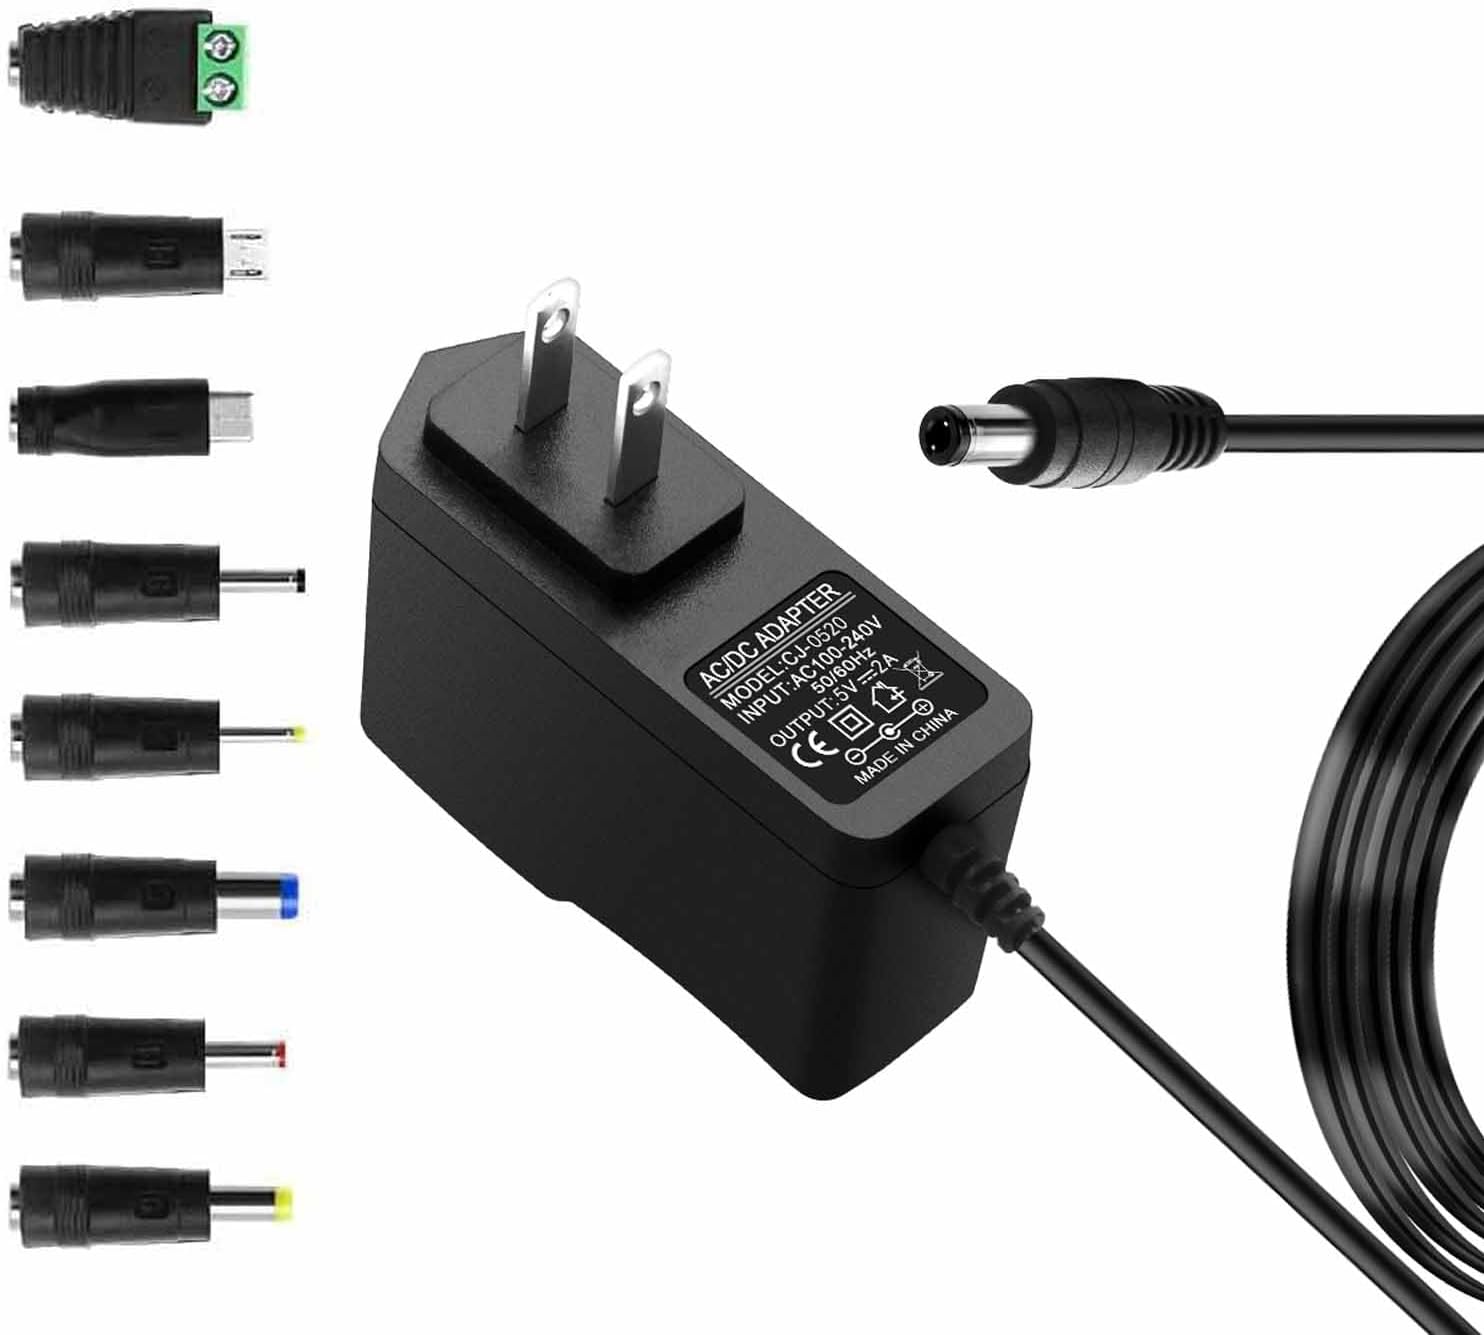
Power supply

DuPont Jumper Wires
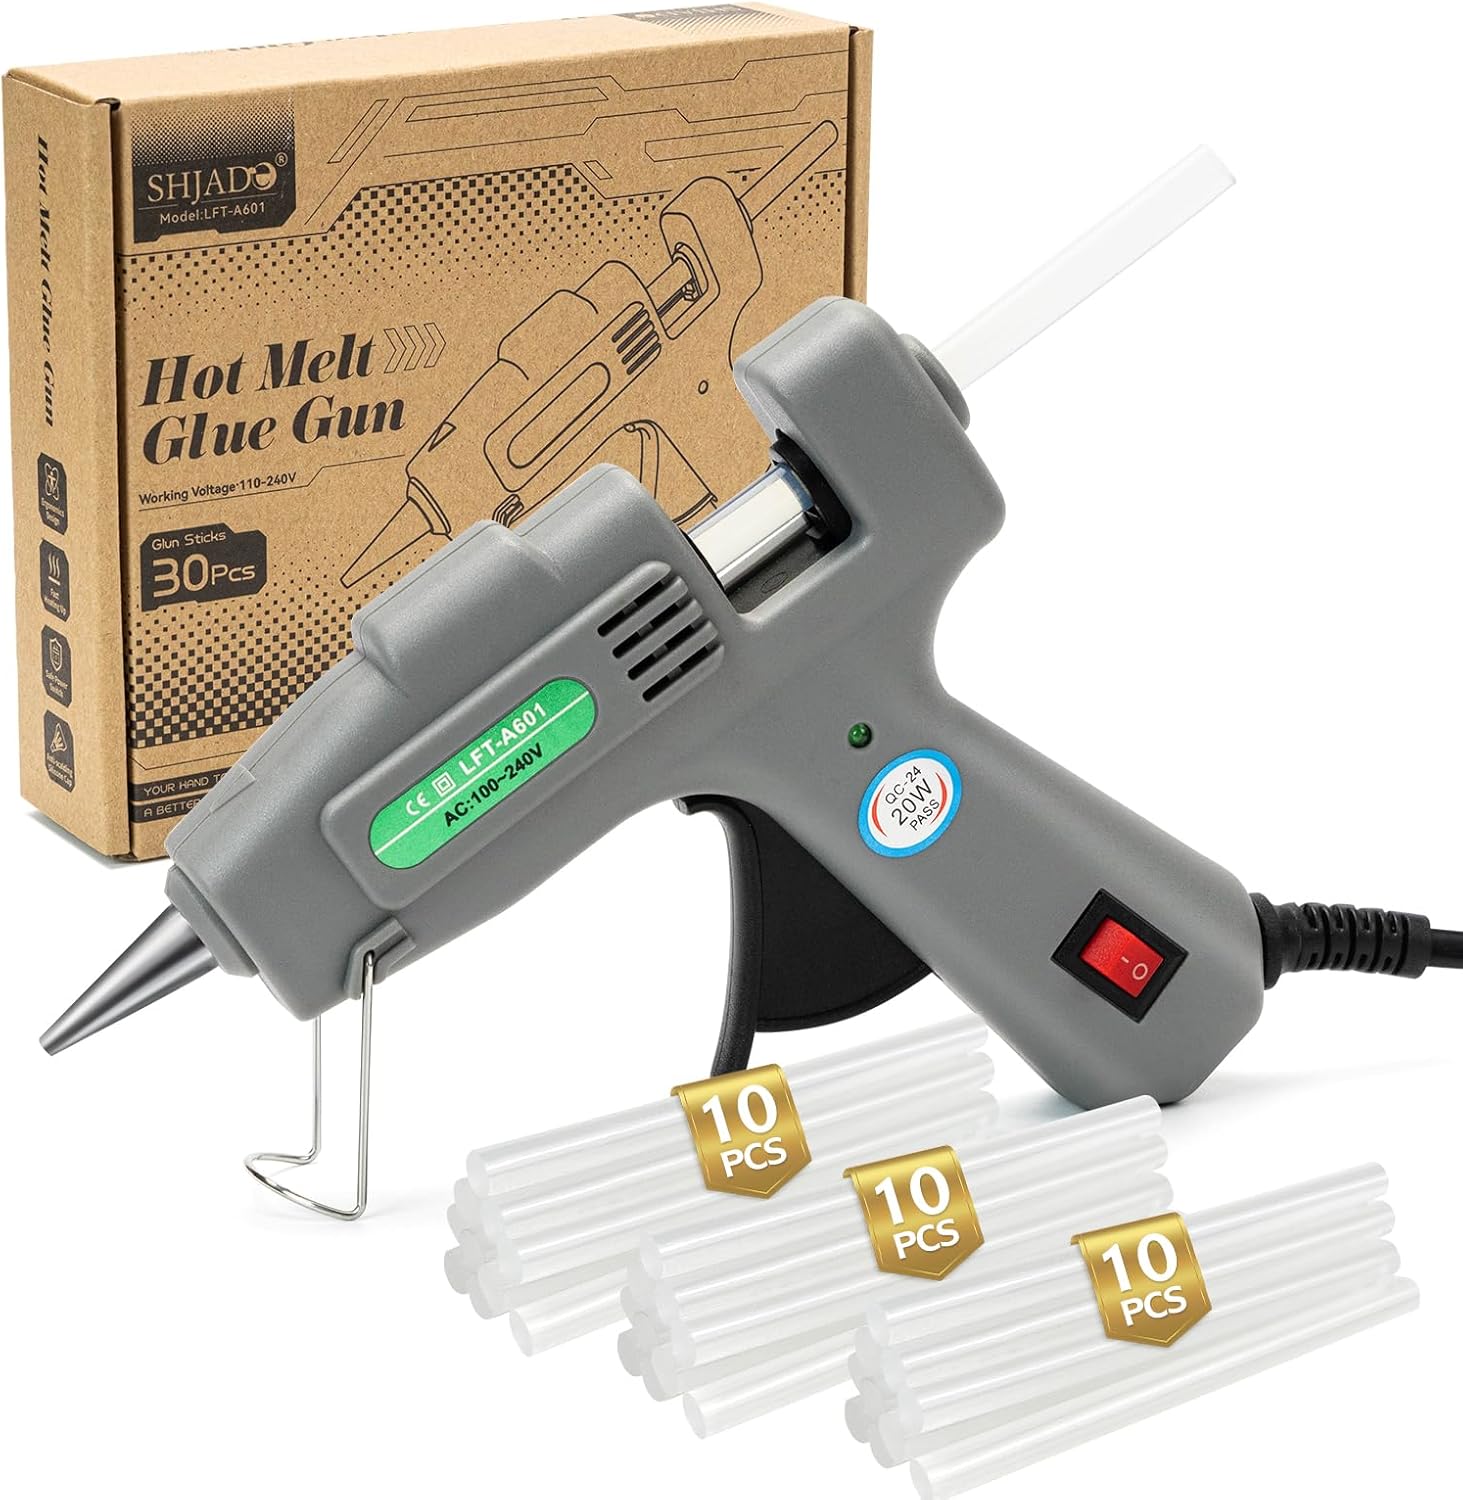
Hot Glue Gun
Sometimes hot glue is the best "firmware" - especially when you're aiming for a functional build, not a polished product.
Assembly #
Wiring everything up was refreshingly simple - one of those rare builds where things just work without needing custom PCBs or adapters.
- Connected the ESP32 to the ULN2003 driver board:
- GPIOs → IN1 through IN4 on the driver
- Make sure to use the correct sequence and match the
pin_atopin_din your YAML
- Wired up a momentary push button to a GPIO with internal pull-up enabled (saves a resistor)
- Added a DC barrel jack for clean power input
- Shared ground between the ESP32 and stepper motor power
- Powered the whole setup from a simple 5V wall adapter - plenty for this little stepper

Since I wasn’t aiming to redesign the whole turntable, I just tucked the electronics inside the base and secured things with hot glue. Not the most elegant, but it’s fast, solid, and it works.

ESPHome Configuration #
Here’s a streamlined version of my ESPHome YAML config that handles everything - stepper motor control, speed tuning, Home Assistant buttons, and a local push button with dual behavior (short press to spin / stop, long press to return to "home").
You can drop this directly into your ESPHome setup and tweak the GPIOs or speed range to match your hardware. Just don’t forget to:
- Set your Wi-Fi SSID and password (or use secrets if you’ve already got those configured)
- Replace the placeholder API key and OTA password if you plan to use encrypted communication or over-the-air updates
- Double-check that the GPIO pins match your ESP32 variant and ULN2003 wiring
esphome:
  name: 360-pod
  friendly_name: 360_Pod

esp32:
  board: esp32-s2-saola-1
  framework:
    type: arduino

logger:

api:
  encryption:
    key: "YOUR_GENERATED_API_KEY"

ota:
  password: "YOUR_OTA_PASSWORD"

wifi:
  ssid: "YOUR_WIFI_SSID"
  password: "YOUR_WIFI_PASSWORD"

captive_portal:

globals:
  - id: is_spinning
    type: bool
    initial_value: 'false'

stepper:
  - platform: uln2003
    id: my_stepper
    pin_a: GPIO9
    pin_b: GPIO7
    pin_c: GPIO5
    pin_d: GPIO3
    max_speed: 250 steps/s
    step_mode: HALF_STEP

binary_sensor:
  - platform: gpio
    pin:
      number: GPIO12
      mode: INPUT_PULLUP
      inverted: true
    id: control_button
    on_click:
      - min_length: 50ms
        max_length: 1500ms
        then:
          - script.execute: toggle_spin
      - min_length: 1500ms
        max_length: 5000ms
        then:
          - script.execute: go_home

number:
  - platform: template
    name: "Stepper Speed"
    id: stepper_speed
    min_value: 50
    max_value: 1020
    step: 10
    unit_of_measurement: "steps/s"
    initial_value: 120
    optimistic: true
    on_value:
      then:
        - stepper.set_speed:
            id: my_stepper
            speed: !lambda 'return id(stepper_speed).state;'

button:
  - platform: template
    name: "Toggle Spin"
    on_press:
      then:
        - script.execute: toggle_spin

  - platform: template
    name: "Reset to Home"
    on_press:
      then:
        - script.execute: go_home

script:
  - id: toggle_spin
    then:
      - if:
          condition:
            lambda: 'return id(is_spinning);'
          then:
            - stepper.set_target:
                id: my_stepper
                target: !lambda 'return id(my_stepper).current_position;'
            - globals.set:
                id: is_spinning
                value: 'false'
          else:
            - globals.set:
                id: is_spinning
                value: 'true'
            - stepper.set_target:
                id: my_stepper
                target: !lambda 'return id(my_stepper).current_position + 4096;'

  - id: go_home
    then:
      - stepper.set_target:
          id: my_stepper
          target: 0
      - globals.set:
          id: is_spinning
          value: 'false'
These are the main interactions defined in the ESPHome config - both from the hardware side (physical button) and Home Assistant UI. Here's how it all works together in practice:
- Short press the physical button: rotates one full step (360° or one revolution). If you short press while spinning, it will stop.
- Long press: resets position back to 0 (great for consistent photo alignment).
- The "Stepper Speed" number in HA gives you live PWM speed control right from the dashboard.
Photos & Demo #
Here’s where you can see the build in action-from the inside wiring to a smooth 360° rotation shot triggered via Home Assistant.

🎥 Demo Video
This video was filmed using the smart turntable itself - Home Assistant triggered, ESP32-controlled, and totally hands-free.
Future Improvements #
A few ideas I'm considering for the next iteration:
- 🎥 Add an ESP32-CAM to the setup - mount it directly on or near the turntable for automated video capture or photo timelapses
- 🔄 Sync motion + capture: use automations to start the turntable and camera at the same time, or trigger snapshots at specific angles
The ESP32-CAM idea is especially interesting - it could make this a completely self-contained 360° product photography rig.
Resources #
If you want to build your own or remix this setup, here are the files:
- 🧱 3D Model: Printables – Turntable
- 💾 ESPHome YAML: GitHub Repo (includes full config, wiring notes, and updates)
Final Thoughts #
This simple ESP32 upgrade turned a basic turntable into a smart, automation-friendly tool that's now fully integrated into my photography setup. It’s been great for product shots, dev board demos, and timelapse clips - all with hands-free control.
If you're already deep into ESPHome and Home Assistant, this is a super rewarding weekend project. Hope it sparks some ideas for your own builds!
👍 Got questions, suggestions, or your own remix? Drop a comment or open an issue on GitHub!