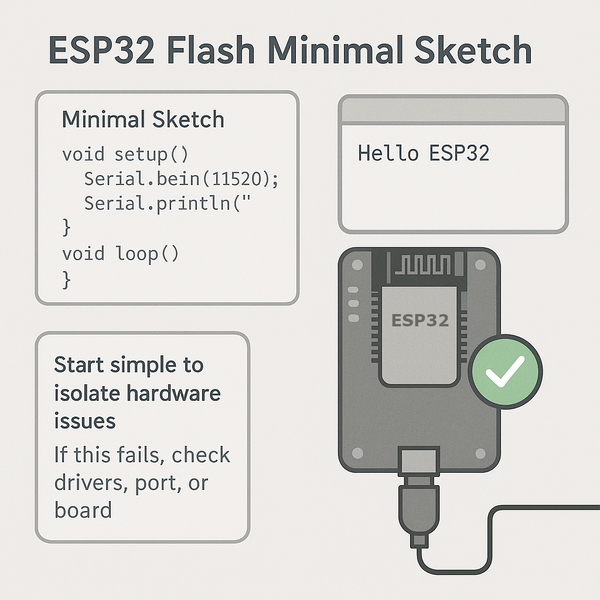
ESP32 Flash Minimal Sketch
Use a simple sketch to confirm your ESP32 board is functional and isolate issues related to flashing, power, or code. A minimal test is the fastest way to determine if your board boots and runs correctly.
Common Causes
- 🧪
Unknown or Complex Failure Conditions
When faced with inconsistent behavior, using a minimal sketch helps isolate hardware, upload, or code issues.
- ⚙️
Faulty Code or Corrupted Upload
Complex or incorrect code may cause crashes on boot, making it unclear whether the board or the sketch is at fault.
- 🛠️
Flashing or Boot Troubleshooting
In case of general flashing issues, testing with a known-good minimal sketch helps confirm whether upload and execution paths are functional.
Symptoms
Board Appears Unresponsive After Upload
After uploading, there’s no serial output or visible activity, suggesting the board may not be running user code.
Serial Monitor Shows No Output or Repeating Boot
The serial log is empty or shows the ESP32 rebooting repeatedly, which can indicate a crash during setup.
Upload Works but Project Sketch Fails
A larger sketch fails to run properly while basic sketches like Blink work, pointing to software configuration or memory issues.
Solutions
Flash a Known-Good Minimal Sketch
Upload a basic sketch (e.g., Blink or a Serial hello-world) to test core functionality and rule out code-related faults.
Disconnect All External Components
Remove sensors, displays, and peripherals to ensure no external wiring is affecting the board’s behavior.
Use Serial Output to Confirm Execution
Add a Serial.begin() and Serial.println() to your minimal sketch to confirm that the ESP32 boots and runs code. If you are using newer ESP32 microcontroller, like ESP32-C3, make sure the CDC on Boot is enabled.
Reset IDE Configuration and Reflash
Verify board, flash size, and partition scheme in your IDE, then upload the minimal sketch to rule out upload config errors. See: ESP32 Flash Size Detection Error.
More Details
ESP32 Flash Minimal Sketch #
When you're facing flashing issues, boot failures, or uncertain behavior after uploading code, your first step should always be to flash a minimal sketch.
This helps determine whether your board, upload process, and basic functionality are intact - or whether a complex sketch or hardware setup is to blame.
Why This Matters #
It’s hard to troubleshoot an issue when you’re not sure whether the problem is:
- The ESP32 board itself
- Your wiring or peripherals
- A library or code crash
- Flash configuration or memory layout
Flashing a minimal, known-good sketch lets you isolate the board and environment from the rest of your project.
Step-by-Step: Test with a Minimal Sketch #
✅ Step 1: Disconnect Everything #
Unplug all sensors, displays, relays, and other external components. You want the ESP32 running standalone.
✅ Step 2: Upload a Serial “Hello” Sketch #
Here’s a minimal serial output sketch:
void setup() {
  Serial.begin(115200);
  delay(1000); // let serial stabilize
  Serial.println("ESP32 is alive!");
}

void loop() {
  delay(1000);
  Serial.println("Still running...");
}
This will confirm that:
- The board powers up
- Upload succeeded
- Code is executing
- Serial output is functional
Watch the serial monitor. If you don’t see the expected output, your board may not be booting correctly. If you are using newer ESP32 microcontroller, like ESP32-C3, make sure the CDC on Boot is enabled.
✅ Step 3: Try the Blink Sketch (Optional) #
If you prefer a visual test or can’t use serial:
int ledPin = 2; // Adjust for your board (e.g., 2 for ESP32 Dev Module)

void setup() {
  pinMode(ledPin, OUTPUT);
}

void loop() {
  digitalWrite(ledPin, HIGH);
  delay(500);
  digitalWrite(ledPin, LOW);
  delay(500);
}
If the onboard LED blinks, your board is alive and running code properly.
✅ Step 4: Confirm IDE and Upload Settings #
In Arduino IDE:
- Tools → Board → Select the correct ESP32 variant
- Tools → Flash Size → Match your board (e.g., 4MB)
- Tools → Partition Scheme → Use default unless customized
- Tools → Upload Speed → 921600 or 115200 typically works
In PlatformIO:
board_build.flash_size = 4MB
upload_speed = 921600
✅ Step 5: Erase Flash if Needed #
If previous code left the board in a bad state, use esptool.py:
esptool.py --port COMx erase_flashThen re-upload your minimal sketch.
When This Works, but Your Main Sketch Fails #
That’s a good sign! Your board and bootloader are functional - the issue is likely:
- Code crash during setup
- Excessive memory usage
- Flash configuration mismatch
- Peripheral draw or power issues
Use this baseline to incrementally reintroduce complexity until you find the breaking point.
Summary #
Before assuming your board is dead or your project is broken, always flash a minimal sketch first. If that works, you’ve eliminated hardware and flashing problems - and now you can troubleshoot your real sketch with confidence.

Quick Navigation
Additional Resources
Still Stuck with an ESP32 Issue? Let's solve it together.
Our interactive troubleshooting wizard will guide you through common ESP32 problems and their solutions, step by step.