ESP32 Serial Monitor Empty
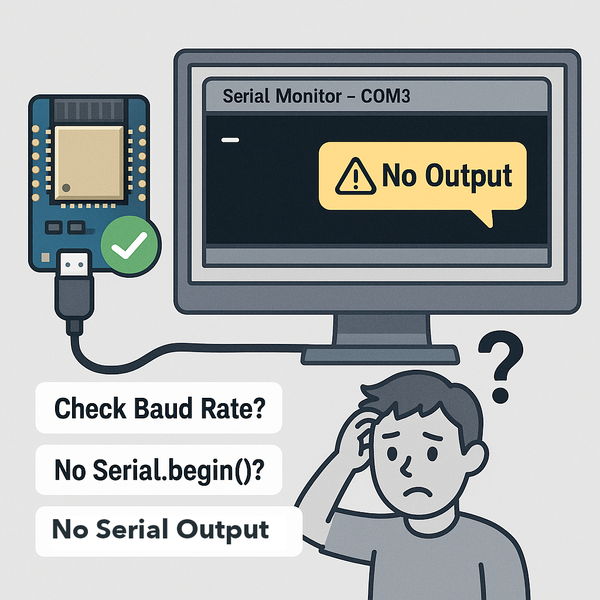
Resolve the issue of a blank serial monitor when using ESP32 boards. Learn how USB CDC settings, cable type, and startup timing affect serial output - especially for boards like the ESP32-C3 - and follow best practices for reliable debugging via Serial.
Common Causes
- 🔇
USB CDC Not Enabled on Boot
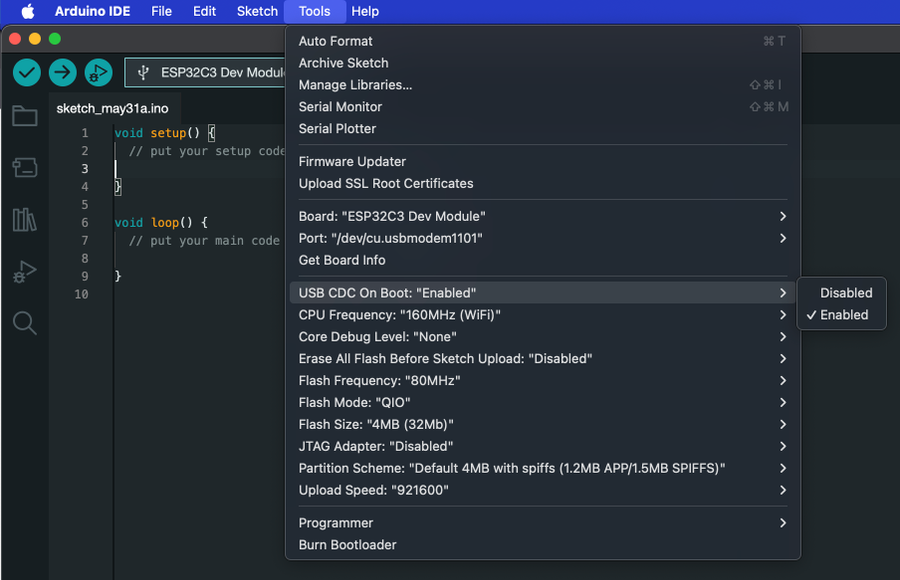
Some newer ESP32 boards like the ESP32-C3 require “Enable USB CDC on boot” to be selected in the Arduino IDE for serial output to appear. Without it, the USB serial interface is inactive.
- 🔌
Incompatible or Power-Only USB Cable
A cable without data lines prevents serial communication. Even if the board powers on, serial output won’t appear. See: ESP32 Wrong USB Cable
- ⚙️
Incorrect Port or Baud Rate
Selecting the wrong serial port or baud rate in your IDE can result in a blank or garbled serial monitor.
- 🔄
Board Not Reset or Not Running Code
If the ESP32 is stuck in bootloader mode or hasn’t started your sketch yet, you won’t see output. It might need a manual reset or proper upload completion.
Symptoms
Blank Serial Monitor Output
Serial monitor opens, but shows no output despite expected
Serial.print()
statements in the sketch.
Missing COM Port After Upload
After flashing the board, no port appears - or the port disappears and never comes back.
Output Only Visible After Reset
Serial output only appears if you press the RESET button, indicating boot/init timing issues.
Solutions
Enable USB CDC on Boot (ESP32-C3 and Similar)
In Arduino IDE, go to Tools > USB CDC on boot and set it to Enabled. This allows the ESP32 to expose its serial interface after flashing.
Check Cable and Port
Use a known good USB data cable, and verify the correct port is selected in your IDE. Reopen the serial monitor if the port changes after upload.
Add a Startup Delay
Insert a small delay before printing to Serial to ensure the monitor has time to connect:
void setup() {
  Serial.begin(115200);
  delay(1000); // let the serial monitor initialize
  Serial.println("Hello!");
}
Manually Reset the Board
Press the RESET button after uploading to ensure the board exits bootloader mode and begins running your code.
More Details
ESP32 Serial Monitor Empty #
If your serial monitor shows nothing - even though your sketch has Serial.println() calls - don’t panic. This is a common issue, especially on newer ESP32 boards like the ESP32-C3 that use USB CDC (USB-to-Serial via software).
It usually comes down to the cable, port, or boot configuration.
Typical Scenarios #
- You see “Upload complete,” but the Serial Monitor stays blank
- Your code has
Serial.begin()andSerial.println("Hello"), but nothing appears - Output only shows up after pressing the RESET button
- The board disappears from the COM port list after uploading
Why It Happens #
1. USB CDC Not Enabled (ESP32-C3, S2, S3) #
Newer chips like ESP32-C3 don’t use a separate USB-to-serial chip. Instead, they emulate it using software (CDC). Unless “USB CDC on boot” is enabled, there won’t be any USB serial output.
2. Power-Only USB Cable #
Some USB cables don’t have data lines. Your board might power on, but there’s no way for serial communication to happen.
→ See: ESP32 Wrong USB Cable
3. Serial Port Changed or Wrong Baud Rate #
If the ESP32 resets or enumerates differently after flashing, the COM port may change. Also, make sure your baud rate matches the code (Serial.begin(115200) is typical).
4. Board Not Running Code #
If the board is stuck in bootloader mode or the code hasn’t started yet, nothing will print to Serial. A manual reset can often fix this.
How to Fix It #
✅ 1. Enable USB CDC on Boot (for ESP32-C3, S2, S3)
In Arduino IDE, go to:
Tools > USB CDC on Boot > Enabled

This ensures the board exposes its USB serial port after startup.
✅ 2. Add a Delay Before Printing
Give the serial interface time to initialize:
void setup() {
  Serial.begin(115200);
  delay(1000); // Give the serial monitor time to connect
  Serial.println("Hello!");
}
✅ 3. Check the USB Cable
Try a known-good USB data cable. Many issues trace back to charge-only or low-quality cables.
→ See: ESP32 Wrong USB Cable
✅ 4. Recheck the Serial Port
After flashing, the ESP32 may enumerate differently. Close and reopen the serial monitor, and make sure the selected port is correct.
✅ 5. Press RESET After Upload
Some boards require a manual reset after code upload to begin execution. Try pressing the RESET button once the upload completes.
Summary #
If your serial monitor is empty, it’s usually not your code - it’s the board not talking. Start by checking USB CDC settings, use a proper data cable, and confirm your serial setup matches the board type. A few quick tweaks can save you hours of confusion.

Quick Navigation
Additional Resources
Still Stuck with an ESP32 Issue? Let's solve it together.
Our interactive troubleshooting wizard will guide you through common ESP32 problems and their solutions, step by step.