
Simulate ESP32 Projects with Wokwi in VSCode (Without the Browser)
Learn how to run Wokwi ESP32 simulations locally in VSCode using your own firmware and hardware setup. Skip the slow browser builds and free-tier limits - simulate faster.
Wokwi is an incredibly useful platform for simulating ESP32 projects - especially when you're testing out sensor setups, checking pin mappings, or just trying to debug a tricky behavior without reaching for the breadboard. The browser-based version is great for quick prototyping, but once your project grows past the “hello world” stage, the limitations start getting in the way.
Live LiveEven something as simple as the standard WiFi Scanner example can take over 60 seconds to compile inside the browser. And that’s for every minor tweak. You’ll often see a message saying “Servers are not busy,” but performance doesn’t reflect it. Worse yet, when Wokwi’s servers are actually under load, compiling larger projects often fails altogether - either timing out or hitting the free-tier memory and CPU limits.
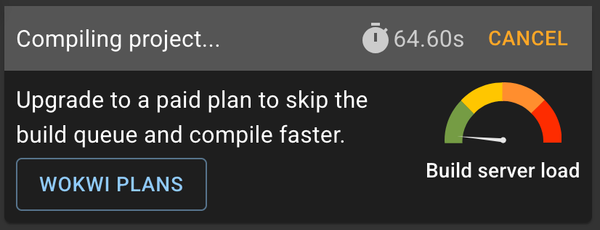
This becomes a real bottleneck when you’re iterating on real code. But the good news? You don’t have to compile in the browser at all.
If you’re already building your project locally - like with Arduino CLI inside VSCode - you can set up Wokwi directly inside VSCode too. The Wokwi extension lets you simulate your ESP32 firmware using your own local hex and elf files, bypassing the browser and its limitations entirely.
No more waiting. No more hitting limits. And simulation starts instantly with your actual build.
Let’s walk through how to set it up.
Install the Wokwi VSCode Extension #
First, make sure you’re running a recent version of VSCode - older versions may not support the Wokwi extension properly.
Then:
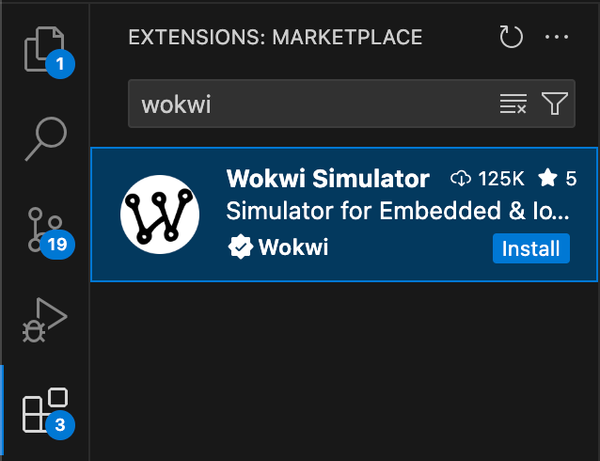
- Open the Extensions panel in VSCode (
Cmd+Shift+XorCtrl+Shift+X) - Search for Wokwi
- Look for the official extension named Wokwi Simulator, published by Wokwi (it should be clearly marked)
- Click Install
Activate Your Wokwi License #
To run Wokwi simulations locally, you'll need to activate a license-but don’t worry, it’s completely free.
Here’s how to do it:
- Press
Cmd + Shift + A(on macOS) orCtrl + Shift + A(on Windows/Linux) to open the Command Palette - Search for and select Wokwi: Request New License
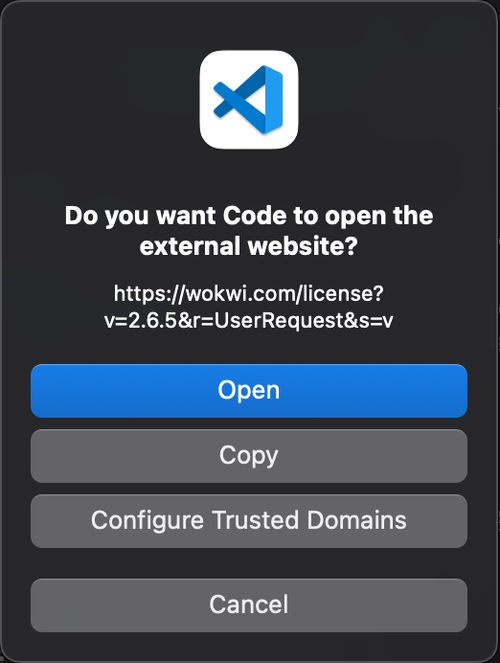
- This opens your browser to the Wokwi website - sign in with your Wokwi account and approve the request
- Normally, your browser will launch VSCode and the license will be added automatically. But if it doesn’t, just copy the license key shown in the browser, go back to VSCode, press
F1, type Wokwi: Manually Enter License Key, and paste it in.
You only need to do this once per machine. After that, Wokwi will use your local license to enable simulation - no recurring logins or subscriptions required.
📄 Wokwi Docs – VSCode Getting Started
Create the wokwi.toml File #
In your project root, create a new file called wokwi.toml. This file tells the Wokwi simulator where to find your firmware and symbol data.
If your build process (like Arduino CLI that we used in the previous post) outputs a .bin and .elf file, use the following configuration:
[wokwi]
version = 1
firmware = 'build/test.ino.bin'
elf = 'build/test.ino.elf'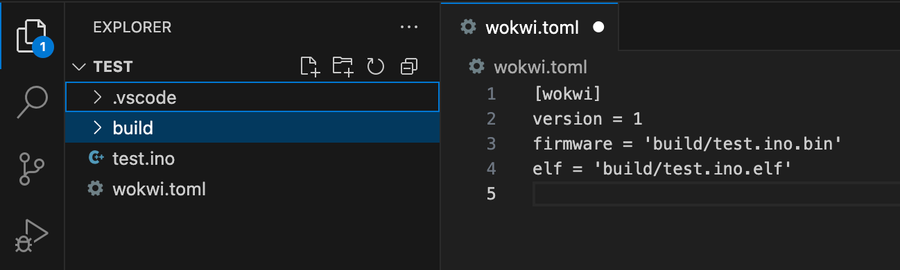
firmwarepoints to the compiled binary that Wokwi will flash into the virtual ESP32elfis used for symbol information like variable names, which improves the simulation experience
Make sure the paths match your actual build output. If you're using the Arduino CLI setup from our VSCode + Arduino workflow guide, you may need to tweak the build folder or filenames accordingly.
Add the diagram.json #
The diagram.json file defines your project's virtual hardware setup - microcontroller, components, connections, etc. Wokwi uses this file to build the simulation.
Here’s how to create it:
- In your project root, create a new file named
diagram.json - Right-click the file and choose Open With → Text Editor
Important: Don’t open it with the Wokwi GUI yet - you can't edit the diagram directly from VSCode - Head over to https://wokwi.com/projects/new/esp32-s3
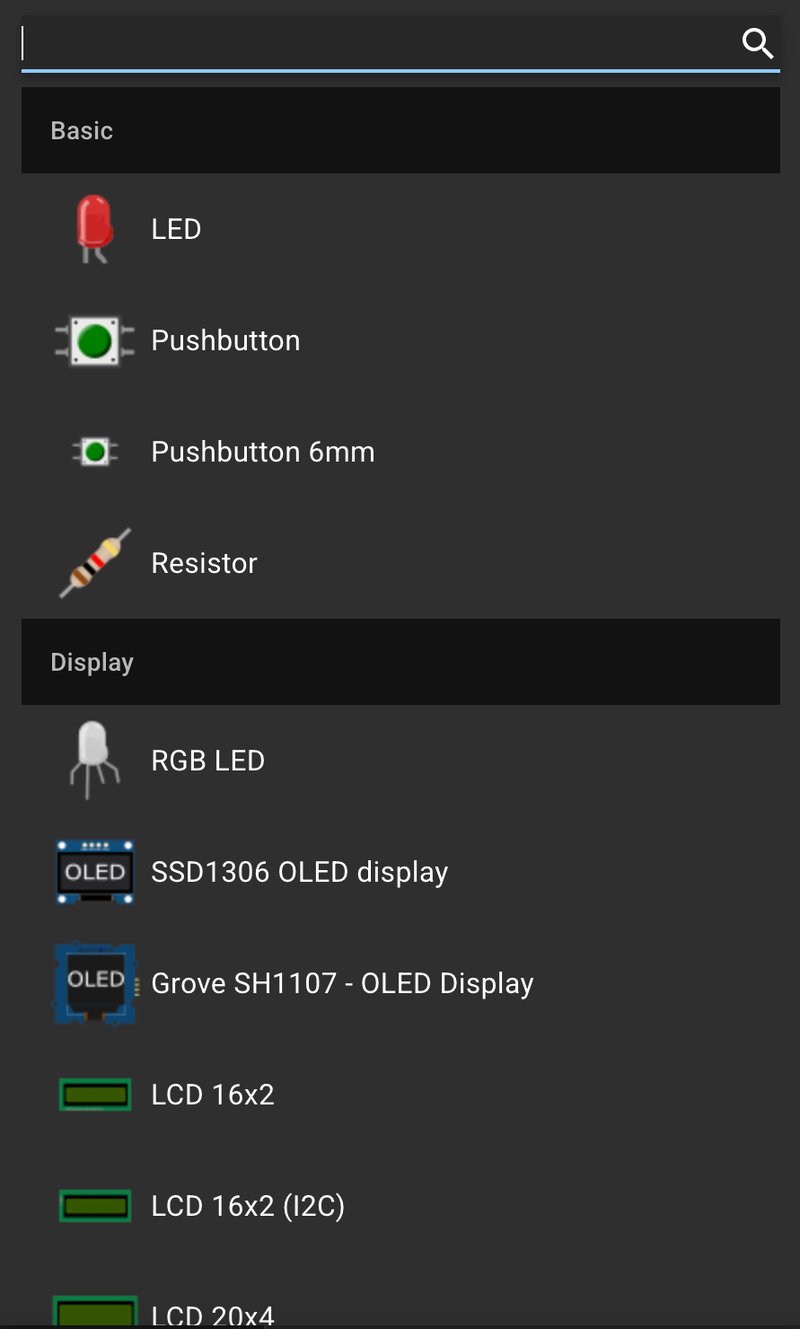
- Use the drag-and-drop editor to configure your ESP32-S3 project (add buttons, LEDs, sensors, etc.)
- Once your virtual circuit is ready, click diagram.json in the top menu
- Copy the contents and paste them into your local
diagram.jsonfile in VSCode
Otherwise, you can just copy-paste the code below, which includes the ESP32-S3 diagram with Serial pins (TX, RX) connected.
{
  "version": 1,
  "author": "Anonymous maker",
  "editor": "wokwi",
  "parts": [ { "id": "esp", "type": "board-esp32-s3-devkitc-1" } ],
  "connections": [ [ "esp:TX", "$serialMonitor:RX", "" ], [ "esp:RX", "$serialMonitor:TX", "" ] ]
}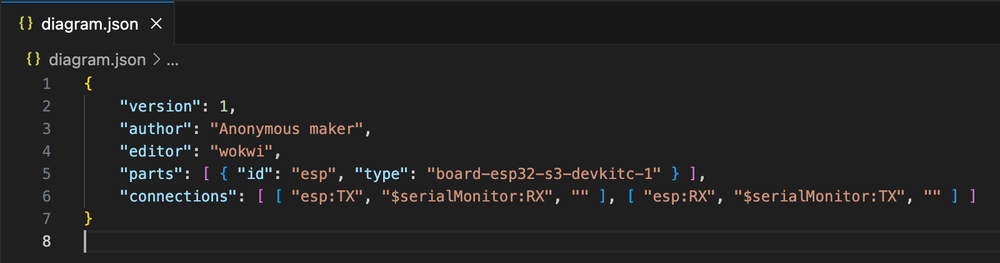
This file doesn’t need to match your firmware 100%, but it should reflect any external components your code expects - so the simulation behaves realistically.
Load the Diagram in Wokwi #
Once your diagram.json is in place and your firmware is built, you're ready to simulate.
- In VSCode, right-click on the
diagram.jsonfile - Choose Open With → Wokwi Diagram Editor from the context menu
- The Wokwi simulator will launch right inside VSCode, showing your configured hardware
- Click the Play button (▶) at the top of the simulator panel to start the simulation
Wokwi will load your local .bin (or .hex) and .elf files from the paths specified in wokwi.toml. Your ESP32 firmware runs exactly as it would on hardware - no flashing, no wiring, and no waiting.
If everything’s configured correctly, your code should just run, and you can start interacting with the simulated components immediately.
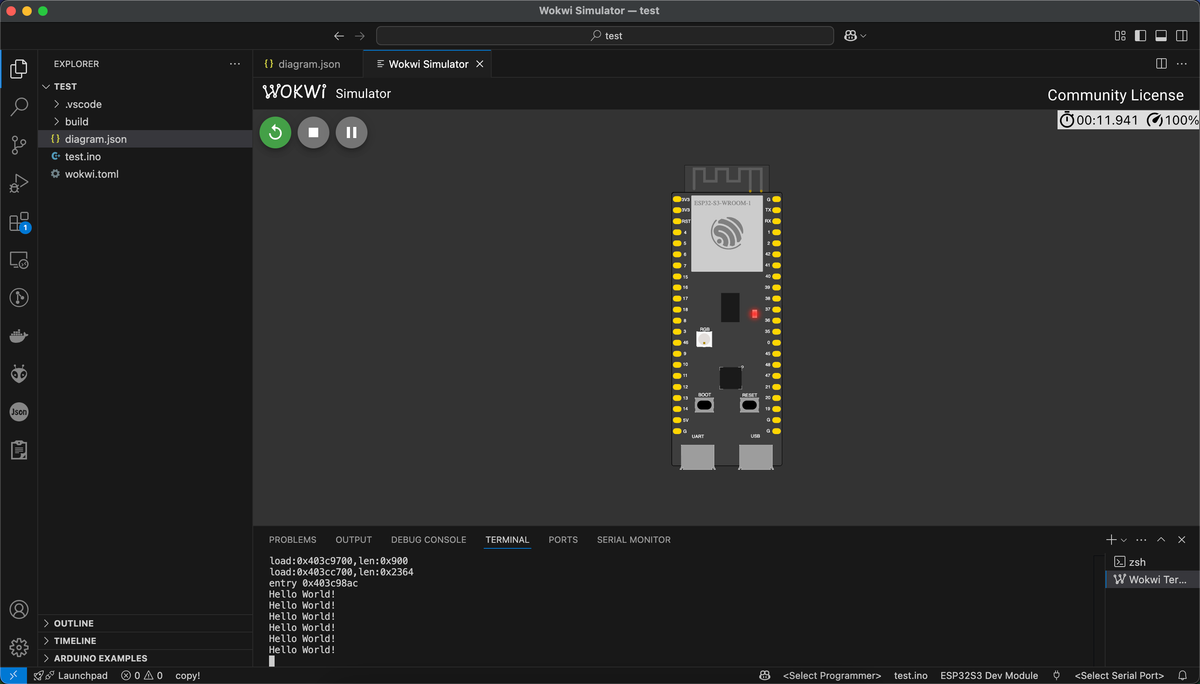
For this example, we are using the following minimal code:
void setup() {
    // put your setup code here, to run once:
    Serial.begin(9600);
}

void loop() {
    // put your main code here, to run repeatedly:
    Serial.println("Hello World!");
    delay(2000);
}
Bonus: Compile Locally with Arduino-CLI in VSCode #
To make this workflow even smoother, you can compile your ESP32 firmware directly in VSCode using the Arduino CLI + Community Plugin setup we covered here.
That guide walks you through:
- Setting up the Arduino CLI
- Using the VSCode Community Edition Arduino plugin
- Configuring build output paths (including
.binand.elffiles)
This setup works perfectly with the Wokwi simulation flow. Just build your firmware like usual, and Wokwi will automatically load the updated .bin and .elf each time you hit Play.
No need to switch between tools - compile and simulate all in one place.
Wrapping Up #
Running Wokwi locally inside VSCode solves a lot of the pain points of the browser-based experience:
- ✅ No build timeouts or resource limits
- ✅ Faster iteration with your own local toolchain
- ✅ Seamless simulation of real firmware builds
- ✅ All-in-one workflow: build, simulate, and edit-all from VSCode
Once you're set up, it feels just like working with real hardware-minus the wires and waiting. And since Wokwi supports a growing list of components (buttons, displays, sensors, even NeoPixels), you can easily prototype full systems by editing the diagram.json file.
So go ahead-experiment, tweak, and test your ideas at full speed, right on your desktop.