
Compile Arduino Core Based ESP32 Projects in Visual Studio Code
Learn how to configure Visual Studio Code to compile and upload ESP32 projects using the Arduino Community Edition plugin and Arduino CLI - no Arduino IDE needed.
If you're already comfortable working in Visual Studio Code, jumping into the Arduino IDE can feel like a bit of a step backward. Sure, you can enable the Arduino IDE's "Use External Editor" option and write your code in VS Code - but that just means you'll be bouncing between two apps every time you want to compile or upload. Not ideal.
The good news? You don't actually need to touch the Arduino IDE at all.
With the right setup, you can handle everything directly in VS Code - from editing and saving your sketches to compiling and uploading them to your ESP32 board. It's a much smoother workflow, especially if you're already used to VS Code's environment, extensions, and shortcuts.
In this post, we’ll walk through how to configure VS Code to work with Arduino Core-based projects for the ESP32.
Install VS Code #
If you don’t have Visual Studio Code installed yet, no worries-it’s a quick setup.
Head over to the official VS Code website and grab the installer for your operating system.
If you're on macOS and prefer using Homebrew, you can install it straight from the terminal:
brew install --cask visual-studio-codeOnce it’s installed, go ahead and launch it. We’ll be adding a few extensions and settings to get it fully ready for ESP32 development.
Install Arduino Community Edition Plugin in VS Code #
Now that VS Code is up and running, let's set it up for Arduino development.
- In VS Code, look over to the left sidebar and click the Extensions icon (it looks like four little blocks).
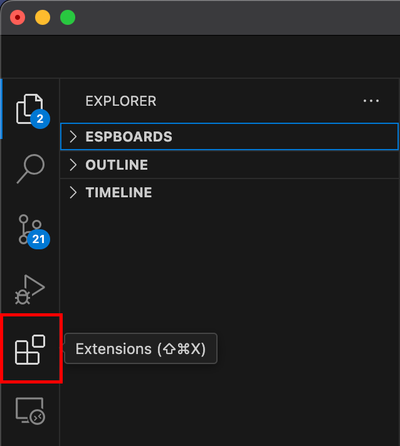
- In the search bar, type:
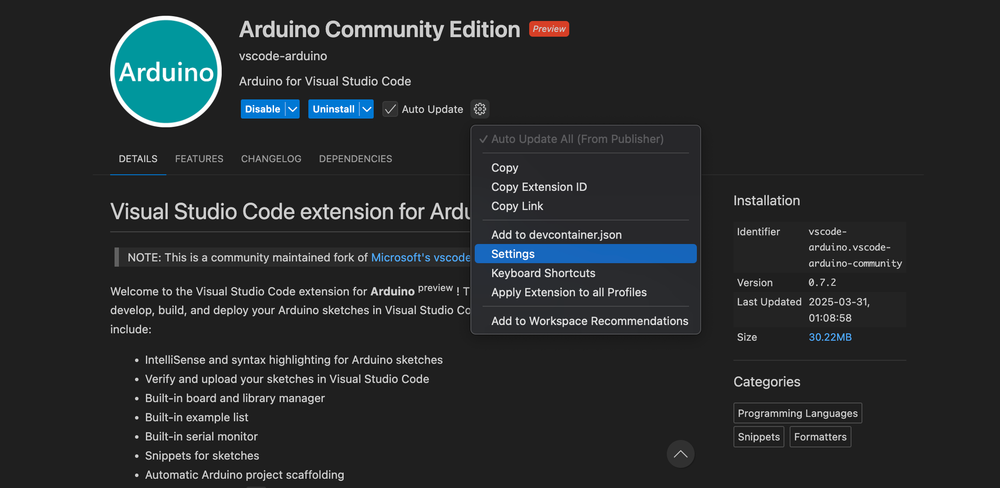
Arduino Community Edition - Click Install on the result that says Arduino Community Edition.
This extension is a community-maintained alternative to the official one, and it plays much nicer with ESP32 projects - especially if you're using the Arduino CLI under the hood. It gives you support for compiling, uploading, and serial monitoring, all from within VS Code.
Use Arduino-CLI Instead of the Arduino IDE Backend #
The Arduino Community Edition extension gives you the option to use either the full Arduino IDE installation or the leaner Arduino CLI (Command Line Interface) as the backend for compiling and uploading.
While both can technically work, the CLI is generally the better choice. Using the Arduino CLI tends to be more stable and consistent-especially when working with ESP32 boards. It also integrates better with version control and scripting workflows, making it more suitable for serious development.
So yeah, we definitely recommend going the CLI route. Let’s install it next.
🪟 Windows #
Go to the Arduino CLI releases page on GitHub, download the appropriate installer or ZIP archive for Windows, and follow the instructions to install it. Make sure to add it to your system's PATH so VS Code can find it.
🍎 macOS #
If you're using Homebrew, it's super easy:
brew install arduino-cliAfter installation, you can confirm it's working by running:
arduino-cli versionIf it prints out a version number, you're good to go!
Find Arduino-CLI location #
Once the Arduino CLI is installed, you'll need to tell the VS Code extension where to find it.
🪟 Windows #
To locate the CLI binary on Windows, open Command Prompt or PowerShell and type:
where arduino-cli🍎 macOS / 🐧 Linux #
On macOS or Linux, open your terminal and run:
which Arduino-cliIf you installed it with Homebrew (as we did earlier), the typical path will be:
/opt/homebrew/bin/arduino-cli
Copy this path-we’ll need it when configuring the extension settings in the next step.
Configure the Arduino Community Edition Plugin #
Now that you’re in the Arduino Community Edition extension settings, let’s connect it to the Arduino CLI.
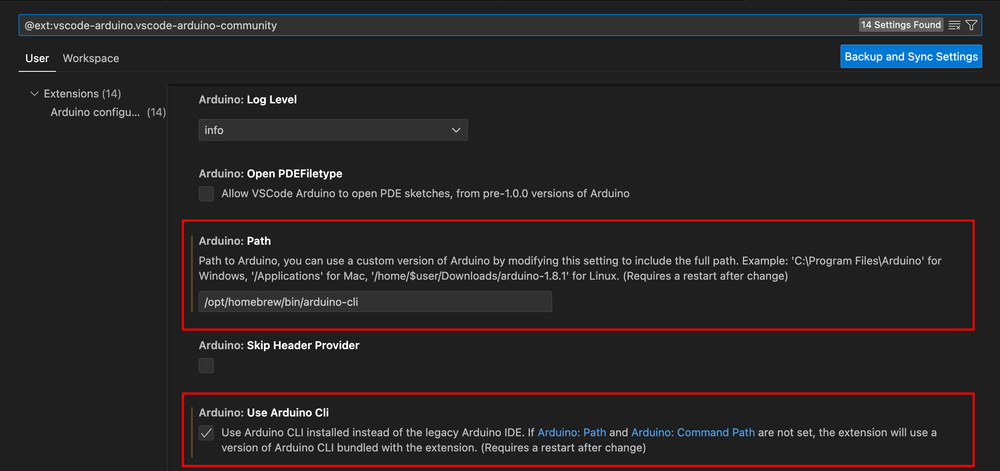
Scroll down through the settings until you find the one labeled "Arduino: Path".
Here, paste the full path to the arduino-cli binary you found earlier. If you followed along with the macOS Homebrew installation, that path will likely be:
/opt/homebrew/bin/arduino-cli
Make sure it’s accurate-this is what the extension uses to run builds, uploads, and other tasks.
Next, look for the "Arduino: Use Arduino CLI" option. It’s a simple checkbox-go ahead and tick it. This switches the extension to use the CLI backend instead of the traditional Arduino IDE backend, giving you a faster and more reliable development experience.
Once you’ve updated the settings, go ahead and restart Visual Studio Code to make sure everything takes effect.
This refresh ensures the extension picks up your new configuration, especially the path to arduino-cli and the selected backend.
Now let’s get your first project set up using the new VS Code + Arduino CLI setup.
In your preferred location on disk, create a new folder for your project. Inside that folder, create a .ino file with the same name as the folder.
For example, if you're making a project called test, your structure should look like this:
test/
└── test.ino
This naming convention is important because the Arduino build system expects the .ino file to match the folder name.
Once you’ve got that set up, open the test folder in VS Code. You can do this by going to:
File → Open Folder...
or just dragging the folder into the editor window.
Select the ESP32 Board and Port #
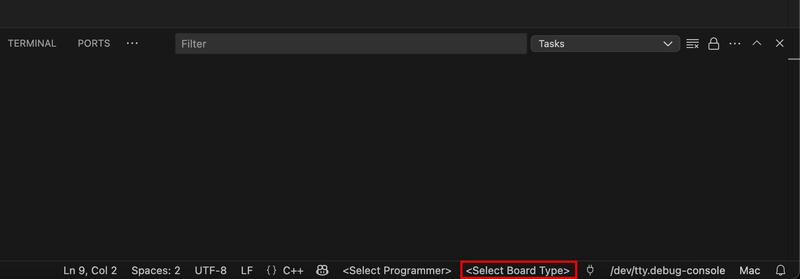
With the extension and CLI set up, you’ll notice some new options appear in the status bar at the bottom of VS Code-things like:
<Select Programmer><Select Board Type><Select Port>
If you don’t see those right away, don’t panic. Sometimes they don’t show up until you trigger a sketch. Just press CMD + Shift + A on macOS (or Ctrl + Shift + P on Windows/Linux) to open the Command Palette, and run:
Arduino: Select Sketch
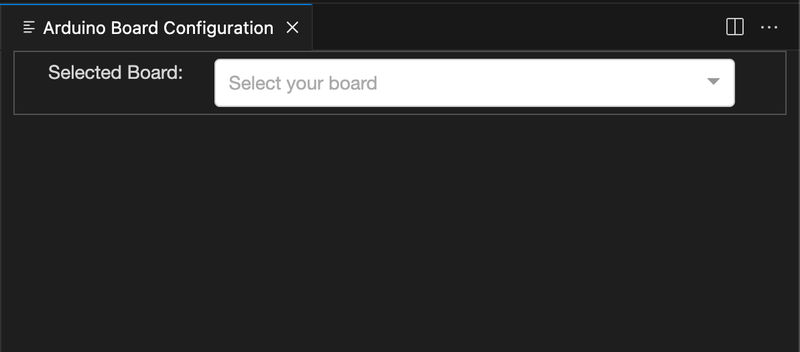
Now, click on <Select Board Type> in the status bar. This will bring up a list of supported boards.
A new tab will open...
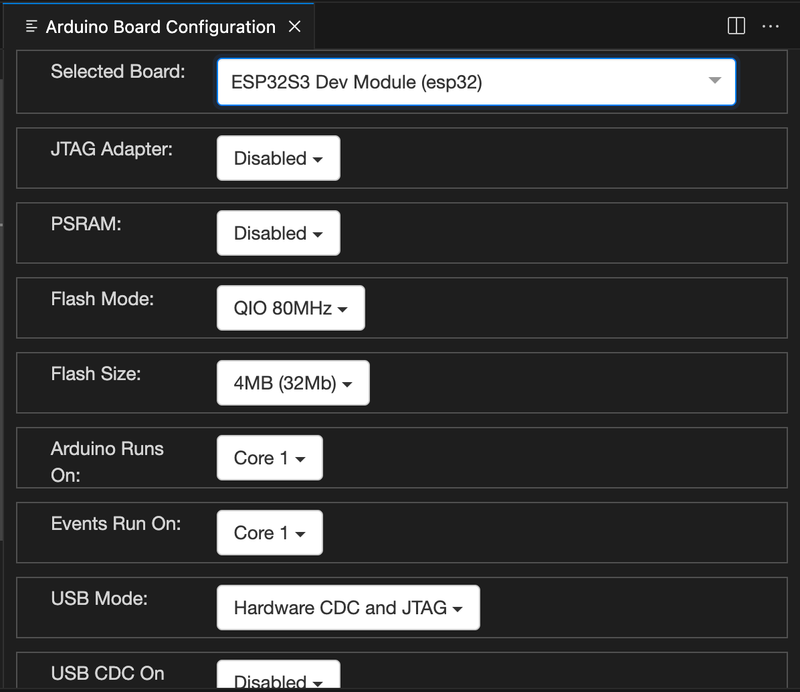
Scroll through and choose the specific ESP32 board you're using. If you're not sure which one to pick, it should match the name from the Arduino Core for ESP32-like ESP32 Dev Module, ESP32-S3-DevKitC-1, or whatever fits your hardware. In our case we select "ESP32S3 Dev Module (ESP32)".
Configure the Build Output Location #
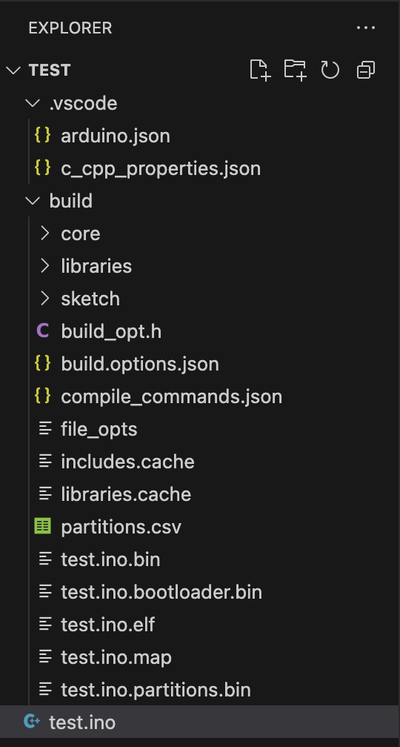
At this point, your project folder should now include a hidden .vscode directory. Inside it, you’ll find a file called arduino.json - this is where the extension stores project-specific settings.
Go ahead and open that arduino.json file, and add the following line:
"output": "build"So the file might end up looking something like this:

This setting tells the Arduino CLI to store all compiled output (like binaries and intermediate files) in a subfolder called build within your project directory. It’s a nice way to keep things clean and avoid cluttering your main folder with build artifacts.
Verify (Build) Your Arduino Core Based Project in VS Code #
Alright, time for the moment of truth-let’s build your project.
Open the Command Palette:
CMD + Shift + Aon macOSCtrl + Shift + Aon Windows/Linux
Then type and run:
Arduino: Verify

The extension will now use arduino-cli to compile your .ino file using the board settings you selected earlier.
After a short wait (especially the first time), you should see a new folder appear in your project directory named build. This folder will contain the output of the compiled program-basically, everything you'd need to upload to your ESP32.
If it builds without errors-congrats! You've got a fully working ESP32 Arduino Core development setup inside Visual Studio Code.
Upload Your Program to ESP32 from VS Code #
With your project built successfully, the next step is getting it onto your ESP32 board.
- Connect your ESP32 board to your computer using a USB cable.
- In the bottom-right corner of VS Code, click on
Select Serial Port. - Choose the port that matches your ESP32. On macOS it usually looks like
/dev/tty.usbserial-XXXX, and on Windows something likeCOM3,COM4, etc. - Open the Command Palette (
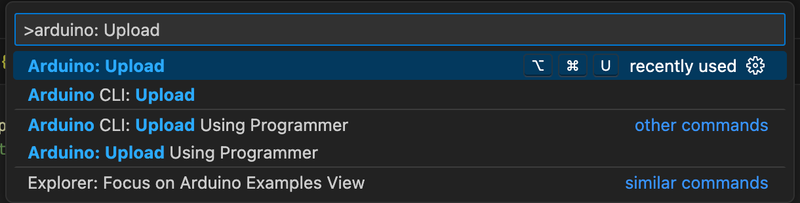
CMD + Shift + Aon macOS, orCtrl + Shift + Aon Windows/Linux). - Search for and run:
Arduino: Upload
You’ll see the upload process begin in the terminal/output panel at the bottom of the window. After a few moments, your compiled program will be flashed to the ESP32 board.
Just like the Arduino IDE - except you never had to open it once!
Conclusion #
You’ve now got everything set up to ditch the Arduino IDE and work entirely in Visual Studio Code using the Arduino Community Edition plugin. From installing the plugin, configuring the board and toolchain, to compiling and uploading your sketch-everything can now happen inside VS Code.
This setup gives you access to powerful development tools like IntelliSense, better file management, and Git integration, making it especially helpful for more advanced projects or when working on multiple files.
🔗 If you’re still weighing your options, we’ve got a deeper look at the differences between Arduino IDE and VS Code for ESP32 development. Or, if you're curious about more advanced workflows, check out ESP-IDF vs Arduino Core or our guide to using ESP-IDF with VS Code.
🔗 And if you're looking to build something cool next, you might want to send a message from ESP32 to Discord or create an RGB LED color picker with WebSocket.
🔗 Got a dev board with two USB ports and wondering why? We’ve explained that too in this post.