

Elecrow ESP32 Miner Review - A CYD with USB-C and a Case
Hands-on review of Elecrow's $15 ESP32 Miner. Same ILI9341 panel as a stock CYD, with USB-C, an included acrylic case, and a few exposed JST headers. Arduino IDE and ESP-IDF starter configs included.
Quick Verdict
A CYD with USB-C and a Case #
Elecrow sent me a 2-pack of their "2.8" ESP32 Miner LCD Display". The box says Cryptocurrency Solo Miner with 1000 KH/s Hashrate. I dutifully flashed NMMiner, watched share submissions scroll past for a while, and shelved the mining idea.
What stuck around was the hardware itself. ESP32, ILI9341, USB-C, an acrylic case, and a row of pre-broken-out JST connectors. With the right firmware, it stops being a miner and starts being a regular Cheap Yellow Display - the same chip and screen as the AliExpress CYD everyone's already using, just with more conveniences sitting on the edge of the board.
This isn't a category-changing dev board. It's a CYD variant. If you already own a stock CYD, you don't need one. If you're shopping, here's what changes and how to flash it.
Disclosure: Sample unit from Elecrow. No paid placement, no editorial input from them. The product links in this post are affiliate links - they cost you nothing extra and help keep the site running.
About the mining bit: The included NMMiner firmware works. Hashrate is around 1 MH/s. Bitcoin's global hashrate is in the zettahash range, which means a single ESP32 is a worse lottery ticket than the actual lottery - you'll wait the heat-death of the sun for a block.
It was a fun hour. I moved on. No mining tutorial in this post.
What's in the Box #
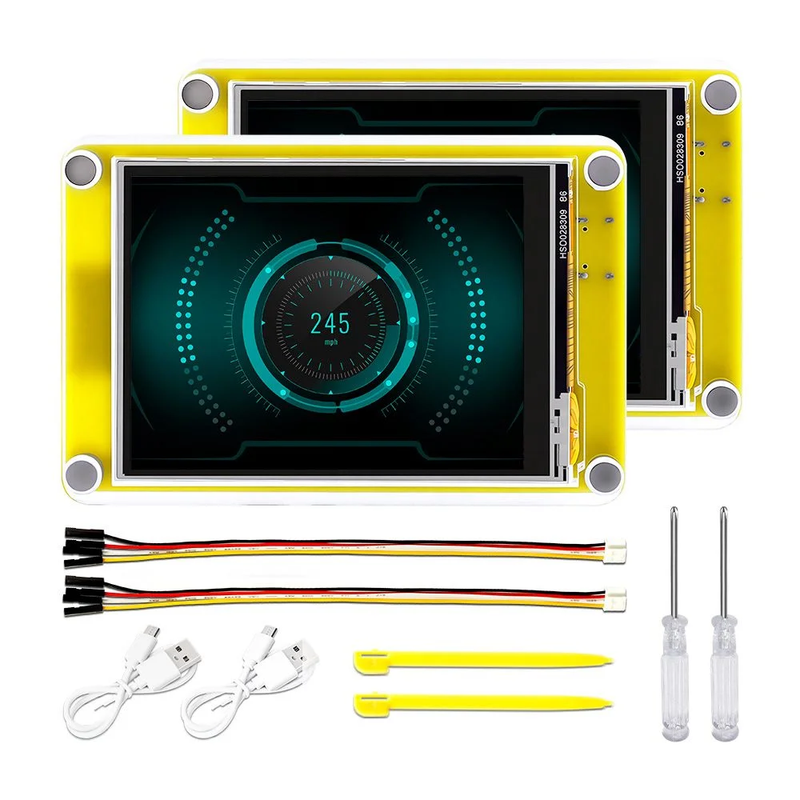
Stock photo - my second unit and the packaging are long gone.
The 2-pack ships with:
- 2× ESP32 Miner LCD Display (2.8", in acrylic case)
- 2× USB-C cables
- 2× Grove/Dupont expansion cables
- 2× Resistive touch styluses
Hardware Tour #
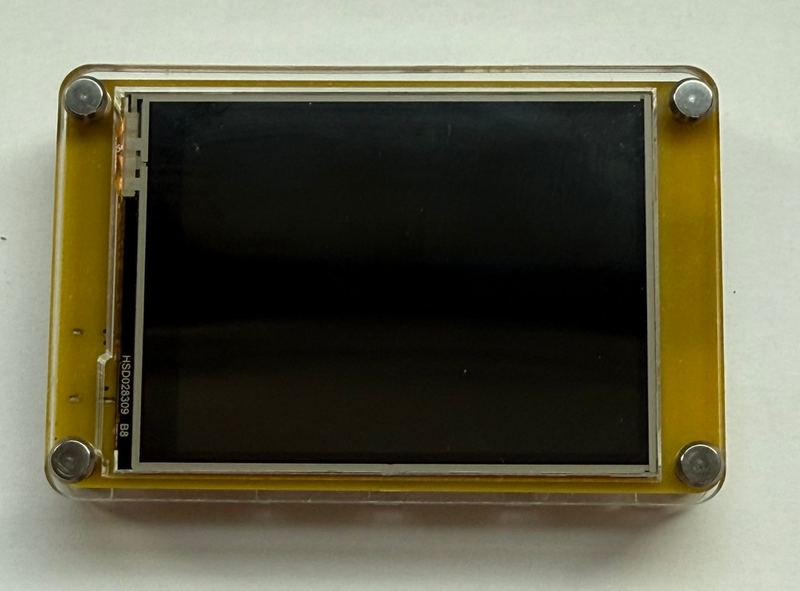
The Display #
2.8" 320×240 TN panel, resistive touch with a stylus. Same panel you'd expect on a typical $14 AliExpress CYD. Colours are fine; viewing angles are TN - slight colour shift when you tilt it off-axis. Not IPS, not high-resolution. If you've already used a CYD, you know what you're getting.
The Case #
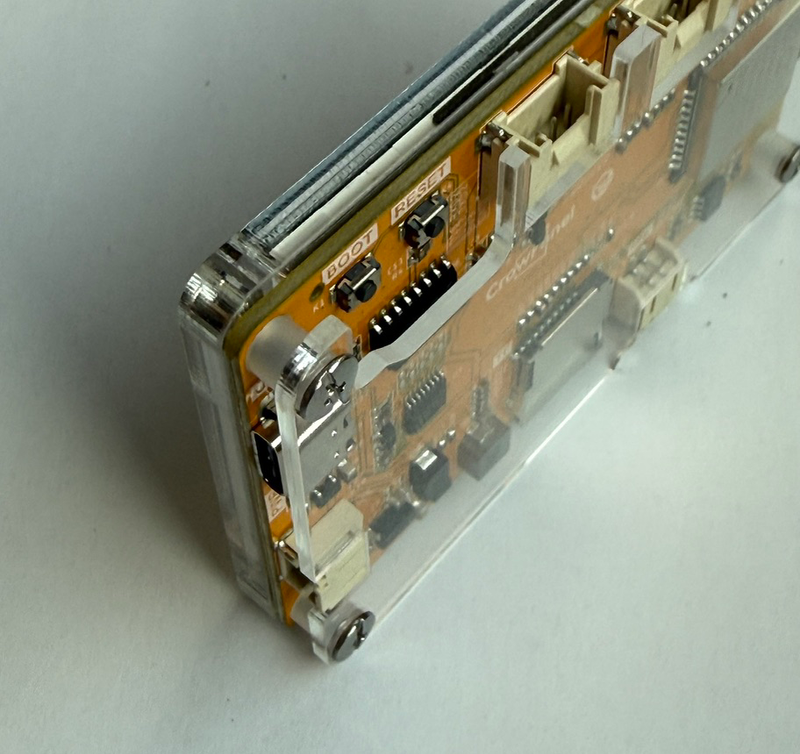
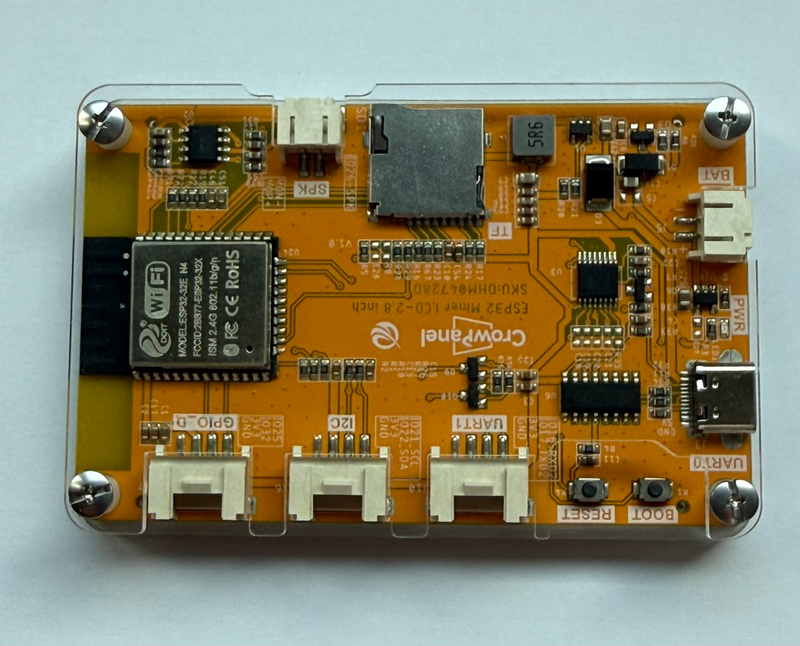
Acrylic sandwich case, included in the box. Not premium materials, but it's a case - your stock CYD probably arrived as a bare PCB. Worth noting as a small convenience, especially if you're handing one to someone non-technical or sticking it on a desk.
Exposed I/O #
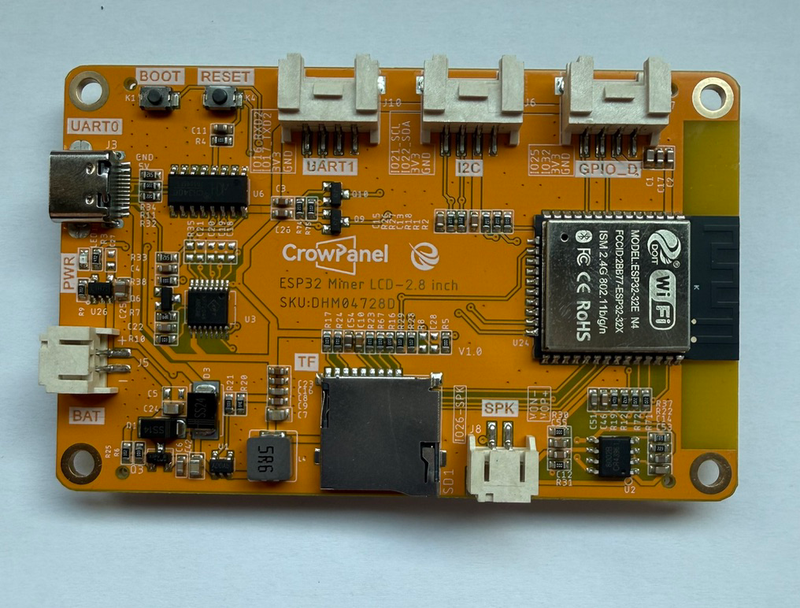
Pre-terminated headers along the edge of the board:
- I2C JST (Grove-compatible 4-pin)
- 2× UART JSTs (separate from USB-C)
- Battery JST (3.7-4.2 V Li-ion / LiPo)
- Speaker JST
- TF (microSD) card slot
- A row of GPIO pins on a header
On a bare CYD you'd typically be soldering to PCB pads or scraping at a connector under the bezel. Here it's pre-broken-out, which is convenient if you happen to want any of these. If you don't, you're paying for connectors you won't use.
How It Stacks Up Against a Stock CYD #
| Spec | Classic CYD (ESP32-2432S028R) | Elecrow ESP32 Miner |
|---|---|---|
| Chip | ESP32-WROOM-32 | ESP32-WROOM-32-N4 (240 MHz LX6) |
| Flash | 4 MB | 4 MB |
| RAM | 520 KB SRAM | 520 KB SRAM |
| Display | 2.8" ILI9341, 320×240, TN | 2.8" ILI9341V, 320×240, TN |
| Touch | Resistive | Resistive (stylus included) |
| USB | microUSB (typical) | USB-C |
| Exposed I/O | 1× P3 + JTAG pads | I2C + 2× UART + battery + speaker + TF + GPIO row |
| Antenna | PCB | PCB |
| Case | None - bare PCB | Acrylic sandwich, included |
| Battery | None typically | JST connector, 3.7-4.2 V |
| Dimensions | ~86 × 50 × 12 mm | 85.7 × 57 mm |
| Operating temp | typical commercial | -20 °C to 70 °C |
| Price (unit) | ~$12-18 | ~$15 (2-pack $29.90 only) |
Chip and screen are essentially identical. The differences are case, USB-C, exposed JSTs, and battery support - small conveniences, not transformations. Whether they're worth it depends on whether you'd otherwise be adding any of those yourself.
Flashing It Like a CYD - Arduino IDE (TFT_eSPI) #
The fastest way to use this board as a CYD. About ten minutes from zero to "Hello, CYD" on screen.
Board selection. Install the ESP32 boards package via the Boards Manager - if you haven't done this before, see our Arduino IDE + ESP32 setup post. Then select ESP32 Dev Module, Flash Size 4 MB, Partition Scheme default.
TFT_eSPI pin configuration. Two ways to configure TFT_eSPI for the Elecrow miner's pinout - pick whichever you prefer.
Option A - drop-in build_opt.h next to your .ino (recommended - survives library upgrades):
-DUSER_SETUP_LOADED
-DILI9341_DRIVER
-DTFT_WIDTH=240
-DTFT_HEIGHT=320
-DTFT_MISO=12
-DTFT_MOSI=13
-DTFT_SCLK=14
-DTFT_CS=15
-DTFT_DC=2
-DTFT_RST=-1
-DTFT_BL=27
-DTFT_BACKLIGHT_ON=HIGH
-DLOAD_GLCD
-DLOAD_FONT2
-DLOAD_FONT4
-DLOAD_FONT7
-DSPI_FREQUENCY=15999999
Option B - edit User_Setup.h inside Arduino/libraries/TFT_eSPI/:
#define USER_SETUP_LOADED
#define ILI9341_DRIVER
#define TFT_WIDTH  240
#define TFT_HEIGHT 320
#define TFT_MISO 12
#define TFT_MOSI 13
#define TFT_SCLK 14
#define TFT_CS   15
#define TFT_DC    2
#define TFT_RST  -1
#define TFT_BL   27
#define TFT_BACKLIGHT_ON HIGH
#define LOAD_GLCD
#define LOAD_FONT2
#define LOAD_FONT4
#define LOAD_FONT7
#define SPI_FREQUENCY 16000000
Minimal "Hello, CYD" sketch:
#include <Arduino.h>
#include <TFT_eSPI.h>

TFT_eSPI tft = TFT_eSPI();

const int BACKLIGHT_PIN  = 27;       // Elecrow Miner. Stock CYD often uses GPIO 21.
const int BACKLIGHT_FREQ = 5000;
const int BACKLIGHT_BITS = 8;

void setup() {
    Serial.begin(115200);
    tft.init();
    tft.setRotation(1);              // 320×240 landscape, USB on the right
    ledcAttach(BACKLIGHT_PIN, BACKLIGHT_FREQ, BACKLIGHT_BITS);
    ledcWrite(BACKLIGHT_PIN, 255);   // full brightness
    tft.fillScreen(TFT_BLACK);
    tft.setTextDatum(MC_DATUM);
    tft.setTextColor(TFT_YELLOW, TFT_BLACK);
    tft.drawString("Hello, CYD", 160, 120, 4);
}

void loop() {}
Backlight pin gotcha: the Elecrow Miner uses GPIO 27 for the backlight. A stock CYD often uses GPIO 21. If your screen stays dark after flashing, swap the pin number.
Flashing It Like a CYD - ESP-IDF #
If you'd rather use native ESP-IDF (for LVGL, multi-task FreeRTOS apps, or just because you're already in that ecosystem), here's the equivalent starter. You'll need ESP-IDF v5.5 or newer and either VS Code with the official Espressif IDF extension, or idf.py from a shell.
Project layout:
elecrow-cyd-idf/
├── CMakeLists.txt
├── sdkconfig.defaults
└── main/
    ├── CMakeLists.txt
    ├── idf_component.yml
    └── main.c
sdkconfig.defaults - minimal flash + tick + stack tweaks:
CONFIG_IDF_TARGET="esp32"
CONFIG_ESPTOOLPY_FLASHSIZE_4MB=y
CONFIG_FREERTOS_HZ=1000
CONFIG_ESP_MAIN_TASK_STACK_SIZE=8192
main/idf_component.yml - pulls the official Espressif ILI9341 driver from the IDF Component Registry, so no manual driver porting:
dependencies:
  idf: ">=5.5.0"
espressif/esp_lcd_ili9341: "^2"main/CMakeLists.txt:
idf_component_register(
    SRCS "main.c"
    INCLUDE_DIRS ".")
main/main.c - bring up SPI, the ILI9341 panel, and the backlight, then paint a yellow stripe so you know it's alive:
#include <stdio.h>
#include "driver/gpio.h"
#include "driver/ledc.h"
#include "driver/spi_master.h"
#include "esp_lcd_panel_io.h"
#include "esp_lcd_panel_ops.h"
#include "esp_lcd_ili9341.h"

// Elecrow Miner pinout (stock CYD uses BL=21).
#define PIN_MISO  12
#define PIN_MOSI  13
#define PIN_SCLK  14
#define PIN_CS    15
#define PIN_DC     2
#define PIN_RST   -1
#define PIN_BL    27

#define LCD_H_RES 320
#define LCD_V_RES 240

static void backlight_on(void) {
    ledc_timer_config_t tcfg = {
        .speed_mode = LEDC_LOW_SPEED_MODE,
        .duty_resolution = LEDC_TIMER_8_BIT,
        .timer_num = LEDC_TIMER_0,
        .freq_hz = 5000,
        .clk_cfg = LEDC_AUTO_CLK,
    };
    ledc_timer_config(&tcfg);
    ledc_channel_config_t ccfg = {
        .gpio_num = PIN_BL,
        .speed_mode = LEDC_LOW_SPEED_MODE,
        .channel = LEDC_CHANNEL_0,
        .timer_sel = LEDC_TIMER_0,
        .duty = 255,
        .hpoint = 0,
    };
    ledc_channel_config(&ccfg);
}

void app_main(void) {
    spi_bus_config_t bus = {
        .miso_io_num = PIN_MISO,
        .mosi_io_num = PIN_MOSI,
        .sclk_io_num = PIN_SCLK,
        .quadwp_io_num = -1,
        .quadhd_io_num = -1,
        .max_transfer_sz = LCD_H_RES * 80 * 2,
    };
    spi_bus_initialize(SPI2_HOST, &bus, SPI_DMA_CH_AUTO);

    esp_lcd_panel_io_handle_t io = NULL;
    esp_lcd_panel_io_spi_config_t io_cfg = {
        .cs_gpio_num = PIN_CS,
        .dc_gpio_num = PIN_DC,
        .pclk_hz = 16 * 1000 * 1000,
        .spi_mode = 0,
        .trans_queue_depth = 10,
        .lcd_cmd_bits = 8,
        .lcd_param_bits = 8,
    };
    esp_lcd_new_panel_io_spi((esp_lcd_spi_bus_handle_t)SPI2_HOST, &io_cfg, &io);

    esp_lcd_panel_handle_t panel = NULL;
    esp_lcd_panel_dev_config_t dev = {
        .reset_gpio_num = PIN_RST,
        .rgb_endian = LCD_RGB_ENDIAN_BGR,
        .bits_per_pixel = 16,
    };
    esp_lcd_new_panel_ili9341(io, &dev, &panel);
    esp_lcd_panel_reset(panel);
    esp_lcd_panel_init(panel);
    esp_lcd_panel_disp_on_off(panel, true);

    backlight_on();

    // Paint a yellow stripe across the middle of the panel just to prove it's alive.
    static uint16_t line[LCD_H_RES];
    for (int i = 0; i < LCD_H_RES; i++) line[i] = 0xFFE0;   // RGB565 yellow
    for (int y = 100; y < 140; y++) {
        esp_lcd_panel_draw_bitmap(panel, 0, y, LCD_H_RES, y + 1, line);
    }
}
Build and flash:
idf.py set-target esp32
idf.py build flash monitor
Same backlight-pin caveat as the Arduino sketch - GPIO 27 on this board, GPIO 21 on most stock CYDs.
What I Actually Used It For #
Honestly? As a test target for our own ESPHome LVGL UI Designer. The miner is a generic ESP32 + ILI9341 panel - the exact combo a huge chunk of the ESPHome community owns - so it doubled as a "does this layout look right on a real 320×240 TN panel?" sanity check for designs coming out of the editor.
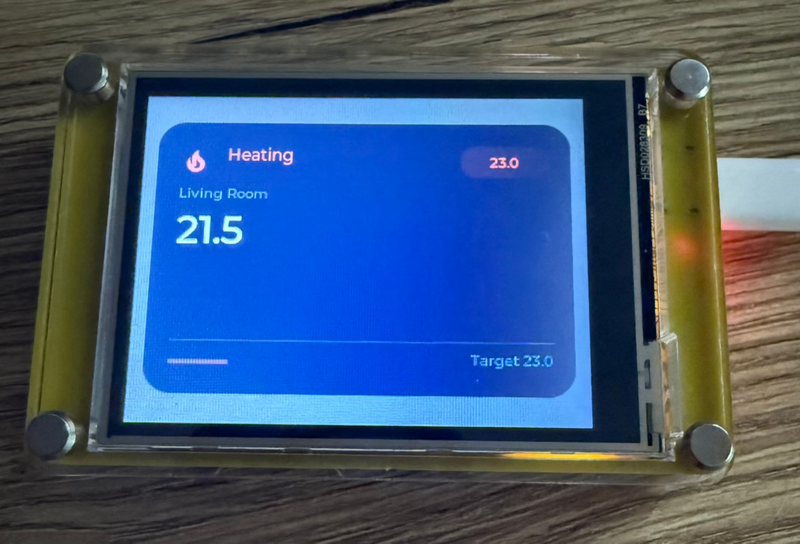
Not the most ambitious use of the hardware, but that's the honest answer - the mining experiment was an hour, the LVGL demos were a couple of evenings, and the unit's been on the desk since.
Resources & Links #
Official & Third-Party
- Product page (Elecrow) - 2-pack at ~$29.90 (affiliate)
- Also on AliExpress (affiliate)
- NMMiner - the lottery-ticket firmware, for the curious
- esp_lcd_ili9341 - official Espressif ILI9341 component
- TFT_eSPI - the Arduino library used above
Related on espboards.dev
- Setting up the Arduino IDE for ESP32 - board manager, drivers, first sketch
- ESPHome LVGL UI Designer - also works on plain ILI9341 ESPHome configs
Frequently Asked Questions #
Is the Elecrow ESP32 Miner just a rebadged CYD? Pretty much. Same chip class, same display IC. The differences are cosmetic (case, USB-C) and ergonomic (exposed JSTs, battery JST).
Can you really mine Bitcoin on it? Technically yes via NMMiner. Practically, ~1 MH/s against a global zettahash network means you're buying a worse-than-actual-lottery lottery ticket. Treat it as entertainment, not income.
Does it work with ESPHome? Yes. It's a plain ESP32 with an ILI9341 panel - any standard ESPHome ili9xxx display config works with the pins listed above. Set the backlight pin to 27.
Final Thoughts: Who Should Buy This? #
Buy it if...
- You're CYD-shopping and the case + USB-C + headers happen to suit your project
- You want two ESP32 displays for $30 to experiment with
- You specifically need the battery JST or speaker JST
Skip it if...
- You already own CYDs
- You want IPS or higher resolution
- You came looking for mining profitability advice
It's a CYD with a case, USB-C, and a few JSTs. If that combination fits your project, $15 a unit is fair. If not, a bare CYD is the same chip and screen for similar money.