
Raspberry Pi 4 LCD Touch Screen Display with Home Assistant
Install and Configure Home Assistant Web UI Dashboard on Raspberry Pi LCD Touch Screen Display running in Chromium with Kiosk mode using Openbox and Xserver
Today we are going to connect and configure an LCD with Touch Screen on Raspberry Pi with our Home Assistance server running. Home Assistant display with touchscreen will be used to control smart devices at home.
We assume that you have the Raspbian Lite OS installed, together with a Home Assistance instance running inside a Docker container, as in the previous post "ESPHome Home Assistant in Docker Containers on Raspberry Pi".
This will allow us to have a Home Assistance server and a control interface on one device - the Raspberry Pi.
Since Raspbian Lite OS doesn’t have any graphical interface, it also doesn’t have the necessary libraries needed for displaying anything on the screen. But worry not, because we will go step by step to get our Raspberry and Home Assistant UI working with LCD touch screen.
Moreover, the reason we chose Raspbian Lite OS earlier, is to keep our system lightweight. We will continue this approach and instead of running the Desktop environment, we will run a Chromium browser in kiosk mode that will open a Home Assistant Web UI automatically, but more about that later.
Installing LCD drivers #
For now, if you connect your screen to the Raspberry, probably the LCD backlight will turn on, but the screen will be empty.
To be able to see something on the screen, we need to install LCD drivers first.

Waveshare 3.5-inch LCD Touch Screen
Other compatible screen types can be found in LCD-show repository readme.
After connecting the LCD screen to your Raspberry, according to the manufacturer instructions, we can start the integration.
- SSH into Raspberry Pi
As in the previous post, open a terminal and type
ssh rpi@192.168.129.13Make sure to replace the IP address with your Raspberry’s IP
- Install git
First, we need to clone the git repository LCD-show, which has the necessary LCD drivers. However, Raspberry Pi Lite OS doesn’t have git. Let’s set it up.
Another option would be to clone the repository to your computer and transfer the files using scp
sudo apt install git- Clone the LCD-show repository
git clone https://github.com/goodtft/LCD-show.git
chmod -R 755 LCD-show
cd LCD-show/- Install the drivers
According to your LCD's type, excute the corresponding driver: We are using the 3.5” LCD, therefore we will install “LCD35-show"
sudo ./LCD35-showThis will install all the necessary packages for the screen to work, including Xserver, for example, which Raspbian Pi Lite OS doesn’t have, as it does not use the graphical UI.
Your computer will lose the SSH connection, as Raspberry Pi will restart automatically after a successful LCD-show install
- Check Raspberry Pi Screen
After the Raspberry Pi restarts, you should see the Raspberry Pi terminal on the LCD screen.
- Remove the LCD-show folder
We have installed the drivers for our LCD screen and will not need the scripts we downloaded earlier anymore, therefore we can remove them.
sudo rm -rf LCD-showWe have the screen working! That’s nice, but we only see a terminal now. Not exactly what we need.
Let's open the Chromium browser instead of the terminal on the LCD screen in the next step.
Running HASS in Kiosk Mode #
Kiosk mode is a restricted operating mode that limits a device or software application to a specific, often single-purpose, function or set of functions. It prevents users from accessing unrelated features or applications, typically used for public information, self-service terminals, or dedicated tasks.
Have you ever seen in a shop for example, a computer that has a website with a presentation opened and thought to yourself, “I will check Google on that”, but quickly noticed there is no address bar? That is a browser running in kiosk mode.
Another example could be an ATM. It is always running one specific program on the screen, and you wouldn’t want people to switch it to anything else, would you?.. Well, run the application kiosk mode.
There are multiple options for running applications in kiosk mode, but we are going to be using the Openbox in this tutorial for the Raspberry Pi Touch Screen kiosk.
- Gain root permissions
As we will be doing quite some configuration in the next steps, that require root permissions, to avoid typing sudo every time, let's gain root permissions. Open a terminal and type:
sudo su- Install Openbox and xinit
For the applications to run in kiosk mode, we will use an Openbox. And the Openbox will run on the Xserver that was installed during LCD-show installation. To make things easier, we will use a tool called “xinit”, which will run the Openbox application. Let's install them.
apt install openbox xinit- Configure xinit (Xserver) to run open box
Now that we have both of required tools installed, we need to tell the Xserver to run an Openbox application on startup. We will do that by utilizing the xinit tool.
Open the xinit settings (xinitrc) for editing:
nano /etc/X11/xinit/xinitrcComment this line:
. /etc/X11/xsessionAdd this line:
exec openbox-sessionNow, every time the Xserver starts, it will run the openbox-session, instead of a default xsession.
- Install Chromium
To open a Home Assistant’s Web UI, we need a browser. Chromium is an open source browser by Google, which we chose because of the built in touch screen capabilities. Install Chromium browser by running the following:
apt install --no-install-recommends chromium-browser- Edit Openbox config
Now that we have our Openbox application configured and Chromium browser installed, let's tell Openbox to run the Chromium on start.
Open an Openbox autostart config for editing:
nano /etc/xdg/openbox/autostartAdd to the end of the file:
chromium-browser --noerrdialogs --disable-infobars --kiosk $KIOSK_URLThis will be executed everytime the Openbox application opens. Note the -kiosk flag and a variable $KIOSK_URL.
- Edit Openbox environment
We have used a variable $KIOSK_URL in the previous step, but we have never defined it.
Edit the Openbox environment configuration:
nano /etc/xdg/openbox/environmentAdd to the end of the file:
export KIOSK_URL=http://localhost:8123The URL http://localhost:8123 is a Home Assistant Web UI URL, that we want to be opened in Chromium every time it runs from the Openbox.
- Test the LCD and touchscreen
Now that we have our setup ready, let's try to start the XServer, which will launch an Openbox with Chromium and should automatically go to our Home Assistant’s Web UI.
Start the Xserver by typing:
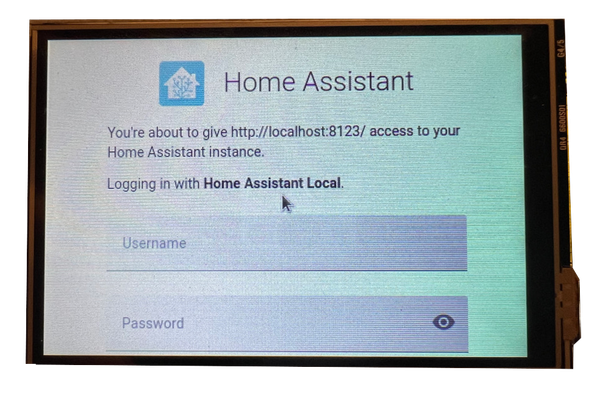
startxCheck your LCD screen and you should see the Home Assistant’s Login page. Try clicking around on your touchscreen.
If you want to exit the Openbox application, click “ctrl + c” and you will be back in the Raspberry’s terminal
In case you notice the clicks are not accurate (and probably inverted), proceed to step 8.
- Calibrate the touch screen (Optional)
You only need to do this, if your touchscreen controls are inverted
Sometimes by default, the touch controls are inverted making the touch screen unusable in a way. Let’s change that.
Open the screen calibration config for editing:
nano /etc/X11/xorg.conf.d/99-calibration.confLook for the line
Option "SwapAxes" “1”And change the “SwapAxes” value from 1 to 0.
Save the file and run the Xserver again by typing
startxThe touch controls should now work as intended.
- Run Xserver automatically when Raspberry starts
If you reboot the Raspberry now, you will again see just the terminal on the LCD screen. To open a Home Assistant UI, you would need to SSH into Raspberry and run “startx” again.
But we don’t want that. Instead, we will start the Xserver automatically when the Raspberry boots.
Edit the rc.local file:
nano /etc/rc.localAdd this before the “exit 0” line:
sudo startx -nocursorPlease note the -nocursor flag. You probably noticed before, that even though we are using a touch screen, a mouse cursor was visible on the screen. We don’t want to see the mouse cursor on the touch screen, therefore we need to use the -nocursor flag.
- Reboot raspberry
Type
sudo rebootAnd wait for the Raspberry to restart. After the restart, the Home Assistant Login page should show up automatically.
Bypass login in Home Assistant Web UI #
So we have the Home Assistant Display working now, but we see the Login screen of Home Assistant. We need to bypass this login screen, as we will not have any keyboard on our home assistant touch screen. Fortunately, that is not very difficult to do.
- Create a new Home Assistant user
Because we will need to configure a different dashboard to see on the LCD screen, than the one we will see when going through mobile or laptop, we need to create a new Home Assistant user first.
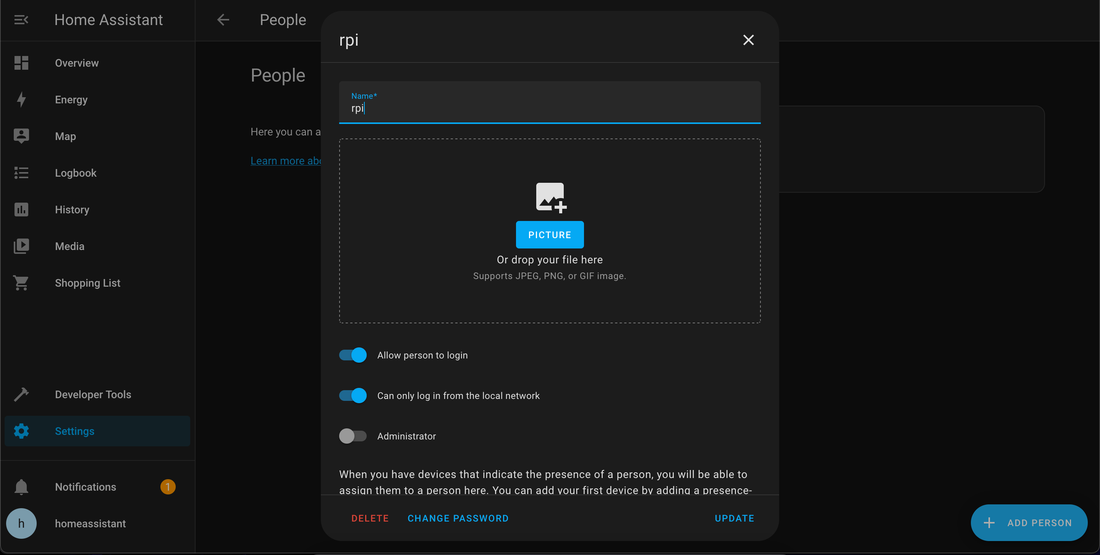
- Go to Home Assistant Web UI and open “Settings”. Select “People” and click “Add Person”.
- Enter the name of your choice, we will use “rpi” for this example.
- Click “Create”
- Click on the newly created user
Turn on:
- “Allow person to login”
- “Can only login from the local network”
- Get the newly created user_id
To automatically login our newly created user, we will need to get it’s user id.
On your raspberry (through ssh), go to homeassistant’s storage folder:
cd homeassistant/.storage/Read “auth” file:
tac authTac command will read the file from bottom to top, as the information we are looking for is on the top of the file
Look for the user with the name “rpi” and copy its “id”, which is a UUIDv4 and should look similar to “fb15473b331e41a983cd680d0c6b2a52”. We will need this user ID in a moment.
- Edit the Home Assistant config
Go back to Home Assistant's folder
cd homeassistant/Open configuration.yaml for editing
nano configuration.yamlAdd to the bottom of the file:
homeassistant:
  auth_providers:
    - type: trusted_networks
      trusted_networks:
        - 127.0.0.1
        - ::1
      trusted_users:
       127.0.0.1: user_id
       "::1": user_id
      allow_bypass_login: true
    - type: homeassistant
Make sure to change the ‘user_id’ with the id of a user you took note of in the previous step.
The “- type: trusted_networks” will allow the client coming from Raspberry Pi, which runs the Home Assistant to bypass the Login screen and will automatically login to our previously created user named “rip”.
The “- type: homeassistant” will keep the default login screen for clients coming from other IPs than the local Raspberry Pi.
- Reboot raspberry
Type
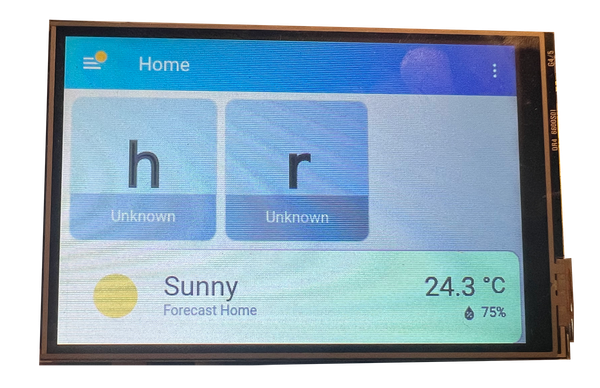
sudo rebootThis will apply the new Home Assistant configuration and run the Chromium in Openbox with Home Assistant Web UI. After the restart, you should see on your Raspberry’s screen the Home Assistant UI with a user logged in automatically.
Troubleshooting #
In case you still see the terminal on your Raspberry screen after running the open box, it doesn’t mean that Openbox is not running. Probably the terminal window is on top of the open box… open the rc.local for edit
sudo nano /etc/rc.localAnd comment the line
fbcp &This should prevent starting the terminal on your display and start only the open box, which will fix the issue.
Conclusion #
After all, we have successfully configured Raspberry Pi to automatically launch on boot the Chromium Browser in Kiosk mode using Openbox with Xserver and xinit tools. In other words, we have setup the Raspberry Pi Touch Screen kiosk.
We have configured Chromium to open Home Assistant Web UI and automatically login our user dedicated to Raspberry Pi, which in turn opens a Home Assistant Dashboard.
Next step would be to configure the Home Assistant user's Dashboard - to include your favorite accessories, such as lamps or other controls or sensors.
With this setup, we can have a single device (Raspberry Pi), running the Home Assistant Server and use the same device to show a Home Assistant Dashboard on the LCD display screen, which can be controlled using Home Assistant Touch Screen capabilities.