
M5Stack CoreS3
Feature-packed ESP32-S3 dev kit with touch display, camera, mic, speaker, IMU and SD card - everything integrated, prototype-ready out of the box.

M5Stack CoreS3 Pinout
36 pins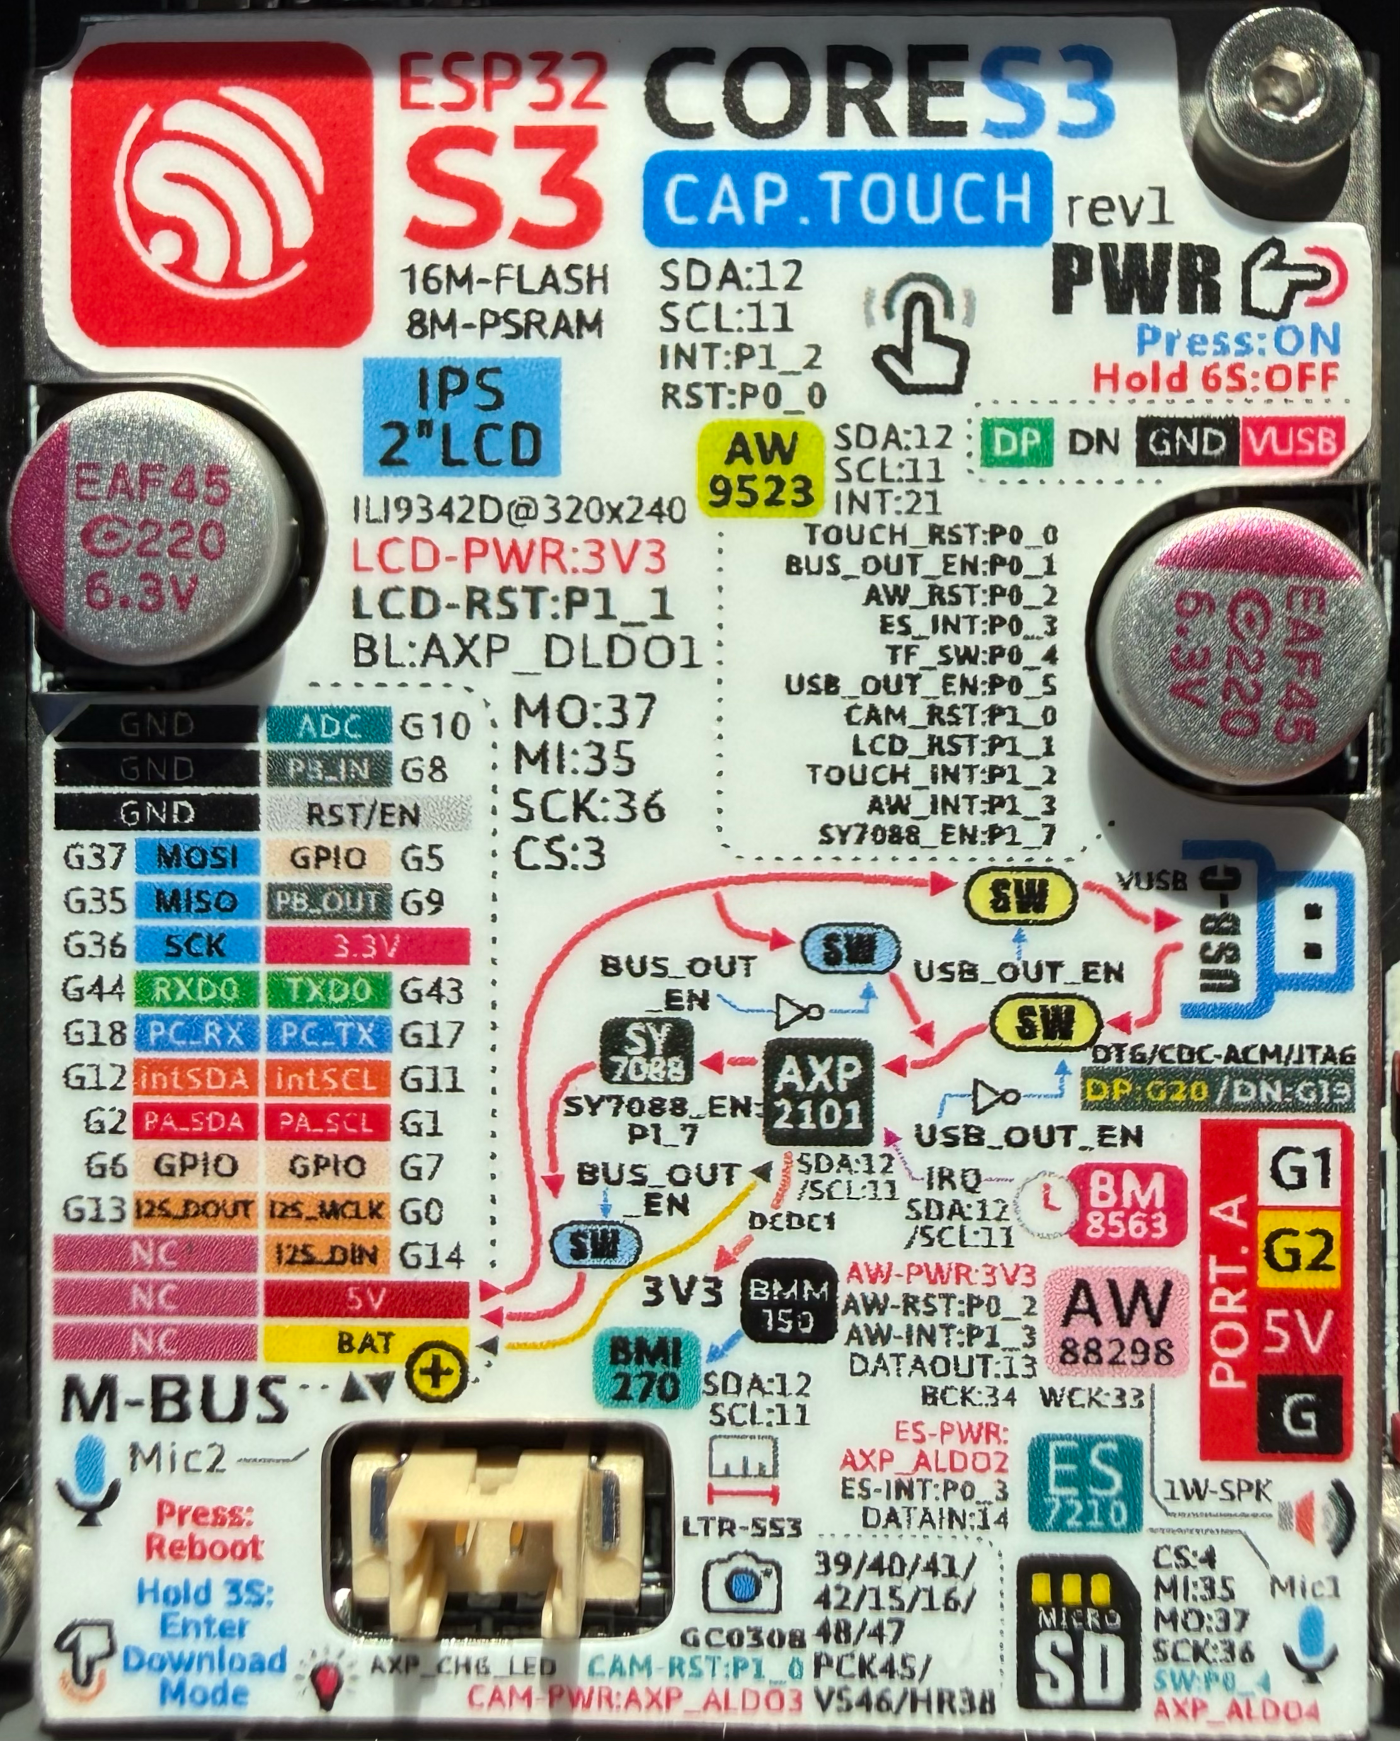
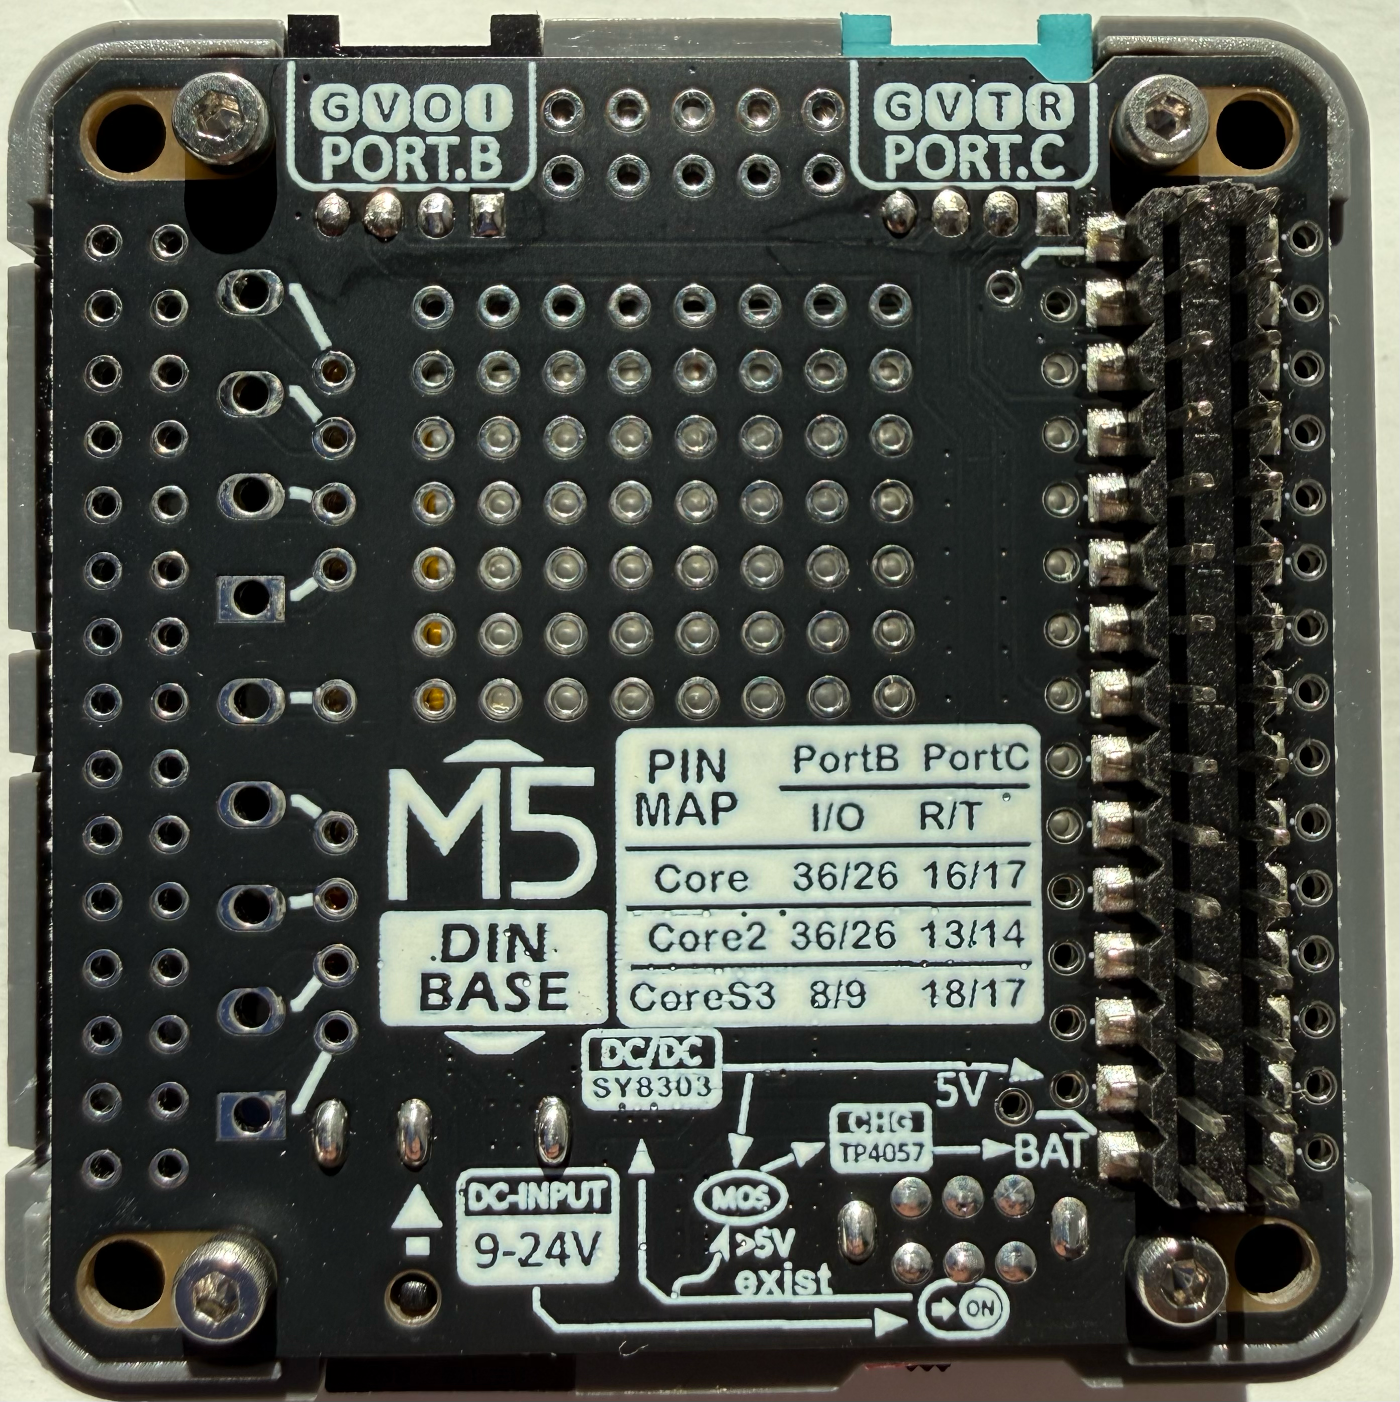
| Pin | GPIO | Labels | Status | Capabilities | Notes |
|---|---|---|---|---|---|
| 1 | 0 | G0I2S_MCLK | strapping | - | |
| 2 | 1 | G1PORT_A_SCL | safe | - | |
| 3 | 2 | G2PORT_A_SDA | safe | - | |
| 4 | 3 | G3LCD_CS | strapping | - | |
| 5 | 4 | G4SD_CS | safe | - | |
| 6 | 5 | G5 | safe | - | |
| 7 | 6 | G6 | safe | - | |
| 8 | 7 | G7 | safe | - | |
| 9 | 8 | G8PORT_B | safe | - | |
| 10 | 9 | G9PORT_B | strapping | - | |
| 11 | 10 | G10ADC | strapping | - | |
| 12 | 11 | G11SCL | strapping | i2c | |
| 13 | 12 | G12SDA | strapping | i2c | |
| 14 | 13 | G13I2S_DOUT | strapping | - | |
| 15 | 14 | G14I2S_DIN | strapping | - | |
| 16 | 15 | G15CAM_D4 | safe | - | |
| 17 | 16 | G16CAM_D5 | safe | - | |
| 18 | 17 | G17PORT_C_TX | safe | - | |
| 19 | 18 | G18PORT_C_RX | safe | - | |
| 20 | 21 | G21TOUCH_INT | safe | - | |
| 21 | 33 | G33I2S_LRCK | safe | - | |
| 22 | 34 | G34I2S_BCLK | safe | - | |
| 23 | 35 | G35LCD_DCMISO | safe | spi | |
| 24 | 36 | G36SCK | safe | spi | |
| 25 | 37 | G37MOSI | safe | spi | |
| 26 | 38 | G38CAM_HREF | safe | - | |
| 27 | 39 | G39CAM_D0 | strapping | - | |
| 28 | 40 | G40CAM_D1 | strapping | - | |
| 29 | 41 | G41CAM_D2 | strapping | - | |
| 30 | 42 | G42CAM_D3 | strapping | - | |
| 31 | 43 | G43TX | uart | uart | |
| 32 | 44 | G44RX | uart | uart | |
| 33 | 45 | G45CAM_PCLK | strapping | - | |
| 34 | 46 | G46CAM_VSYNC | strapping | - | |
| 35 | 47 | G47CAM_D7 | strapping | - | |
| 36 | 48 | G48CAM_D6 | strapping | - |
Start with these
18 pins with no boot or system involvementFreely assignable - no strapping, flash, USB or JTAG duties. Ideal first picks for buttons, sensors and LEDs.
Fine - with a little care
18 pins · 12 things to knowG0GPIO0 Bootstrapping pin (Chip boot mode selection) Strapping
Must be pulled high (default) or low (to enter UART download mode) at reset. Using it for other functions can interfere with boot mode configuration.
G3GPIO3 Bootstrapping pin (controls JTAG signal source) Strapping
Sampled at reset to select JTAG interface (USB Serial/JTAG controller vs. external pins). Improper use can disable external JTAG or alter debug interface.
G9GPIO9G10GPIO10G11GPIO11G12GPIO12G13GPIO13G14GPIO14 General-purpose SPI2 (FSPI) IO MUX pins Other
IO MUX pin of the general-purpose SPI2 (FSPI) bus, not of the in-package flash - that sits on GPIO26-32. The datasheet lists it as a priority-2 pin ("can be freely used without restrictions"), so it is only taken if your board wires flash, an SD card or a display to FSPI.
- G9General-purpose SPI2 (FSPI) IO MUX pin - hold/data line (FSPIHD)
- G10General-purpose SPI2 (FSPI) IO MUX pin - chip select (FSPICS0)
- G11General-purpose SPI2 (FSPI) IO MUX pin - data in (FSPID)
- G12General-purpose SPI2 (FSPI) IO MUX pin - clock (FSPICLK)
- G13General-purpose SPI2 (FSPI) IO MUX pin - data out (FSPIQ)
- G14General-purpose SPI2 (FSPI) IO MUX pin - write-protect/data line (FSPIWP)
G39GPIO39 JTAG test clock (MTCK); IO MUX alternates CLK_OUT3 and SUBSPICS1 (chip select on the alternative SUBSPI memory bus, unused on standard modules) JTAG
Default JTAG TCK - keep it free if you debug over JTAG. It is not a flash or PSRAM line on standard modules: those sit on GPIO26-37.
G40GPIO40 JTAG test data out pin (MTDO) JTAG
Default JTAG TDO output for debugging. Using it as GPIO will interfere with JTAG debugging functionality.
G41GPIO41 JTAG test data in pin (MTDI) JTAG
Default JTAG TDI input for debugging. Should be reserved for JTAG or left unused if JTAG is to remain available.
G42GPIO42 JTAG test mode select pin (MTMS) JTAG
Default JTAG TMS signal for debugging. Using this pin for other purposes will disable the JTAG interface (unless JTAG is rerouted to USB).
G43GPIO43 UART0 transmit pin (U0TXD), default serial console TX UART
Used for bootloader output and UART console logs. If repurposed, you will lose the default serial output (and programming via UART0).
G44GPIO44 UART0 receive pin (U0RXD), default serial console RX UART
Used for bootloader input (download mode via serial). If repurposed, you cannot use the default UART0 download mode for programming the chip.
G45GPIO45 Bootstrapping pin (selects VDD_SPI flash voltage) Strapping
Determines flash/PSRAM power voltage (3.3 V vs 1.8 V) at boot. Must match hardware configuration; using as GPIO can upset flash supply setting.
G46GPIO46 Bootstrapping pin (used with GPIO0 for boot mode; controls ROM log output) Strapping
Must be at a defined level during reset (with GPIO0) to select normal or download boot and UART/USB print mode. This pin is input-only (no output drive), so it should be left for its intended strapping function.
G47GPIO47G48GPIO48 Octal SPI differential clock legs (SPICLK_P/N_DIFF), used only by the 1.8 V octal flash/PSRAM variants Other
Only the 1.8 V octal parts (ESP32-S3R8V, ESP32-S3R16V) run the differential memory clock here, and on those the pin works at 1.8 V instead of 3.3 V. On the common 3.3 V modules it is a normal GPIO - several devkits drive their RGB LED from GPIO48.
- G47Octal SPI differential clock positive leg (SPICLK_P_DIFF), used only by the 1.8 V octal flash/PSRAM variants
- G48Octal SPI differential clock negative leg (SPICLK_N_DIFF), used only by the 1.8 V octal flash/PSRAM variants
The M5Stack CoreS3 pinout brings out 36 GPIO pins - every one of them usable in your project.
For peripherals, I²C is mapped to SDA on GPIO12 and SCL on GPIO11; the SPI bus (MOSI, MISO, SCK) is broken out in full; TX/RX on GPIO43 and GPIO44 cover serial logging and flashing.
If you want zero surprises, G1, G2, G4, G5 and 14 more are free of any such role - the safest first picks. 18 of the exposed pins carry boot-time or system duties on the ESP32-S3 (G0, G3, G9 and 15 more).
Pinout notes Unlike bare dev boards, the M5Stack CoreS3 doesn't expose a classic pin header. Instead, its GPIOs are available through the M5-Bus - a 30-pin connector on the…
Unlike bare dev boards, the M5Stack CoreS3 doesn't expose a classic pin header. Instead, its GPIOs are available through the M5-Bus - a 30-pin connector on the bottom that provides GPIO, I2C, SPI, I2S, UART and ADC access for stacking modules and bases.
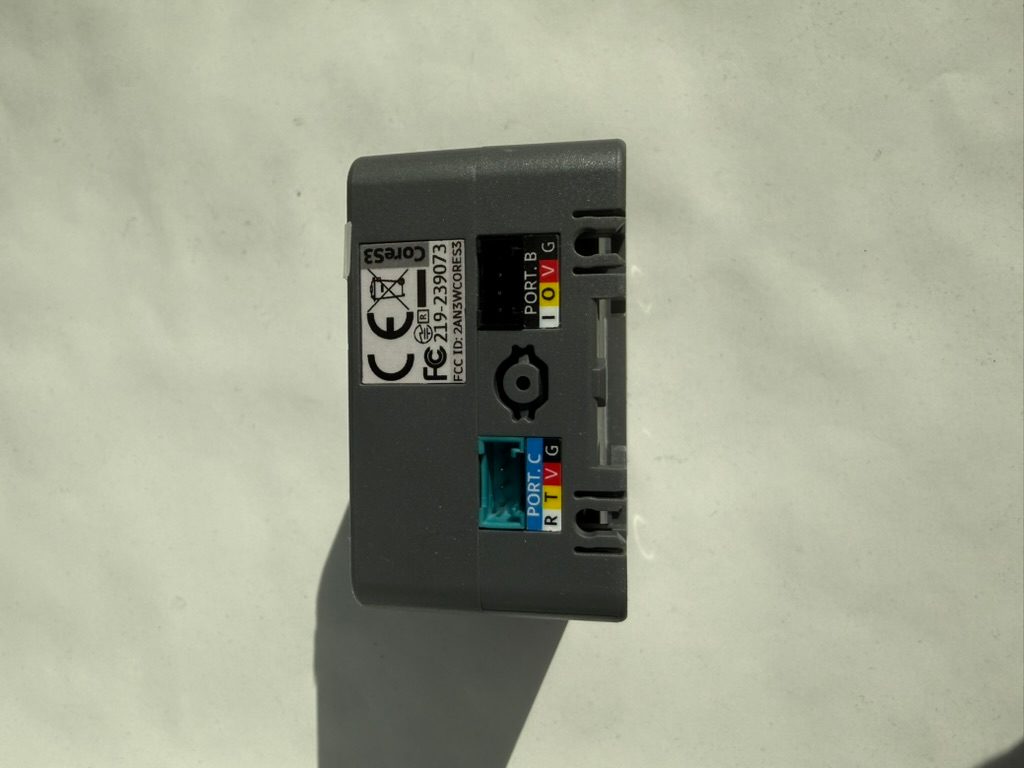
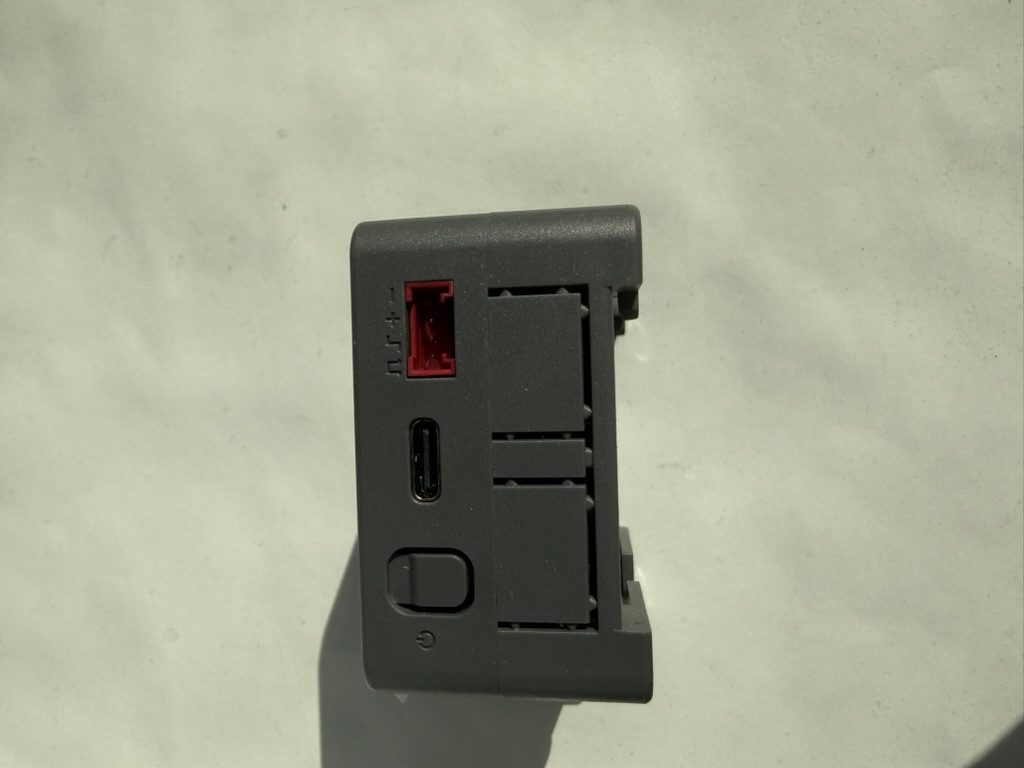
For quick peripheral hookups there are three Grove (HY2.0-4P) ports: Port A (G1/G2, external I2C), Port B (G8/G9, GPIO/ADC) and Port C (G17/G18, UART). This is easily the fastest way to attach sensors without any soldering.
Internally, most of the onboard peripherals live on the internal I2C bus (G12 SDA / G11 SCL) - the AXP2101 PMU, AW9523B IO expander, IMU, magnetometer, RTC, touch controller and proximity sensor all share it. The display and microSD slot share the SPI bus (G36 SCK / G37 MOSI), and the microphone and speaker share the I2S bus.
Keep in mind that the display reset and backlight are controlled through the AW9523B IO expander rather than direct GPIOs - something to remember when configuring ESPHome or writing your own drivers.
Getting started
flash your first firmware in ~2 minutesBoard: ESP32S3 Dev Module USB CDC On Boot: Enabled Flash Size: 16MB (128Mb) Flash Mode: QIO PSRAM: QSPI PSRAM Partition Scheme: 16M Flash (3MB APP/9.9MB FATFS) Upload Speed: 921600
// toggle GPIO1 - wire an LED and resistor to it
void setup() {
  pinMode(1, OUTPUT);
}
void loop() {
  digitalWrite(1, HIGH); delay(500);
  digitalWrite(1, LOW);  delay(500);
}[env:m5stack-cores3]
platform = espressif32
board = esp32-s3-devkitc-1
framework = arduino
monitor_speed = 115200
upload_speed = 921600
board_build.arduino.memory_type = qio_qspi
build_flags = -DBOARD_HAS_PSRAMesp32-s3-devkitc-1 - or type it after board =.esp32:
board: esp32-s3-devkitc-1
variant: esp32s3
framework:
type: esp-idf
psram:
mode: quad
speed: 80MHz
# blink - GPIO1
output:
- platform: gpio
pin: 1
id: led_out
light:
- platform: binary
name: "LED"
output: led_outesp32-s3-devkitc-1 (same ids as PlatformIO).esptool.py --chip esp32s3 --port /dev/ttyACM0 \
--baud 921600 write_flash 0x0 firmware.bin--port = your /dev/tty* (macOS/Linux) or COMx (Windows).Good to know
board-specific quirks worth 60 seconds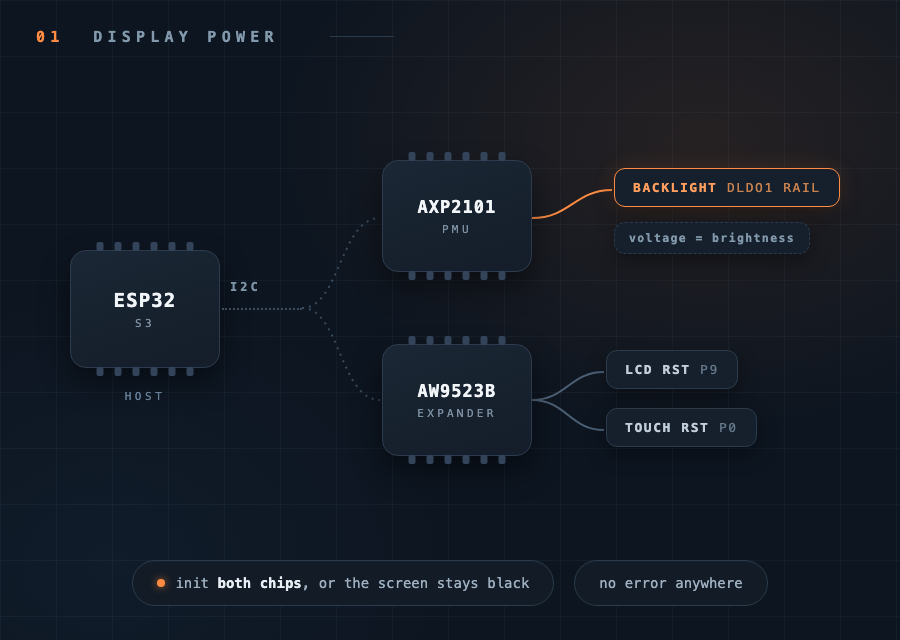
The backlight is not a GPIO - it is the AXP2101's DLDO1 rail, and brightness is set by varying that rail's voltage (about 2.6-3.3V). LCD reset and touch reset sit on the AW9523B IO expander (pins 9 and 0). Firmware that doesn't initialize both chips gets a black screen and no error anywhere - M5Unified/M5GFX do this for you, custom drivers must do it themselves. In ESPHome the display itself is native…
The backlight is not a GPIO - it is the AXP2101's DLDO1 rail, and brightness is set by varying that rail's voltage (about 2.6-3.3V). LCD reset and touch reset sit on the AW9523B IO expander (pins 9 and 0). Firmware that doesn't initialize both chips gets a black screen and no error anywhere - M5Unified/M5GFX do this for you, custom drivers must do it themselves.
In ESPHome the display itself is native (mipi_spi, model M5CORE, invert_colors: true), but the AXP2101 and AW9523B need M5Stack's external components from github://m5stack/esphome-yaml.
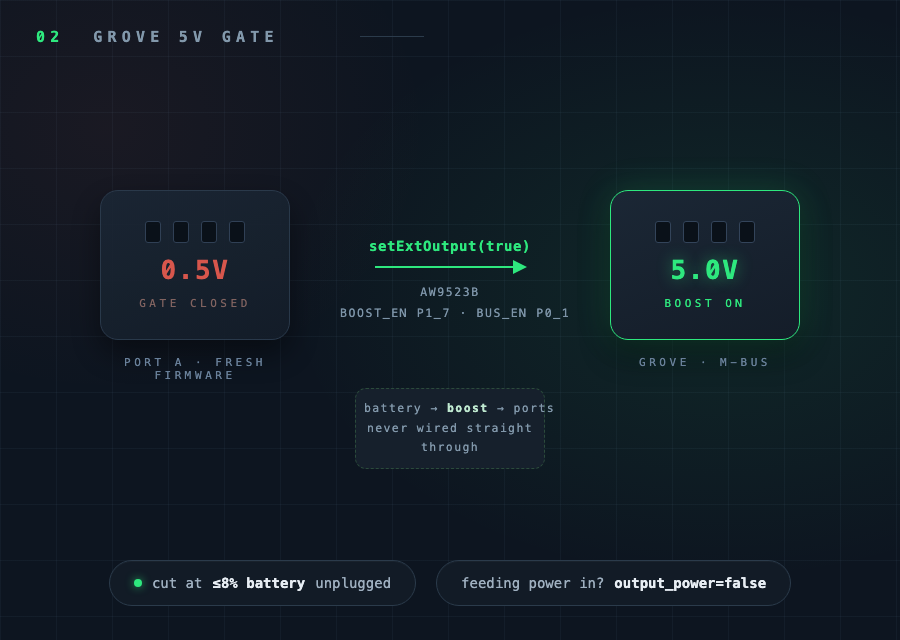
Grove and M-Bus 5V comes from a boost converter that firmware has to switch on through the AW9523B (BOOST_EN pin 15, BUS_OUT_EN pin 1). Skip that and a meter shows only ~0.5V on Port A. In Arduino/M5Unified it's M5.Power.setExtOutput(true); in UIFlow, the "Set external port power to output mode" block. M5Unified also cuts external output when the battery drops to about 8% with no charger attached. The gate…
Grove and M-Bus 5V comes from a boost converter that firmware has to switch on through the AW9523B (BOOST_EN pin 15, BUS_OUT_EN pin 1). Skip that and a meter shows only ~0.5V on Port A. In Arduino/M5Unified it's M5.Power.setExtOutput(true); in UIFlow, the "Set external port power to output mode" block. M5Unified also cuts external output when the battery drops to about 8% with no charger attached.
The gate works both ways - when powering the CoreS3 from a Grove port or the DC input, official docs require cfg.output_power = false, or the board fights its own supply.
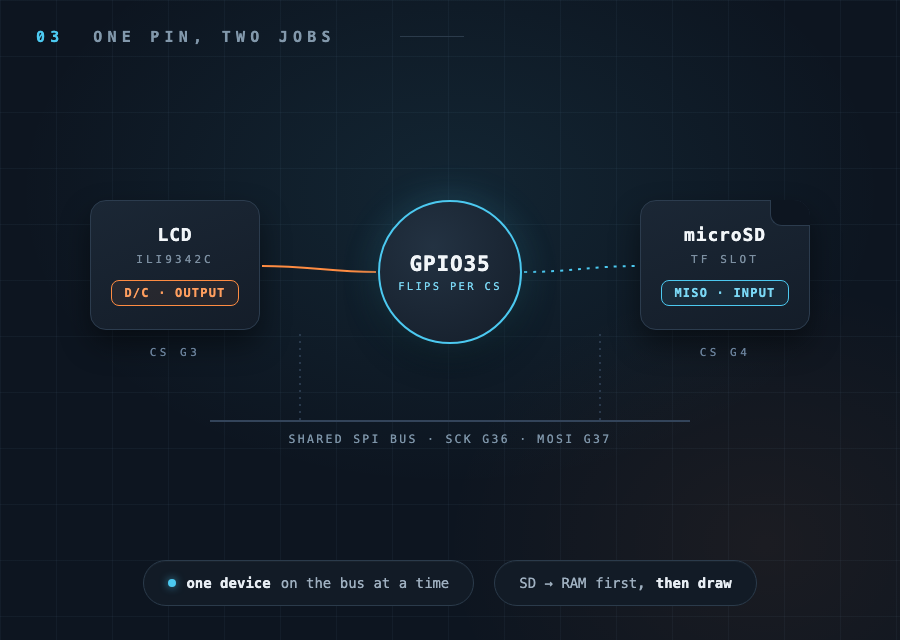
The display and microSD slot share one SPI bus (SCK G36, MOSI G37), and GPIO35 does double duty: it is SPI MISO for the SD card and the D/C line for the LCD. M5GFX flips the pin between input and output on every chip-select change, so the two can never be on the bus at the same moment - drawing an image straight from the SD card crashes with a bus conflict. Keep SD reads and screen redraws sequential: load the…
The display and microSD slot share one SPI bus (SCK G36, MOSI G37), and GPIO35 does double duty: it is SPI MISO for the SD card and the D/C line for the LCD. M5GFX flips the pin between input and output on every chip-select change, so the two can never be on the bus at the same moment - drawing an image straight from the SD card crashes with a bus conflict.
Keep SD reads and screen redraws sequential: load the file into RAM (or copy to flash) first, then draw. Streaming from card to screen is the one pattern that reliably fails.
Gallery
9 photos
Specifications
ESP32-S3 · 54 × 54 mm · vs other ESP32 chips →Dimensions
About this board
At its core is the ESP32-S3 - a dual-core Xtensa with vector extensions suited to AI workloads.
Expect to pay about $60.00 - above the ~$29 typical for ESP32-S3 boards.
36 GPIO are broken out - more than most ESP32-S3 boards, so the pin budget is rarely the constraint.
Onboard you'll find 8MB (QSPI) PSRAM, an IPS LCD 2.0" 320x240 display with touch, a GC0308 camera (0.3MP), a microSD slot, a microphone (Dual mic array), a speaker, an audio codec (ES7210), an amplifier (AW88298), a BMI270 + BMM150 IMU, a BM8563 RTC, an ambient-light sensor (LTR-553) and battery charging (AXP2101).
It flashes over native USB - no serial-converter driver needed, which isn't a given among ESP32-S3 boards.
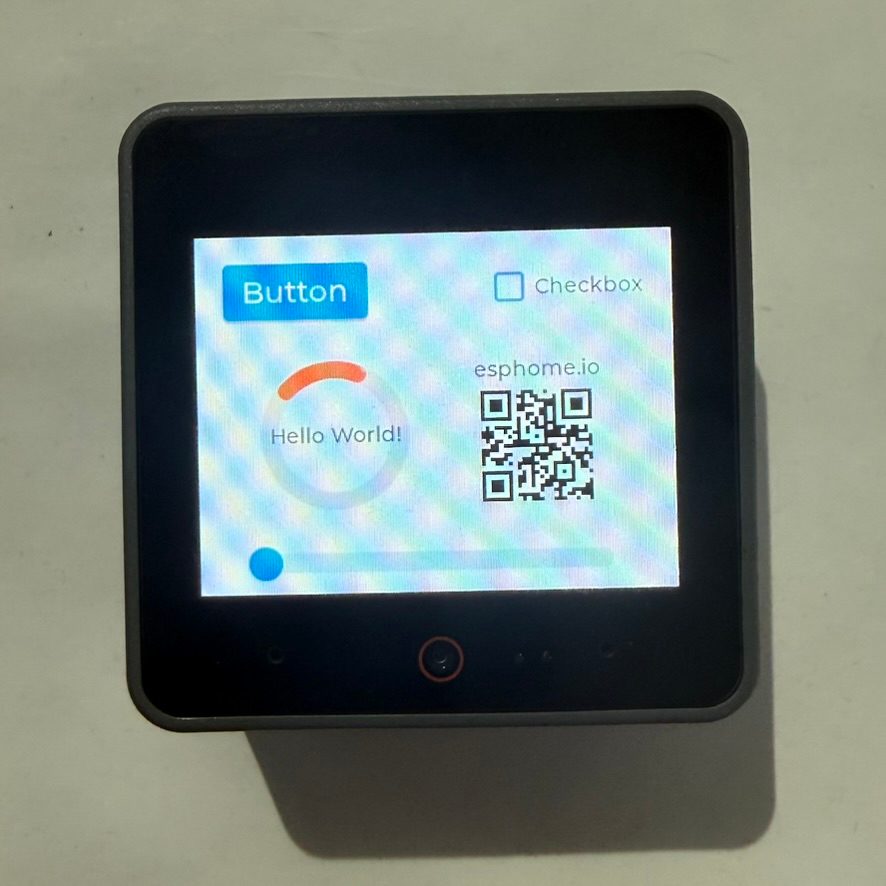
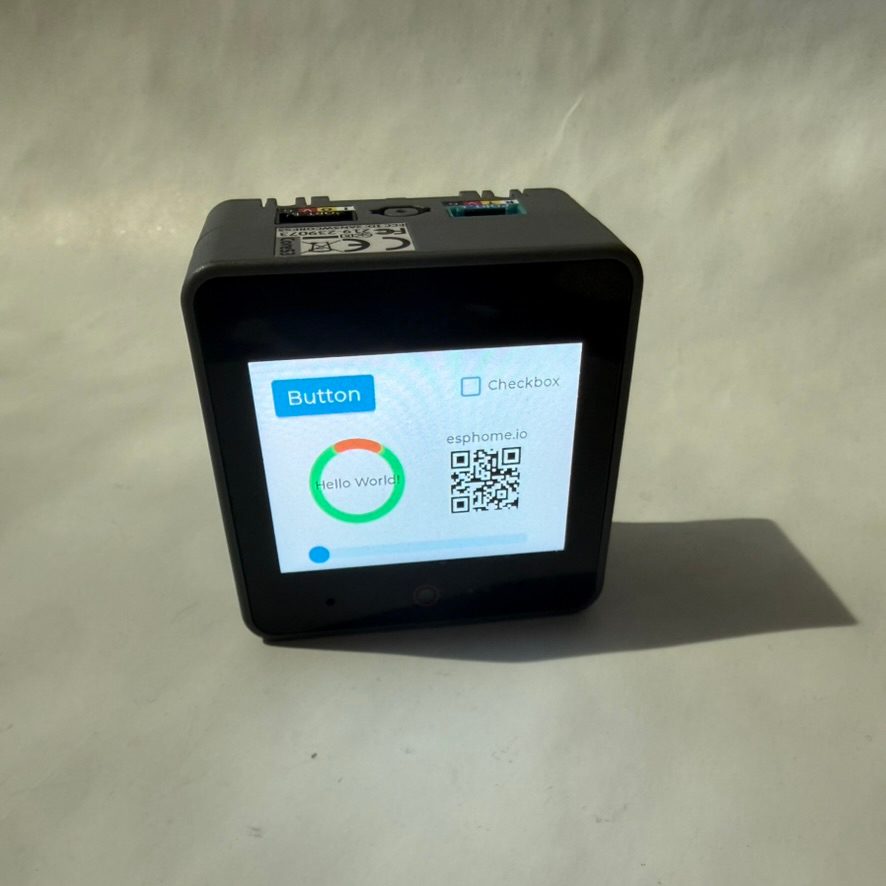
The M5Stack CoreS3 is the third-generation flagship of the M5Stack Core series, built around the ESP32-S3 (dual-core @ 240 MHz, 16 MB flash, 8 MB PSRAM). It's less of a bare dev board and more of a complete, enclosed development kit - a 2.0" capacitive-touch IPS display behind glass, in a solid case with a proper power button.
The integrated peripheral list is long: a GC0308 camera, microSD card slot, dual microphones (ES7210 codec), a 1W speaker on an AW88298 I2S amplifier, a BMI270 IMU with BMM150 magnetometer, a proximity sensor, a BM8563 RTC, and an AXP2101 power management chip handling it all.
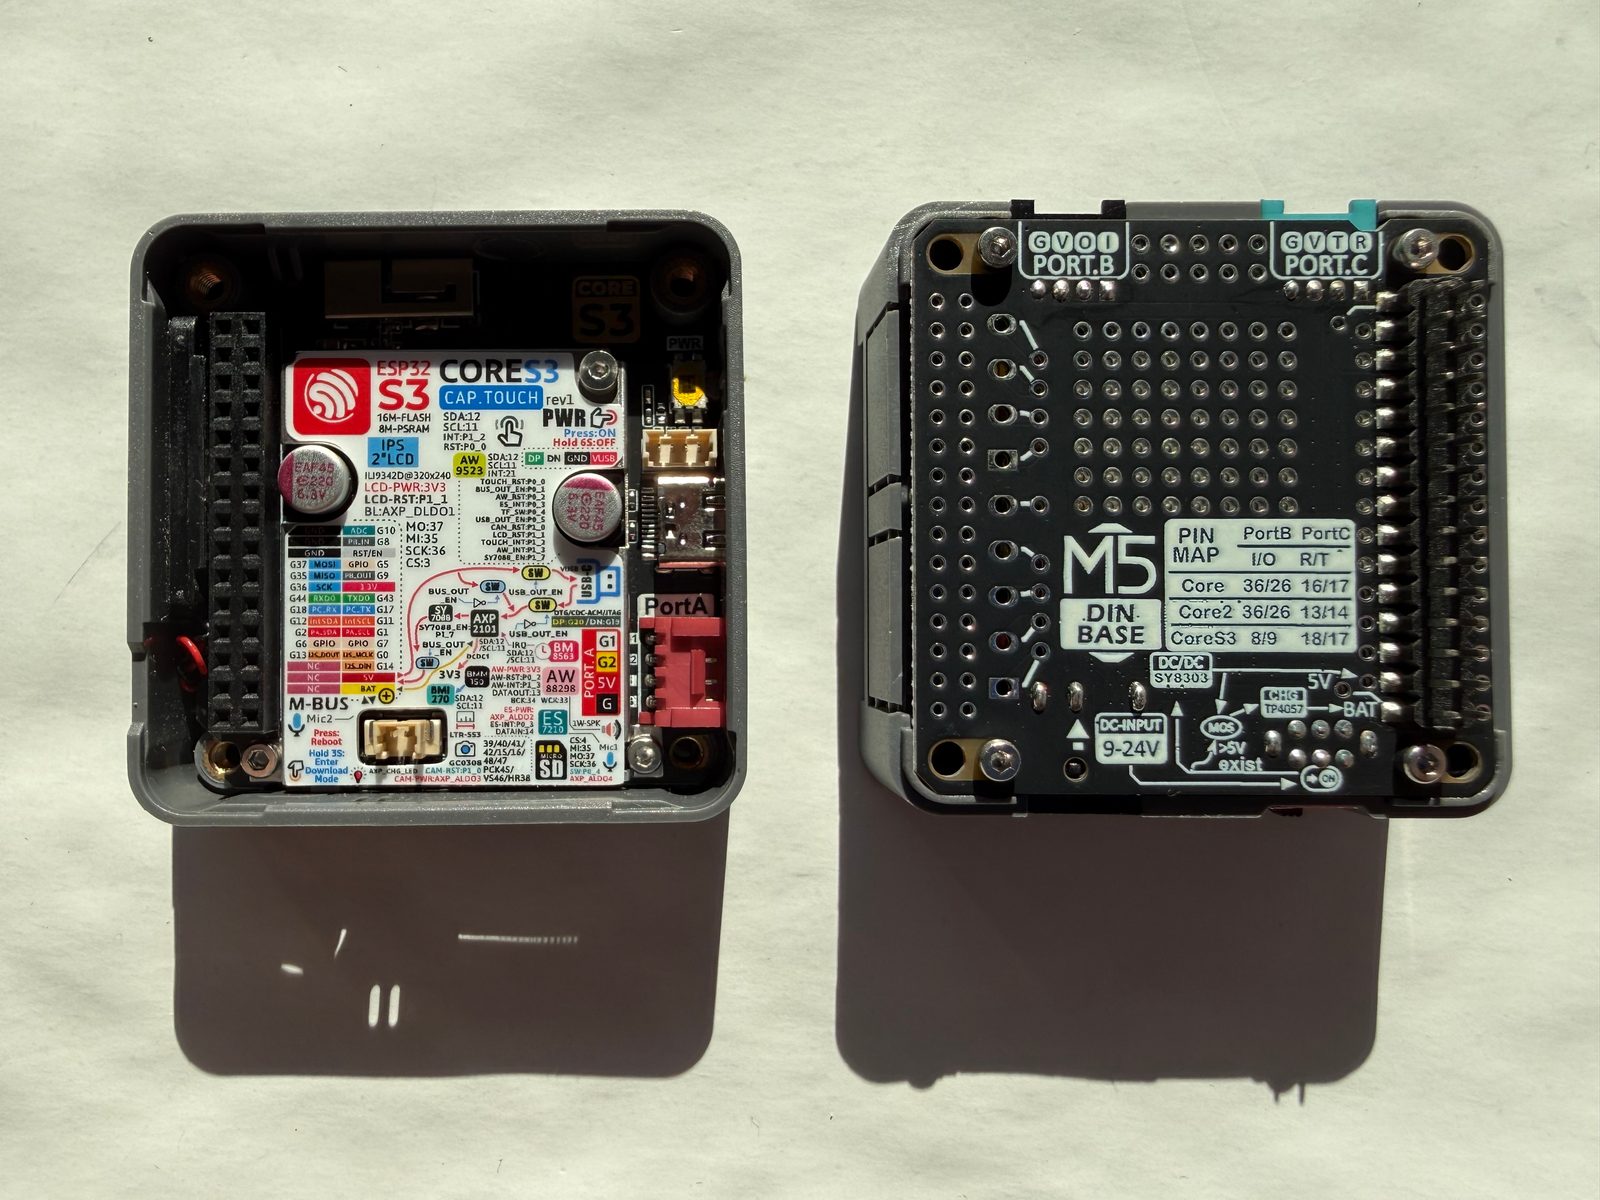
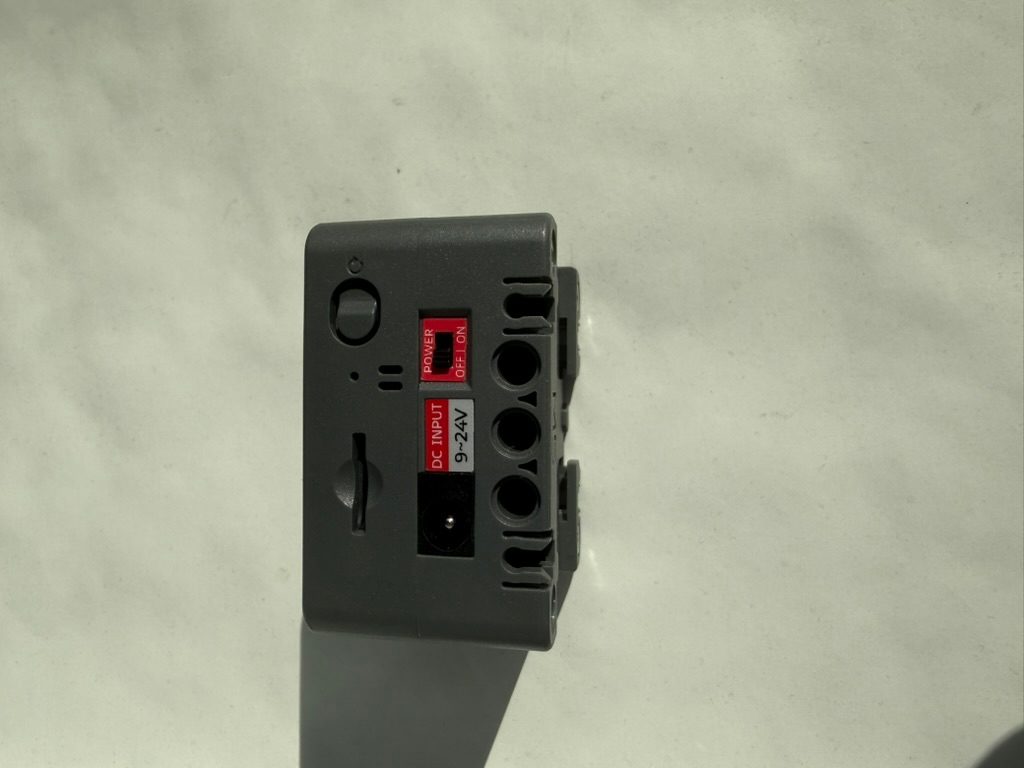
It ships with the DinBase - a bottom module that adds a 500 mAh battery, DC 9-24V power input, and DIN-rail / wall / screw mounting options.
It's bulkier than a bare board, but that's the trade-off: everything is already wired up, so instead of breadboarding a display, camera, mic and battery charger yourself, you flash it and start prototyping.
- 2.0" capacitive-touch IPS display (320x240, ILI9342C) behind high-strength glass
- GC0308 0.3MP camera with LTR-553ALS-WA proximity sensor
- Dual microphones with ES7210 codec + 1W speaker via AW88298 I2S amplifier
- BMI270 6-axis IMU and BMM150 3-axis magnetometer
- BM8563 RTC with sleep-timer wake-up
- AXP2101 power management IC and AW9523B IO expander
- microSD card slot (shares SPI bus with the display)
- Three Grove ports (I2C / GPIO / UART) and 30-pin M5-Bus expansion
- Included DinBase: 500mAh battery, DC 12V (9-24V) input, DIN-rail / wall / screw mounting, proto areas
- Dedicated power button and reset button (long-press for download mode)
FAQ
8 common questionsWhat is the difference between the M5Stack CoreS3 and Core2?›
Does the M5Stack CoreS3 work with ESPHome?›
Does the M5Stack CoreS3 have a battery?›
What camera does the M5Stack CoreS3 have?›
How do I program the M5Stack CoreS3?›
What is the difference between the CoreS3 and the CoreS3 SE?›
Can the speaker and microphone be used at the same time?›
Does the CoreS3 have touch buttons below the screen like the Core2?›
Where to buy
prices are typical street pricesResources
Similar boards

