AHT20 Temperature and Humidity Sensor

View on Amazon
Overview
About AHT20 Temperature and Humidity Sensor
The AHT series, developed by AOSONG (Aosong Electronics Co., Ltd.), consists of high-precision digital temperature and humidity sensors.
⚡ Key Features
- Upgraded Performance – The AHT20 offers higher accuracy and improved reliability compared to the AHT10.
- Reliable Environmental Monitoring – Ideal for weather stations, indoor climate control, and industrial applications.
- Compact & Efficient – Digital output with I²C interface for seamless integration.
🔗 Learn more about the AHT20 sensor.
🔗 Check out the AHT10 sensor for a more affordable option.
Get Your AHT20


💡 Prices are subject to change. We earn from qualifying purchases as an Amazon Associate.
AHT20 Specifications
Complete technical specification details for AHT20 Temperature and Humidity Sensor
📊 Technical Parameters
AHT20 Pinout
The AHT20 pinout includes four pins: VCC (power), GND (ground), SDA (I2C data), and SCL (I2C clock). This upgraded sensor provides improved temperature and humidity measurements via I2C protocol.
Visual Pinout Diagram
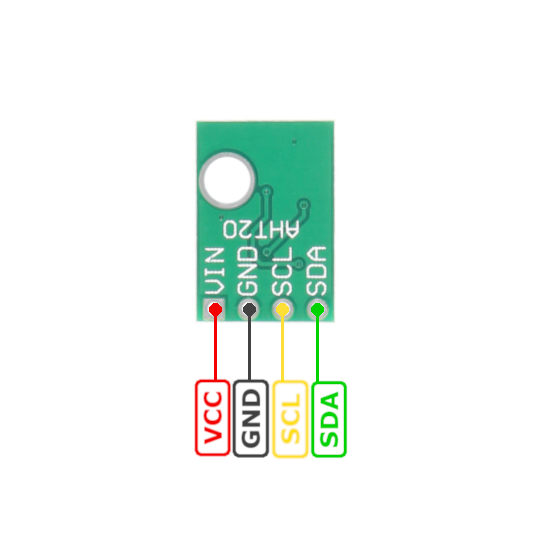
Pin Types
Quick Tips
version of AHT10 with improved performance,Temperature accuracy: ±0.3°C,Humidity accuracy: ±2% RH
voltage: 3.3V to 5V,I2C address: 0x38 (same as AHT10),Enhanced reliability compared to AHT10
output with I2C interface,Ideal for weather stations and indoor climate control
Pin Descriptions
| Pin Name | Type | Description | Notes |
|---|---|---|---|
1 VCC | Power | Power supply input (3.3V to 5V) | Typically 3.3V for ESP32 |
2 GND | Ground | Ground connection | Common ground |
3 SDA | I2C Data | I2C Serial Data line | Bidirectional data (requires pull-up) |
4 SCL | I2C Clock | I2C Serial Clock line | Clock signal (requires pull-up) |
Wiring AHT20 to ESP32
Connect the AHT20 to your ESP32 via I2C (SDA and SCL pins). This upgraded sensor offers improved accuracy and reliability compared to the AHT10. Pull-up resistors (typically 4.7kΩ) are required on I2C lines.
Visual Wiring Diagram
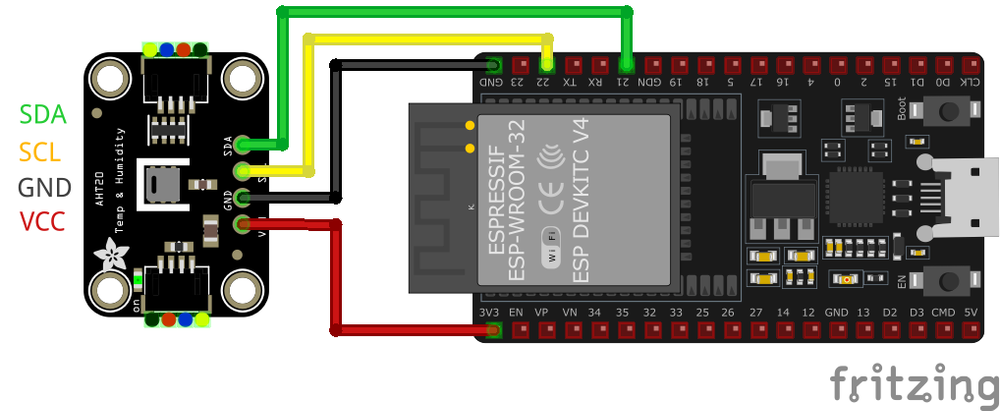
Connection Status
Protocol
Pin Connections
| AHT20 Pin | Connection | ESP32 Pin | Description |
|---|---|---|---|
1 VCC Required | 3.3V | Power supply (3.3V or 5V) | |
2 GND Required | GND | Ground connection | |
3 SDA Required | GPIO21 | I2C data line (with 4.7kΩ pull-up) | |
4 SCL Required | GPIO22 | I2C clock line (with 4.7kΩ pull-up) |
address: 0x38 (same as AHT10 - cannot coexist on same bus)
resistors (4.7kΩ) required on SDA and SCL
modules include pull-up resistors on board
calibrated - no user calibration needed
away from heat sources to avoid self-heating
longer wires to distance sensor from ESP32 heat
reliability and accuracy than AHT10
ESPHome: Specify variant: AHT20 in configuration
AHT20 sensors require I2C multiplexer (fixed address)
proper ventilation around sensor for accurate readings
for precision environmental monitoring
AHT20 Troubleshooting
Common issues and solutions to help you get your sensor working
Common Issues
Issue: When connecting the AHT20 sensor to an ESP32, the sensor fails to initialize, resulting in errors such as: AHT20 sensor initialization failed. error status : 2.
Possible causes include incorrect wiring, improper I2C configuration, or insufficient power supply.
Solution: Verify that the AHT20's SCL and SDA pins are correctly connected to the ESP32's I2C pins (commonly GPIO 21 for SDA and GPIO 22 for SCL). Ensure that the sensor is powered appropriately, either through the 3.3V or 5V pin, depending on the sensor's voltage requirements. Additionally, confirm that the I2C bus is properly initialized in the code with the correct pins and that no other devices on the bus share the same address. ([forum.arduino.cc](https://forum.arduino.cc/t/esp32-says-i-havent-wired-the-aht20-sensor/873681))
Issue: When integrating the AHT20 sensor with ESPHome, the following error appears in the logs: [E][aht10:080]: Communication with AHT10 failed!, leading to the sensor not providing temperature and humidity data.
Possible causes include incorrect sensor variant specification or compatibility issues with the ESPHome version.
Solution: Ensure that the sensor variant is correctly specified in the ESPHome configuration. For the AHT20 sensor, the configuration should include variant: AHT20. Additionally, updating ESPHome to the latest version may resolve compatibility issues. If the problem persists, consider testing the sensor with a different microcontroller or using alternative libraries to rule out hardware-related issues. ([github.com](https://github.com/esphome/issues/issues/5621))
Issue: The AHT20 sensor reports temperature readings that gradually increase over time, deviating from actual ambient conditions.
Possible causes include self-heating effects due to the sensor's proximity to heat-generating components or insufficient ventilation.
Solution: Position the sensor away from heat sources such as microcontrollers, voltage regulators, or other components that may emit heat. Implement proper ventilation around the sensor to allow for accurate ambient temperature measurements. Using longer connecting wires can help distance the sensor from potential heat sources. Additionally, consider placing the sensor in a well-ventilated enclosure to minimize the impact of external heat. ([community.home-assistant.io](https://community.home-assistant.io/t/temperature-of-aht20-sensor-keeps-rising-on-wemos-s2-mini/785392))
Issue: On a ESP32, the I2C bus detects the AHT20 sensor's address, but attempts to read data result in errors such as: Error: Read failed.
Possible causes include incorrect I2C bus configuration, insufficient pull-up resistors, or conflicts with other I2C devices.
Solution: Verify that the I2C interface is enabled on the ESP32 and that the correct I2C bus is being used. Ensure that appropriate pull-up resistors (typically 4.7kΩ) are present on the SDA and SCL lines. Check for address conflicts with other devices on the I2C bus and ensure that each device has a unique address.
Debugging Tips
Use the Serial Monitor to check for error messages and verify the sensor's output. Add debug prints in your code to track the sensor's state.
Use a multimeter to verify voltage levels and check for continuity in your connections. Ensure the power supply is stable and within the sensor's requirements.
Additional Resources
AHT20 Programming Examples
Ready-to-use code examples for different platforms and frameworks
#include <Wire.h>
#include <Adafruit_AHTX0.h>  // Correct library for AHT20

// Create an instance of the AHT20 sensor
Adafruit_AHTX0 aht;  // Use AHTX0 instead of AHT10

void setup() {
  // Initialize Serial Monitor
  Serial.begin(115200);
  Serial.println("AHT20 Sensor Example");

  // Initialize I2C communication
  if (!aht.begin()) {  // No parameter needed
    Serial.println("Failed to find AHT20 sensor! Check wiring.");
    while (1);
  }
  Serial.println("AHT20 sensor initialized.");
}

void loop() {
  // Get sensor data
  sensors_event_t humidity, temp;
  aht.getEvent(&humidity, &temp); // Retrieve sensor readings

  // Print temperature and humidity
  Serial.print("Temperature: ");
  Serial.print(temp.temperature);
  Serial.println(" °C");

  Serial.print("Humidity: ");
  Serial.print(humidity.relative_humidity);
  Serial.println(" %");

  // Delay between readings
  delay(2000);
}#include <stdio.h>
#include "freertos/FreeRTOS.h"
#include "freertos/task.h"
#include "driver/i2c.h"
#define I2C_MASTER_NUM I2C_NUM_0 // I2C port number
#define I2C_MASTER_SDA_IO 21 // GPIO for SDA
#define I2C_MASTER_SCL_IO 22 // GPIO for SCL
#define I2C_MASTER_FREQ_HZ 100000 // I2C clock frequency
#define AHT20_ADDR 0x38 // I2C address of the AHT20 sensor
#define AHT20_CMD_TRIGGER 0xAC // Command to trigger measurement
#define AHT20_CMD_SOFTRESET 0xBA // Command to reset the sensor
#define AHT20_CMD_INIT 0xBE // Command to initialize the sensor
// Function to initialize I2C
void i2c_master_init() {
i2c_config_t conf = {
.mode = I2C_MODE_MASTER,
.sda_io_num = I2C_MASTER_SDA_IO,
.scl_io_num = I2C_MASTER_SCL_IO,
.sda_pullup_en = GPIO_PULLUP_ENABLE,
.scl_pullup_en = GPIO_PULLUP_ENABLE,
.master.clk_speed = I2C_MASTER_FREQ_HZ,
};
i2c_param_config(I2C_MASTER_NUM, &conf);
i2c_driver_install(I2C_MASTER_NUM, conf.mode, 0, 0, 0);
}
// Function to write data to the AHT20
esp_err_t aht20_write_command(uint8_t cmd) {
i2c_cmd_handle_t handle = i2c_cmd_link_create();
i2c_master_start(handle);
i2c_master_write_byte(handle, (AHT20_ADDR << 1) | I2C_MASTER_WRITE, true);
i2c_master_write_byte(handle, cmd, true);
i2c_master_stop(handle);
esp_err_t ret = i2c_master_cmd_begin(I2C_MASTER_NUM, handle, pdMS_TO_TICKS(1000));
i2c_cmd_link_delete(handle);
return ret;
}
// Function to read data from the AHT20
esp_err_t aht20_read_data(uint8_t *data, size_t length) {
i2c_cmd_handle_t handle = i2c_cmd_link_create();
i2c_master_start(handle);
i2c_master_write_byte(handle, (AHT20_ADDR << 1) | I2C_MASTER_READ, true);
i2c_master_read(handle, data, length, I2C_MASTER_LAST_NACK);
i2c_master_stop(handle);
esp_err_t ret = i2c_master_cmd_begin(I2C_MASTER_NUM, handle, pdMS_TO_TICKS(1000));
i2c_cmd_link_delete(handle);
return ret;
}
// Function to reset and initialize the AHT20
void aht20_init() {
aht20_write_command(AHT20_CMD_SOFTRESET);
vTaskDelay(pdMS_TO_TICKS(20)); // Wait after reset
aht20_write_command(AHT20_CMD_INIT);
vTaskDelay(pdMS_TO_TICKS(20)); // Wait for initialization
}
// Function to get temperature and humidity
void aht20_get_temp_humidity(float *temperature, float *humidity) {
uint8_t data[6];
aht20_write_command(AHT20_CMD_TRIGGER);
vTaskDelay(pdMS_TO_TICKS(80)); // Wait for the measurement
if (aht20_read_data(data, 6) == ESP_OK) {
uint32_t raw_humidity = ((data[1] << 16) | (data[2] << 8) | data[3]) >> 4;
uint32_t raw_temperature = ((data[3] & 0x0F) << 16) | (data[4] << 8) | data[5];
*humidity = ((float)raw_humidity / 1048576.0) * 100.0;
*temperature = ((float)raw_temperature / 1048576.0) * 200.0 - 50.0;
} else {
*humidity = -1.0;
*temperature = -1.0;
}
}
// Main application
void app_main() {
float temperature = 0.0, humidity = 0.0;
i2c_master_init();
aht20_init();
while (1) {
aht20_get_temp_humidity(&temperature, &humidity);
printf("Temperature: %.2f °C, Humidity: %.2f %%", temperature, humidity);
vTaskDelay(pdMS_TO_TICKS(2000));
}
}The code initializes the I2C communication using i2c_master_init() and sets up the AHT20 sensor with aht20_init(). The aht20_write_command() function sends commands to the sensor for initialization and measurements, while aht20_read_data() reads the response, including raw temperature and humidity data. The aht20_get_temp_humidity() function processes the raw data to compute the actual temperature and humidity values. The main function app_main() initializes the sensor, enters a loop, and retrieves and displays the sensor data every 2 seconds using printf().
sensor:
  - platform: aht10
    variant: AHT20
    temperature:
      name: "Living Room Temperature"
    humidity:
      name: "Living Room Humidity"
    update_interval: 60s
This code snippet configures an AHT20 temperature and humidity sensor in an ESPHome YAML file. The sensor block defines the platform as aht10, specifying that the device is compatible with the AHT10/AHT20 series of sensors. The variant field explicitly declares the sensor model as AHT20.
Two sensors are set up: temperature and humidity. Each sensor has a unique name for identification in the ESPHome dashboard or Home Assistant, such as Living Room Temperature and Living Room Humidity. These names are used when displaying or logging the sensor readings.
The update_interval is set to 60s, which means the sensor will provide updated temperature and humidity readings every 60 seconds.
platformio.ini
[env:esp32]
platform = espressif32
board = esp32dev
framework = arduino
monitor_speed = 115200
lib_deps =
    adafruit/Adafruit AHTX0 @ ^2.0.0
    arduino-libraries/Wire
main.cpp
#include <Wire.h>
#include "Adafruit_AHT10.h"

// Create an instance of the AHT20 sensor
Adafruit_AHT10 aht;

void setup() {
    // Initialize Serial Monitor
    Serial.begin(115200);
    Serial.println("AHT20 Sensor Example");

    // Initialize I2C communication and sensor
    if (!aht.begin(Adafruit_AHT10::AHTX0_SENSOR)) { // Specify AHT20 variant
        Serial.println("Failed to find AHT20 sensor! Check wiring.");
        while (1); // Infinite loop if initialization fails
    }
    Serial.println("AHT20 sensor initialized.");
}

void loop() {
    // Read temperature and humidity from the sensor
    sensors_event_t humidity, temp;
    aht.getEvent(&humidity, &temp); // Populate the event objects

    // Print temperature and humidity to Serial Monitor
    Serial.print("Temperature: ");
    Serial.print(temp.temperature);
    Serial.println(" °C");

    Serial.print("Humidity: ");
    Serial.print(humidity.relative_humidity);
    Serial.println(" %");

    // Delay between readings
    delay(2000);
}
The platformio.ini file configures the project for the ESP32 using the Arduino framework. The environment is set to [env:esp32], with platform = espressif32 for the ESP32 platform and board = esp32dev specifying a generic ESP32 development board. The framework is set to arduino, and the baud rate for the serial monitor is configured with monitor_speed = 115200.
import machine
import time
from ahtx0 import AHT20

# Initialize I2C
i2c = machine.I2C(0, scl=machine.Pin(22), sda=machine.Pin(21))

# Initialize AHT20 sensor
sensor = AHT20(i2c)

# Main loop
while True:
    try:
        # Read temperature and humidity
        temperature = sensor.temperature
        humidity = sensor.humidity

        # Print readings
        print("Temperature: {:.2f} °C".format(temperature))
        print("Humidity: {:.2f} %".format(humidity))

        # Wait for 2 seconds
        time.sleep(2)
    except Exception as e:
        print("Error reading
The code initializes I2C communication using machine.I2C with GPIO22 for SCL and GPIO21 for SDA. The AHT20 sensor is initialized with the AHT20 class. In the main loop, the temperature and humidity are read using sensor.temperature and sensor.humidity, and the values are printed to the console using print(). A delay of 2 seconds is added between readings using time.sleep(2).
Wrapping Up AHT20
The ESP32 AHT20 Temperature and Humidity Sensor is a powerful environment sensor that offers excellent performance and reliability. With support for multiple development platforms including Arduino, ESP-IDF, ESPHome, PlatformIO, and MicroPython, it's a versatile choice for your IoT projects.
Best Practices
For optimal performance, ensure proper wiring and follow the recommended configuration for your chosen development platform.
Safety First
Always verify power supply requirements and pin connections before powering up your project to avoid potential damage.
Ready to Start Building?
Now that you have all the information you need, it's time to integrate the AHT20 into your ESP32 project and bring your ideas to life!
Explore Alternative Sensors
Looking for alternatives to the AHT20? Check out these similar sensors that might fit your project needs.
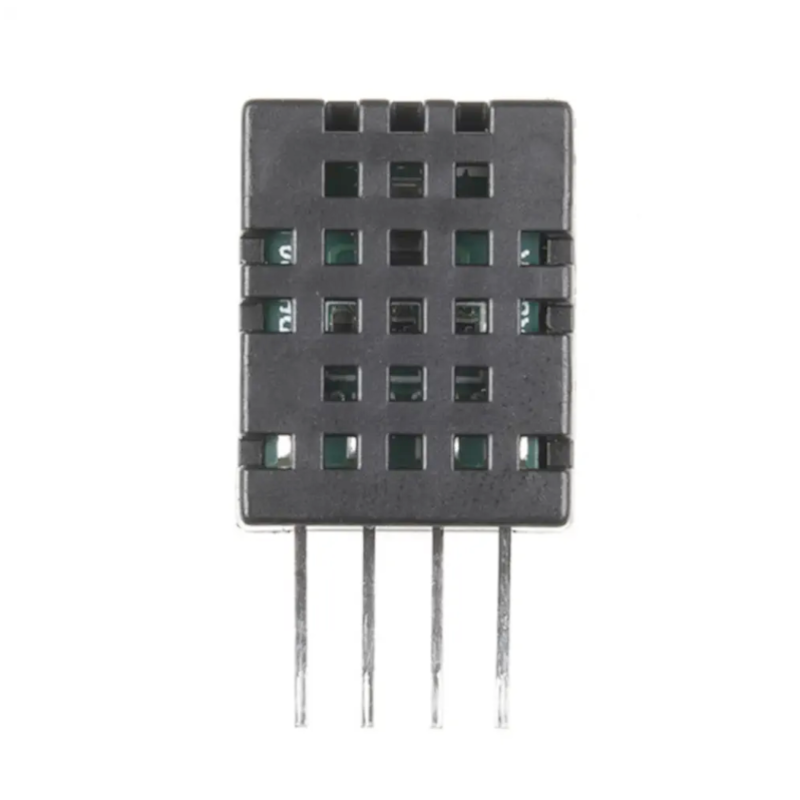
DHT20 Temperature and Humidity Sensor
The DHT20 is a high-precision digital temperature and humidity sensor with an I²C interface. It features low power consumption, fast...
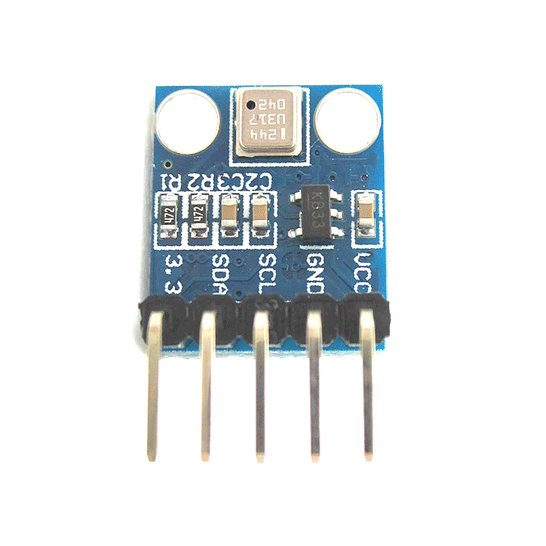
BMP180 Barometric Pressure Sensor
The BMP180 is a high-precision digital barometric pressure and temperature sensor, designed for applications such as weather monitoring,...
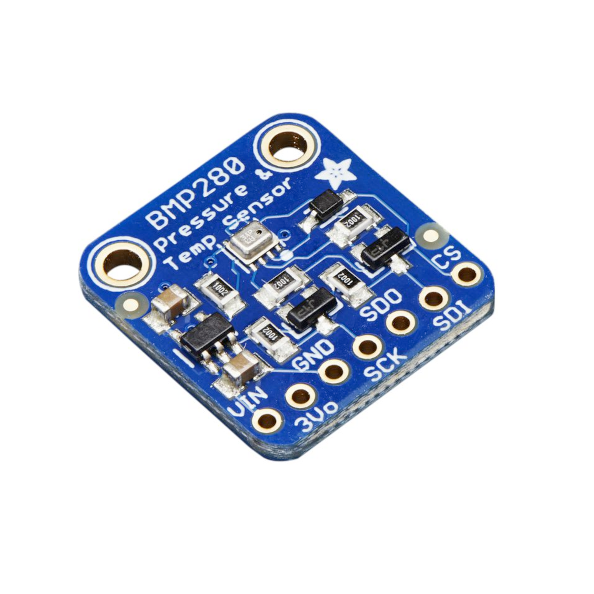
BMP280 Barometric Pressure and Temperature Sensor
The BMP280 is a high-precision digital barometric pressure and temperature sensor, ideal for weather monitoring, altimetry, and navigation....


