
Espressif ESP32-S3-USB-Bridge
USB-to-serial debug board with ESP32-S3 - ideal for interfacing with and debugging ESP-based modules via USB.

Pinout
12 pins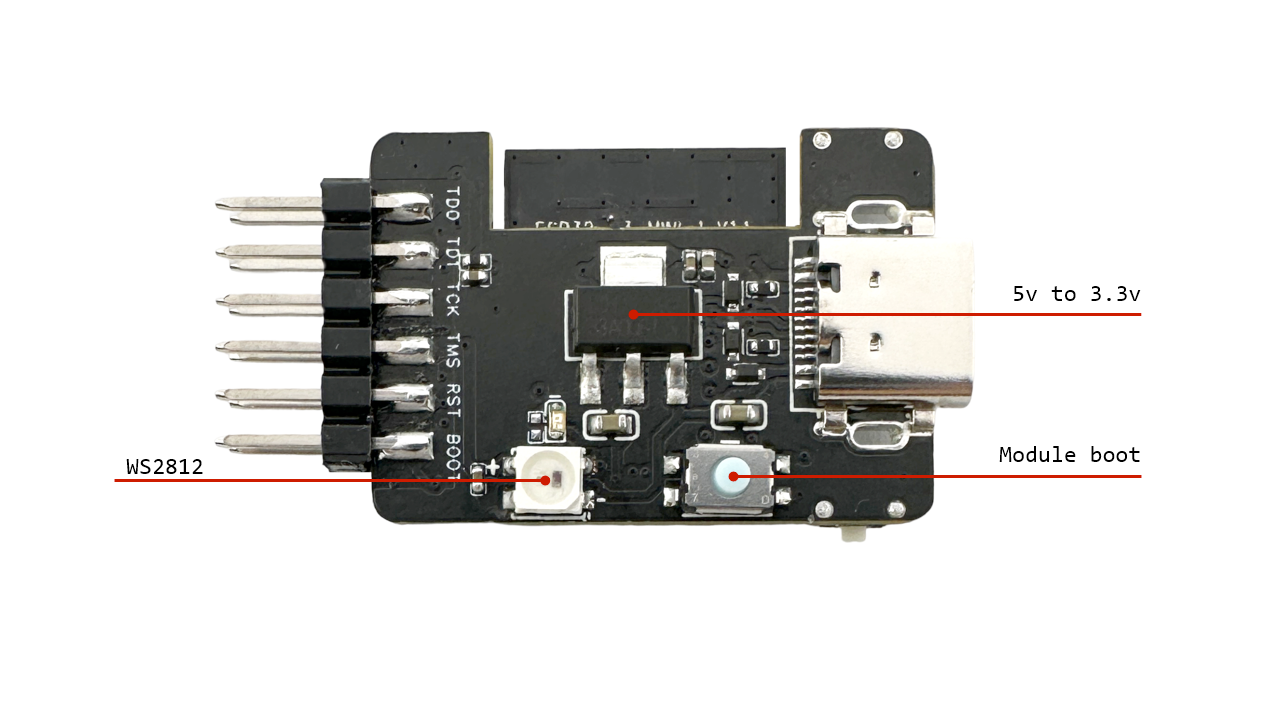
| Pin | GPIO | Labels | Status | Capabilities | Notes |
|---|---|---|---|---|---|
| 1 | 0 | A0T0PWM | strapping | adc · touch | |
| 2 | 2 | TDOPWM | safe | - | |
| 3 | 3 | TDIPWM | strapping | - | |
| 4 | 4 | TCKPWM | safe | - | |
| 5 | 5 | TMSPWM | safe | - | |
| 6 | 8 | Reset | safe | - | |
| 7 | 9 | Boot | strapping | - | |
| 8 | 19 | USB_D- | uart | - | |
| 9 | 20 | USB_D+ | uart | - | |
| 10 | 40 | RX | strapping | uart | |
| 11 | 41 | TX | strapping | uart | |
| 12 | 42 | WS2812 | strapping | - |
Start with these
4 pins with no boot or system involvementFreely assignable - no strapping, flash, USB or JTAG duties. Ideal first picks for buttons, sensors and LEDs.
Fine - with a little care
sampled at boot or shared with debug/serial| Pin | Label | What to know | Role |
|---|---|---|---|
| A0 | GPIO0 | Must be pulled high (default) or low (to enter UART download mode) at reset. Using it for other functions can interfere with boot mode configuration. | Strapping |
| TDI | GPIO3 | Sampled at reset to select JTAG interface (USB Serial/JTAG controller vs. external pins). Improper use can disable external JTAG or alter debug interface. | Strapping |
| Boot | FSPIHD | IO MUX pin of the general-purpose SPI2 (FSPI) bus, not of the in-package flash - that sits on GPIO26-32. The datasheet lists it as a priority-2 pin ("can be freely used without restrictions"), so it is only taken if your board wires flash, an SD card or a display to FSPI. | Other |
| RX | MTDO (GPIO40) | Default JTAG TDO output for debugging. Using it as GPIO will interfere with JTAG debugging functionality. | Other |
| TX | MTDI (GPIO41) | Default JTAG TDI input for debugging. Should be reserved for JTAG or left unused if JTAG is to remain available. | Other |
| WS2812 | MTMS (GPIO42) | Default JTAG TMS signal for debugging. Using this pin for other purposes will disable the JTAG interface (unless JTAG is rerouted to USB). | Other |
Only if you know the tricks
wired to flash or USB - expect a fight| Pin | Label | What to know | Role |
|---|---|---|---|
| USB_D- | USB_D- | By default connected to the on-chip USB Serial/JTAG controller. Using it as general GPIO without reconfiguring IO MUX will interfere with USB functionality. | USB |
| USB_D+ | USB_D+ | By default connected to the on-chip USB Serial/JTAG controller. Using it as general GPIO without reconfiguring IO MUX will interfere with USB functionality. | USB |
Pinout notes All 12 pins on the Espressif ESP32-S3-USB-Bridge are usable GPIO. Peripheral wiring is straightforward: TX/RX on GPIO41 and GPIO40 cover serial logging and…
All 12 pins on the Espressif ESP32-S3-USB-Bridge are usable GPIO.
Peripheral wiring is straightforward: TX/RX on GPIO41 and GPIO40 cover serial logging and flashing.
Beyond plain digital I/O you get 1 ADC-capable pin for sensors and battery monitoring and 1 capacitive-touch inputs.
6 of the exposed pins carry boot-time or system duties on the ESP32-S3 (A0, TDI, Boot and 3 more) - check the guidance above before wiring anything to them. TDO, TCK, TMS and Reset are free of any such role - the safest first picks.
The ESP32-S3-USB-Bridge features a 12-pin expansion connector providing access to key GPIOs and communication interfaces. Key pins include power supply (3V3 and GND), JTAG pins (TCK, TMS, TDI, TDO), UART pins (TX, RX), and control pins (Boot, Reset). This configuration allows for seamless integration with target chips and peripherals.
Getting started
flash your first firmware in ~2 minutesBoard: ESP32S3 Dev Module USB CDC On Boot: Enabled Flash Size: 4MB (32Mb) Flash Mode: DIO PSRAM: QSPI PSRAM Partition Scheme: Default 4MB with spiffs (1.2MB APP/1.5MB SPIFFS) Upload Speed: 921600
// toggle GPIO2 - wire an LED and resistor to it
void setup() {
  pinMode(2, OUTPUT);
}
void loop() {
  digitalWrite(2, HIGH); delay(500);
  digitalWrite(2, LOW);  delay(500);
}[env:esp32-s3-usb-bridge]
platform = espressif32
board = esp32-s3-devkitc-1
framework = arduino
monitor_speed = 115200
upload_speed = 921600
board_build.arduino.memory_type = qio_qspi
build_flags = -DBOARD_HAS_PSRAMesp32-s3-devkitc-1 - or type it after board =.esp32:
board: esp32-s3-devkitc-1
variant: esp32s3
framework:
type: esp-idf
psram:
mode: quad
speed: 80MHz
# blink - GPIO2
output:
- platform: gpio
pin: 2
id: led_out
light:
- platform: binary
name: "LED"
output: led_outesp32-s3-devkitc-1 (same ids as PlatformIO).esptool.py --chip esp32s3 --port /dev/ttyACM0 \
--baud 921600 write_flash 0x0 firmware.bin--port = your /dev/tty* (macOS/Linux) or COMx (Windows).Specifications
ESP32-S3 · 31.5 × 23.3 mm · vs other ESP32 chips →About this board
Inside sits the ESP32-S3 - a dual-core Xtensa with vector extensions suited to AI workloads.
At $9.99 it's cheaper than most ESP32-S3 boards, which usually run around $29.
Only 12 GPIO are broken out, where most ESP32-S3 boards manage about 22 - worth checking the pinout covers what you need.
Around the module: 2MB (QSPI) PSRAM, an addressable RGB LED (GPIO42) and Boot/Reset buttons.
It flashes over native USB - no serial-converter driver needed, which isn't a given among ESP32-S3 boards.
The ESP32-S3-USB-Bridge is a compact development board based on the ESP32-S3-MINI-1 module. It serves as an alternative to traditional USB-to-UART chips by establishing a bridge between a computer and existing microcontrollers. The board supports multiple functions, including USB-to-UART bridging, JTAG debugging, and acts as a USB composite device supporting various functionalities.
Where to buy
prices are typical street pricesResources
Similar boards

