

MicroPython on ESP32 and ESP8266 Getting Started
Learn how to set up MicroPython on your ESP32 with this guide. Flash firmware with Thonny IDE, write python scripts to interact with the ESP32 microcontroller.
Today, we are going to jump straight into getting MicroPython up and running on the ESP32. It lets you write and run Python scripts directly on the microcontroller, so you can prototype without a separate compile-and-flash step for every change. This guide sets up Thonny IDE, flashes the MicroPython firmware onto your board, and runs a first script that controls the built-in LED - and every step here also works on the ESP8266.
What you need
Hardware
Any ESP32 or ESP8266 board - MicroPython supports the original ESP32 plus the ESP32-S2, ESP32-S3 and ESP32-C3, as well as ESP8266 boards. Not sure what you have? Find your board among 270+ pages →
A USB data cable - a charge-only cable will not show up as a serial port.
Software
Windows, macOS or Linux - Thonny runs on all three and the steps below are identical.
Thonny IDE - a free, beginner-friendly editor with MicroPython support built in. It drives esptool for you when flashing firmware.
1Install Thonny IDE
Download Thonny from the official Thonny website - grab the installer for your OS straight from the front page.
Windows
Download the installer from the website and follow the on-screen instructions.
macOS
With Homebrew:
brew install --cask thonny
Linux
Use your package manager, for example on Ubuntu:
sudo apt update
sudo apt install thonny
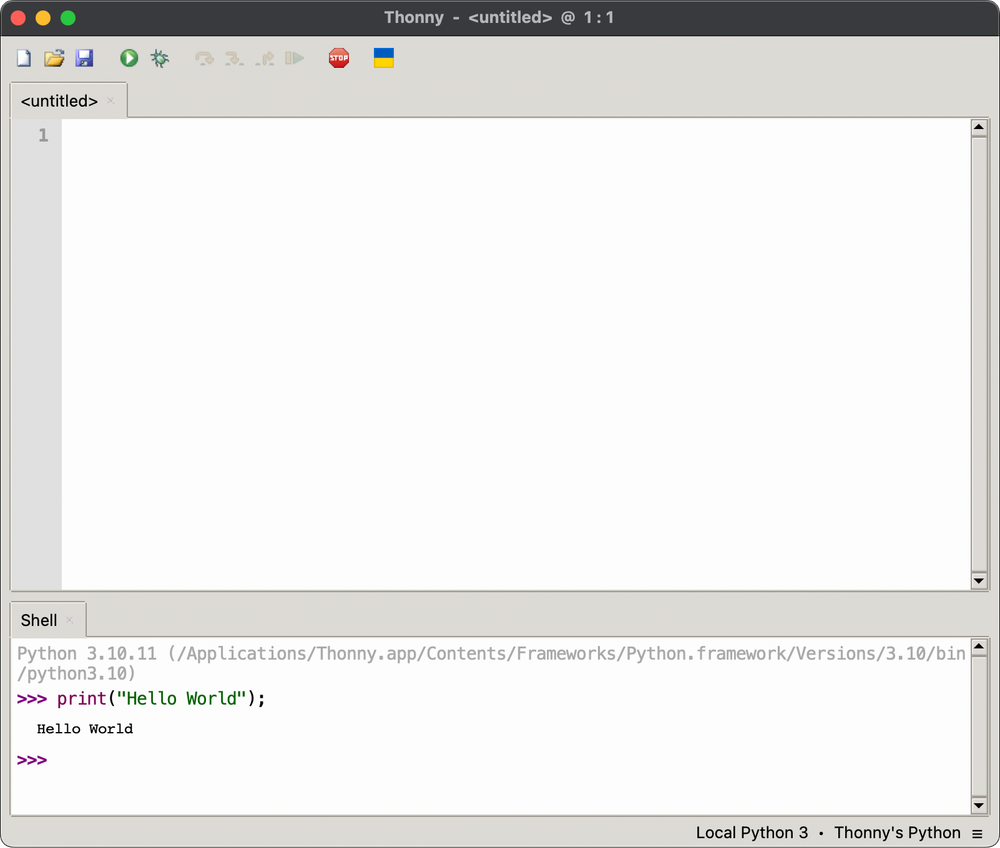
Launch Thonny. On first open it shows a plain script editor with a shell panel underneath:
2Flash MicroPython to your board
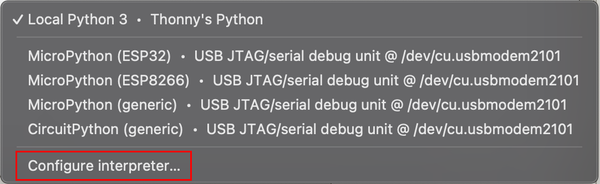
Connect your ESP32 or ESP8266 to your computer with a USB cable. Click the interpreter selector in Thonny's bottom-right corner, then choose Configure interpreter from the list.
In the dialog that opens:
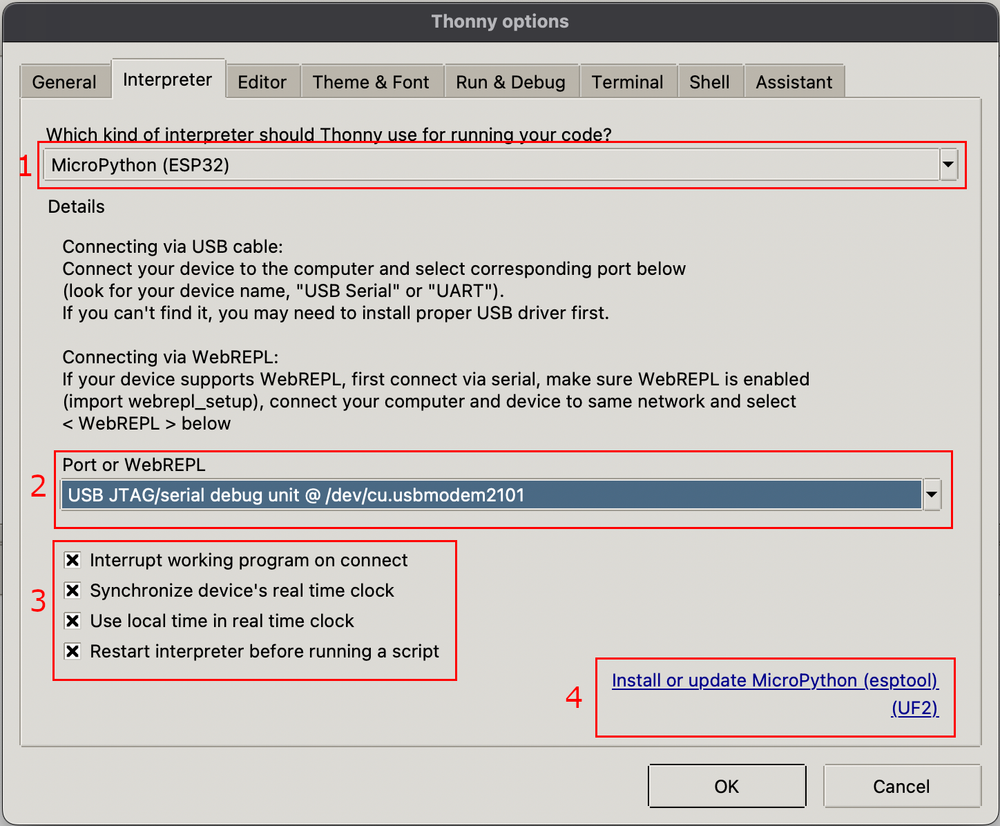
- Set the interpreter dropdown to MicroPython (ESP32) (or MicroPython (ESP8266) for that chip). If it is not listed, make sure your board is connected first.
- Under Port or WebREPL, select the port that corresponds to your board.
- Leave the checkboxes enabled - interrupt the working program on connect, sync the real-time clock, and restart the interpreter before running a script.
- Click Install or update MicroPython (esptool).
A second dialog handles the actual flash:
- MicroPython family: pick your chip, for example ESP32 or ESP32-C3.
- Variant: pick the entry that matches your board - Espressif's generic variant works for most boards.
- Version: pick the latest stable release from the dropdown.
Click Install and wait for it to finish - Thonny erases the flash and writes the firmware over USB.
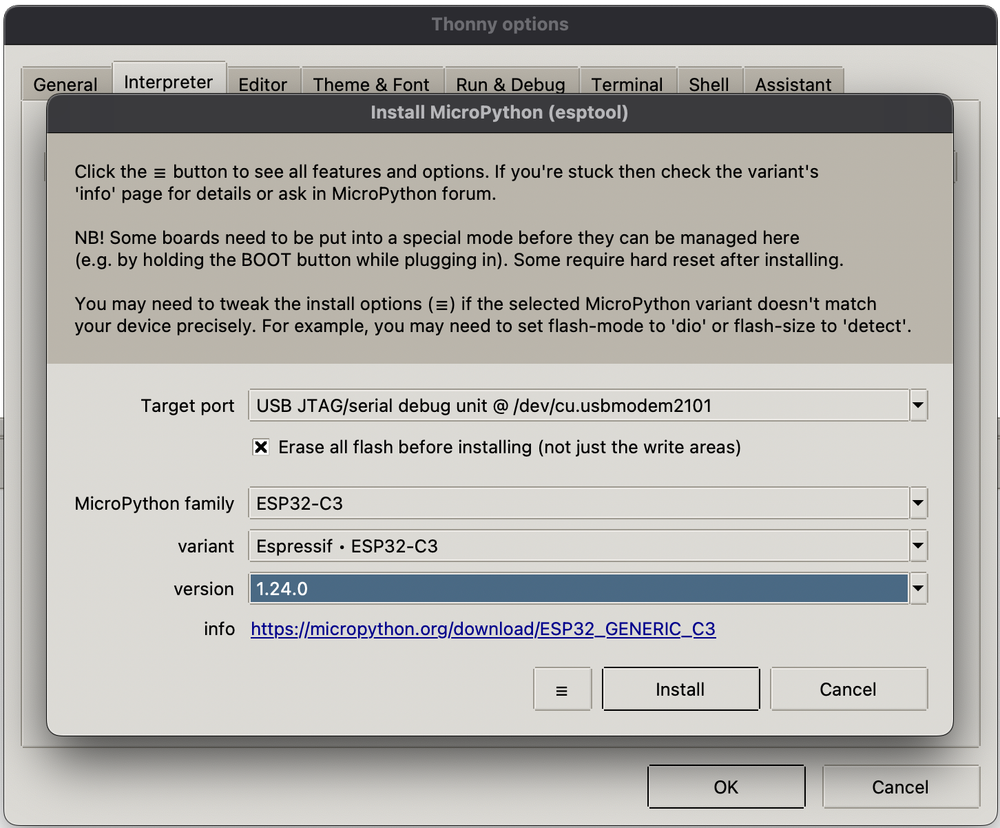
Which version should I pick? Always pick the latest stable release available in the dropdown rather than chasing a specific version number from a tutorial - firmware and this guide's text can drift apart. The current stable line is listed on micropython.org's ESP32 download page.
Once it finishes, Thonny reconnects to your board and the shell shows a boot banner:
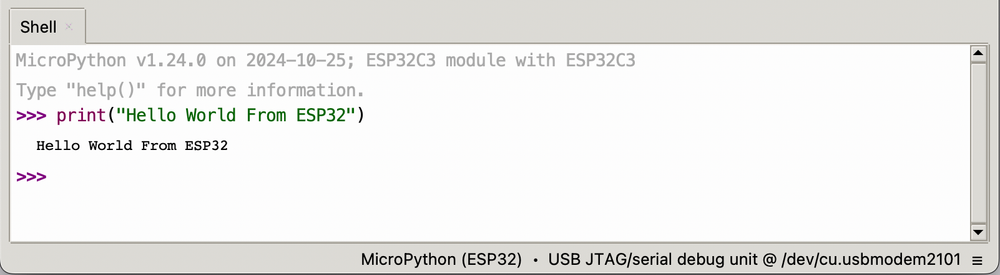
Type print("Hello World from ESP32") into the shell and press Enter - it runs immediately on the board, before you have written a single script file.
3Run your first script
In the script editor (the top pane), type the following:
from machine import Pin

p0 = Pin(10, Pin.OUT)
p0.on()
Pin varies by board. This example uses GPIO10 for the built-in LED, matching the screenshots below, but the actual pin depends on the board you are holding. Check your board's page in the boards database for the correct number.
Click the green Run button in the toolbar (or Run → Run current script):
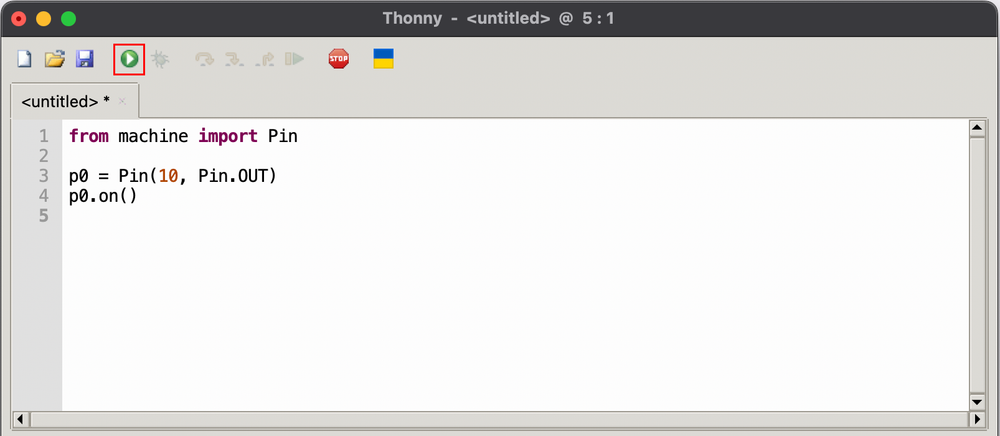
If your board's LED pin matches, it lights up as the script runs. Because p0 was defined at the top level of the script, it stays alive in the shell afterward, so you can control it directly without re-running anything. Turn the LED off with p0.off():
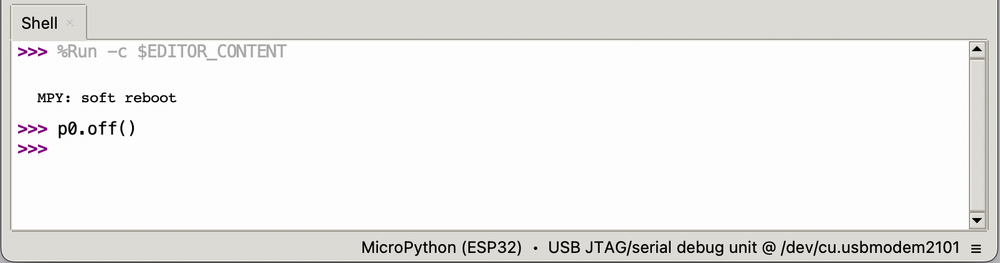
Type p0.on() to turn it back on. Both commands take effect immediately - there is no re-upload step in between.
This is the real advantage of MicroPython over compiled firmware: the shell stays live against whatever the script last defined, so you can poke at hardware, read a sensor value, or flip a pin directly from the console instead of running a full compile-and-flash cycle for every change.