ESP32 BMP180 Barometric Pressure Sensor
Overview
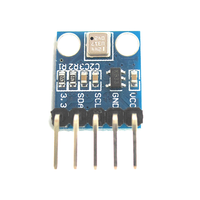
The BMP180 is a high-precision digital barometric pressure and temperature sensor, designed for applications such as weather monitoring, altitude measurement, and GPS enhancement. It operates via the I²C protocol, ensuring seamless integration with embedded systems.
About BMP180 Barometric Pressure Sensor
The BMP180, developed by Bosch Sensortec, is an enhanced version of the BMP085, offering improved accuracy and lower power consumption. Designed for weather monitoring, altimetry, and navigation, it provides precise barometric pressure and temperature readings.
⚡ Key Features
- Upgraded Accuracy & Efficiency – More precise and power-efficient than the BMP085.
- Wide Pressure Range – Measures atmospheric pressure for altitude tracking.
- Integrated Temperature Sensor – Enables accurate weather and altitude calculations.
- I²C Communication – Seamless integration with ESP32, Arduino, and other microcontrollers.
With its compact design and improved performance, the BMP180 is a reliable choice for weather stations, drones, and GPS-enhanced applications. 🚀
Technical Specifications
Pinout Configuration
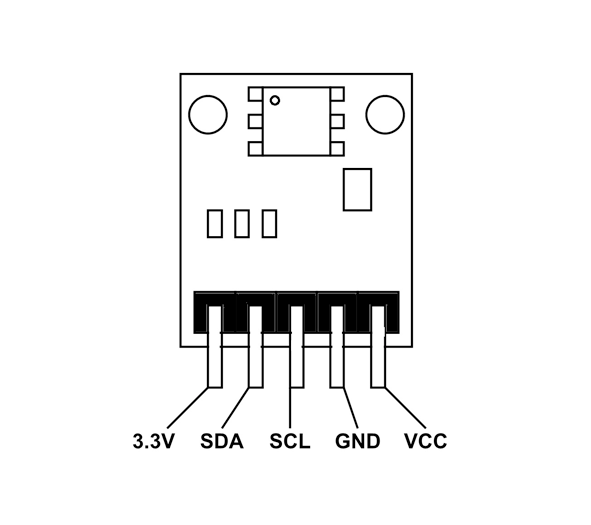
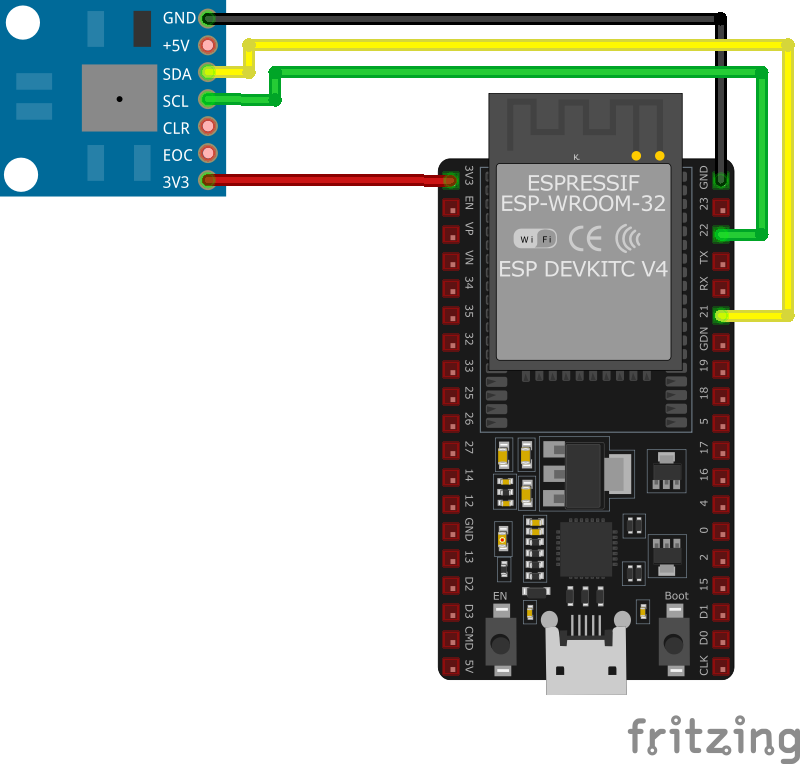
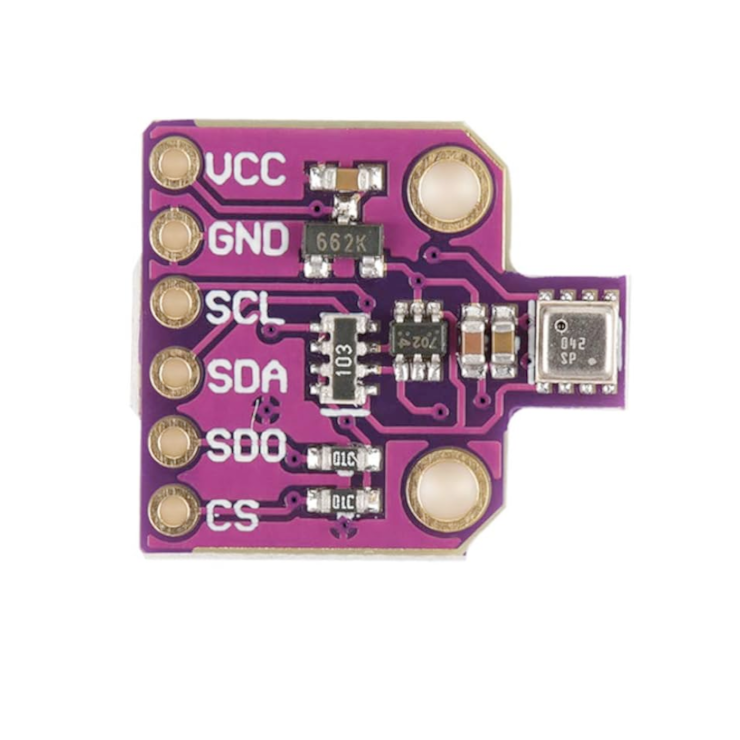
The VCC pin is used to supply power to the sensor, and it typically requires 3.3V or 5V (refer to the datasheet for specific voltage requirements). The GND pin is the ground connection and must be connected to the ground of your ESP32.
The BMP180 module includes the following pins: VIN: Power input (3.3V or 5V compatible). GND: Ground pin. SDA: Serial Data pin for I²C communication. SCL: Serial Clock pin for I²C communication.
Troubleshooting Guide
Common Issues
💻 Library Not Found Error
Issue: The Arduino IDE cannot find the required BMP180 library.
Solution: Ensure that you have installed the Adafruit BMP180 library from the Arduino Library Manager. Restart the Arduino IDE after installation.
❌ Sensor Initialization Failure
Issue: The BMP180 sensor fails to initialize, and the error message Could not find a valid BMP180 sensor appears.
Solution: Verify the wiring connections and ensure the sensor is receiving power. Use an I²C scanner to detect the sensor's address.
⚠️ Incorrect Readings
Issue: The sensor outputs incorrect temperature or pressure readings.
Solution: Check the reference sea-level pressure value and recalibrate the sensor if necessary.
Debugging Tips
🔍 Serial Monitor
Use the Serial Monitor to check for error messages and verify the sensor's output. Add debug prints in your code to track the sensor's state.
⚡ Voltage Checks
Use a multimeter to verify voltage levels and check for continuity in your connections. Ensure the power supply is stable and within the sensor's requirements.
Additional Resources
Code Examples
Arduino Example
#include <Wire.h>
#include <Adafruit_Sensor.h>
#include <Adafruit_BMP085_U.h>

Adafruit_BMP085_Unified bmp = Adafruit_BMP085_Unified(10085);

void setup() {
  Serial.begin(115200);
  if (!bmp.begin()) {
    Serial.println("Could not find a valid BMP180 sensor, check wiring!");
    while (1);
  }
}

void loop() {
  sensors_event_t event;
  bmp.getEvent(&event);
  if (event.pressure) {
    Serial.print("Pressure: ");
    Serial.print(event.pressure);
    Serial.println(" hPa");
  }
  float temperature;
  bmp.getTemperature(&temperature);
  Serial.print("Temperature: ");
  Serial.print(temperature);
  Serial.println(" *C");
  delay(2000);
}
This Arduino code initializes the BMP180 sensor using the Adafruit BMP180 library. It reads and prints atmospheric pressure and temperature values every two seconds.
ESP-IDF Example
#include "bmp180.h"
#include "esp_log.h"

#define I2C_MASTER_SCL_IO 22
#define I2C_MASTER_SDA_IO 21
#define I2C_MASTER_FREQ_HZ 100000
#define BMP180_ADDR 0x77

static const char *TAG = "BMP180";

void app_main() {
    ESP_LOGI(TAG, "Initializing BMP180...");
    bmp180_dev dev;
    bmp180_init(&dev, I2C_MASTER_SCL_IO, I2C_MASTER_SDA_IO, I2C_MASTER_FREQ_HZ, BMP180_ADDR);

    while (1) {
        bmp180_data data;
        bmp180_read(&dev, &data);
        ESP_LOGI(TAG, "Temperature: %.2f°C", data.temperature);
        ESP_LOGI(TAG, "Pressure: %.2f hPa", data.pressure);
        vTaskDelay(2000 / portTICK_PERIOD_MS);
    }
}
This ESP-IDF code configures the ESP32 to interface with the BMP180 sensor over I²C. The bmp180_init function initializes the sensor, and bmp180_read fetches pressure and temperature readings.
ESPHome Example
sensor:
  - platform: bmp180
    temperature:
      name: "BMP180 Temperature"
    pressure:
      name: "BMP180 Pressure"
    address: 0x77
This ESPHome configuration allows the BMP180 sensor to provide temperature and pressure readings over I²C, using the default address 0x77.
PlatformIO Example
platformio.ini
[env:esp32dev]
platform = espressif32
board = esp32dev
framework = arduino
lib_deps =
    adafruit/Adafruit BMP180 Library
    wire
monitor_speed = 115200
PlatformIO Example Code
#include <Wire.h>
#include "Adafruit_BMP085.h"

Adafruit_BMP085 bmp;

void setup() {
  Serial.begin(115200);
  if (!bmp.begin()) {
    Serial.println("Could not find a valid BMP180 sensor, check wiring!");
    while (1);
  }
}

void loop() {
  Serial.print("Temperature: ");
  Serial.print(bmp.readTemperature());
  Serial.println(" *C");

  Serial.print("Pressure: ");
  Serial.print(bmp.readPressure() / 100.0);
  Serial.println(" hPa");
  delay(2000);
}
This PlatformIO code integrates the BMP180 sensor to read temperature and pressure values, printing them every two seconds.
Conclusion
The ESP32 BMP180 Barometric Pressure Sensor is a powerful environment sensor that offers excellent performance and reliability. With support for multiple development platforms including Arduino, ESP-IDF, ESPHome, PlatformIO, and MicroPython, it's a versatile choice for your IoT projects.
For optimal performance, ensure proper wiring and follow the recommended configuration for your chosen development platform.
Always verify power supply requirements and pin connections before powering up your project to avoid potential damage.
