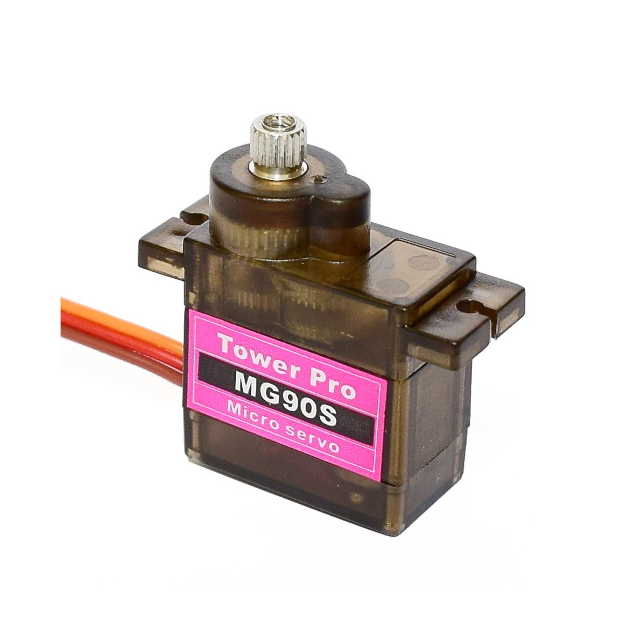
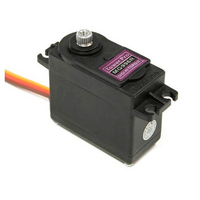
ESP32 MG996R Servo
Overview
The MG996R is a high-torque servo motor ideal for robotics and demanding DIY projects. Operating on 4.8V to 7.2V, it delivers up to 11 kg·cm torque at 6V, with a ~120° rotation range controlled via PWM signals. Weighing 55g, its durable metal gears and dimensions (40.7mm x 19.7mm x 42.9mm) make it suitable for heavy-duty applications requiring strength and reliability.


About MG996R Servo
The MG996R is a high-torque metal gear servo motor designed for robotics, RC models, and heavy-duty DIY projects. With strong metal gears and a powerful torque output, it is ideal for applications requiring strength and durability, such as robotic arms and steering systems.
⚡ Key Features
- Operating Voltage: 4.8V – 7.2V
- Torque: Up to 11 kg·cm at 6V
- Angular Range: ~120° (60° in each direction)
- PWM Control: 1ms (0°), 1.5ms (midpoint), 2ms (max position)
- Weight: ~55g
- Size: 40.7mm × 19.7mm × 42.9mm
- Metal Gears: Increased durability and load capacity
Looking for the best ESP32-compatible servo motors? Check out our ESP32 Servo Motor Guide. 🚀
Where to Buy

Starting from
4$ per unit


Prices are subject to change. We earn from qualifying purchases as an Amazon Associate.
Technical Specifications
Pinout Configuration
The VCC pin is used to supply power to the sensor, and it typically requires 3.3V or 5V (refer to the datasheet for specific voltage requirements). The GND pin is the ground connection and must be connected to the ground of your ESP32.

- The servo's
GNDwire (brown) is used to complete the electrical circuit and must be connected to the ground of the ESP32 and/or the external power source. - The servo's
+5Vwire (red) supplies power to the servo motor and must receive 5 to 7.2 volts from an external power source capable of providing sufficient current (up to 2.5A during stall conditions). - The servo's
DATAwire (orange) carries the PWM signal to control the servo's position and should be connected to a PWM-capable GPIO pin on the ESP32.
Wiring with ESP32

- Connect the MG996R servo's signal wire (orange) to a PWM-capable GPIO pin on the ESP32 (e.g.,
GPIO 13). - Connect the power wire (red) to the
5Vpin on the ESP32 or an external power source capable of supplying sufficient current (up to 2.5A during stall conditions). - Connect the ground wire (brown) to the ESP32's
GNDpin and ensure it is shared with the external power source if used.
Troubleshooting Guide
Common Issues
❌ Servo Not Responding or Moving Erratically
Issue: The MG996R servo does not move as expected or exhibits erratic behavior.
Possible causes include insufficient power supply, incorrect wiring, or incompatible control signals.
Solution: Ensure the servo is powered by an adequate external power source, as it can draw up to 2.5A at stall. Verify that the control signal is connected to a PWM-capable pin on the microcontroller, and that the signal parameters match the servo's specifications.
🔥 Servo Overheating
Issue: The MG996R servo becomes excessively hot during operation.
Possible causes include overloading the servo, continuous operation under high torque, or inadequate power supply.
Solution: Avoid stalling the servo for extended periods, as this can lead to overheating. Ensure that the load applied to the servo is within its torque specifications. Use a stable and adequately rated power supply to prevent voltage drops that could cause the servo to overheat.
⚡ Servo Jittering or Twitching
Issue: The MG996R servo exhibits jittery or twitchy movements during operation.
Possible causes include electrical noise, insufficient power supply, or signal interference.
Solution: Ensure a stable and adequate power supply to the servo, as voltage fluctuations can cause erratic behavior. Implement proper grounding and consider adding decoupling capacitors to filter out electrical noise. Check for any sources of signal interference and ensure that control signals are clean and within the appropriate voltage levels.
⚙️ Servo Not Centering Correctly
Issue: The MG996R servo does not return to its neutral position accurately.
Possible causes include calibration issues, mechanical wear, or internal potentiometer faults.
Solution: Perform a calibration by sending a neutral position command (typically 1500µs pulse width) and adjust as necessary. Inspect the servo for signs of mechanical wear or damage. If the problem persists, the internal potentiometer may be faulty, and replacing the servo could be necessary.
Debugging Tips
🔍 Serial Monitor
Use the Serial Monitor to check for error messages and verify the sensor's output. Add debug prints in your code to track the sensor's state.
⚡ Voltage Checks
Use a multimeter to verify voltage levels and check for continuity in your connections. Ensure the power supply is stable and within the sensor's requirements.
Additional Resources
Code Examples
Arduino Example
ESP-IDF Example
ESPHome Example
PlatformIO Example
MicroPython Example
Conclusion
The ESP32 MG996R Servo is a powerful servo sensor that offers excellent performance and reliability. With support for multiple development platforms including Arduino, ESP-IDF, ESPHome, PlatformIO, and MicroPython, it's a versatile choice for your IoT projects.
For optimal performance, ensure proper wiring and follow the recommended configuration for your chosen development platform.
Always verify power supply requirements and pin connections before powering up your project to avoid potential damage.