

esptool.py Guide: Install, Flash, Erase & Backup ESP32 Firmware
Complete esptool.py guide: install on Windows, Linux, and macOS, then flash, erase, backup, and read ESP32 firmware. Includes all essential commands with examples.
If you've used the Arduino IDE, ESPHome, PlatformIO, or MicroPython to upload firmware to an ESP32, esptool was doing the work behind the scenes. This guide covers using it directly: install, first flash, and the commands worth keeping bookmarked.
What is esptool
esptool is Espressif's open-source command-line tool for flashing, erasing, backing up, and inspecting ESP32 and ESP8266 chips over a serial connection. Arduino IDE, ESPHome, and PlatformIO all call it behind the scenes every time you upload code - this guide is about running it yourself.
Reach for it directly when you need to:
- Flash firmware without installing a full IDE
- Back up or restore a board's flash memory
- Erase flash to troubleshoot a board that won't boot
- Control flashing details an IDE normally hides - offset, baud rate, target chip
Many ESP32 boards use different USB-to-UART bridge chips (CP210x, CH340) - esptool lets you set the right port and baud rate when the defaults don't work. More about USB-to-UART bridges →
1Install esptool
esptool is a Python package, so the steps are the same on every OS:
- Get Python 3.10 or newer - the current esptool release requires it.
- Install esptool:
pip install esptool - Verify:
esptool versionshould printesptool v5.x.x.
Windows
Download Python from python.org and check "Add Python to PATH" during install. Then:
pip install esptool
macOS
Homebrew installs esptool with its own bundled Python - no separate Python step needed:
brew install esptool
Or install Python via brew install python and use pip instead.
Linux
Ubuntu/Debian:
sudo apt install python3 python3-pip
Then pip install esptool as usual.
'esptool' is not recognized or command not found? On Windows, Python scripts may not be on your PATH. On any OS, if your Python is older than 3.10, pip installs esptool 4.x instead of the current release, and that older version doesn't ship an esptool command at all - only the older esptool.py. Either way, python -m esptool works exactly like esptool everywhere this guide uses it, including with a version number: python -m esptool version.
Commands changed in esptool v5: subcommands now use hyphens (write-flash, not write_flash). If your Python is older than 3.10, pip quietly installs esptool 4.x instead, which only understands the old underscore names - and, as the callout above explains, doesn't install a bare esptool command at all. Run python -m esptool version first (it works on both versions), and if it doesn't say v5, use the underscore spelling from the version you actually have.
2Connect your ESP32
Plug the board into your computer with a USB cable.
Use a data cable. Many bundled micro-USB cables are charge-only and won't show up as a serial port at all.
3Find the serial port
Windows
Command Prompt:
wmic path Win32_SerialPort get DeviceID,Name
Or Device Manager → Ports (COM & LPT). Look for COM3, COM4, etc.
macOS
Terminal:
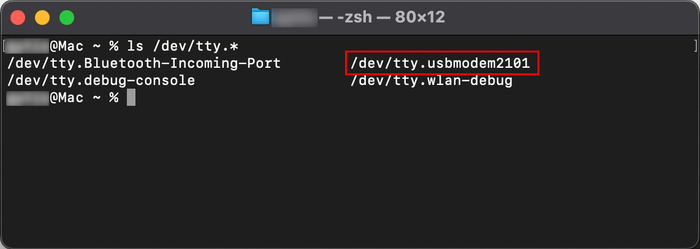
ls /dev/tty.*
Look for /dev/tty.usbmodemXXXX or /dev/tty.usbserial-....
Linux
Terminal:
ls /dev/ttyUSB*
Look for /dev/ttyUSB0.
No port shows up? Install the driver for your board's USB-to-serial chip:
- CP210x (Silicon Labs): Download here
- CH340 (WCH): Download here
4Erase the flash
Optional, but recommended - wiping the flash before writing new firmware avoids leftover data from a previous install conflicting with the new one:
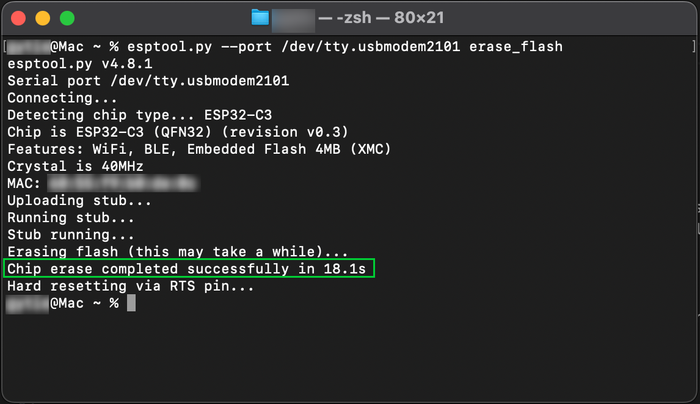
esptool --port <your-port> erase-flash
Replace <your-port> with what you found in the previous step (e.g. /dev/ttyUSB0 or COM3). If the chip won't respond, hold the BOOT/FLASH button until the erase starts.
5Write the firmware
With a firmware.bin ready, flash it:
esptool --chip esp32 --port <your-port> --baud 460800 write-flash 0x1000 firmware.bin
Flag reference
--chip esp32 - target chip. Also accepts esp32s3, esp32c3, esp32c6, and others, or omit it entirely and esptool auto-detects the chip.
--port <your-port> - serial port, e.g. COM3 or /dev/ttyUSB0.
--baud 460800 - flashing speed; drop to 115200 if it errors out.
write-flash 0x1000 firmware.bin - write the file starting at flash offset 0x1000 (the classic ESP32's bootloader offset - S3/C3/etc. variants typically start at 0x0, check your board's build docs). Compression is on by default now, so the old -z flag isn't needed.
Where to get ESP32 firmware
WLED - LED control firmware
ESPHome - smart home automation
MicroPython - Python on ESP32
Tasmota - MQTT automation
Arduino IDE - your own firmware
A successful write ends with Hash of data verified. and Hard resetting via RTS pin... - the board should now be running the new firmware.
Command reference
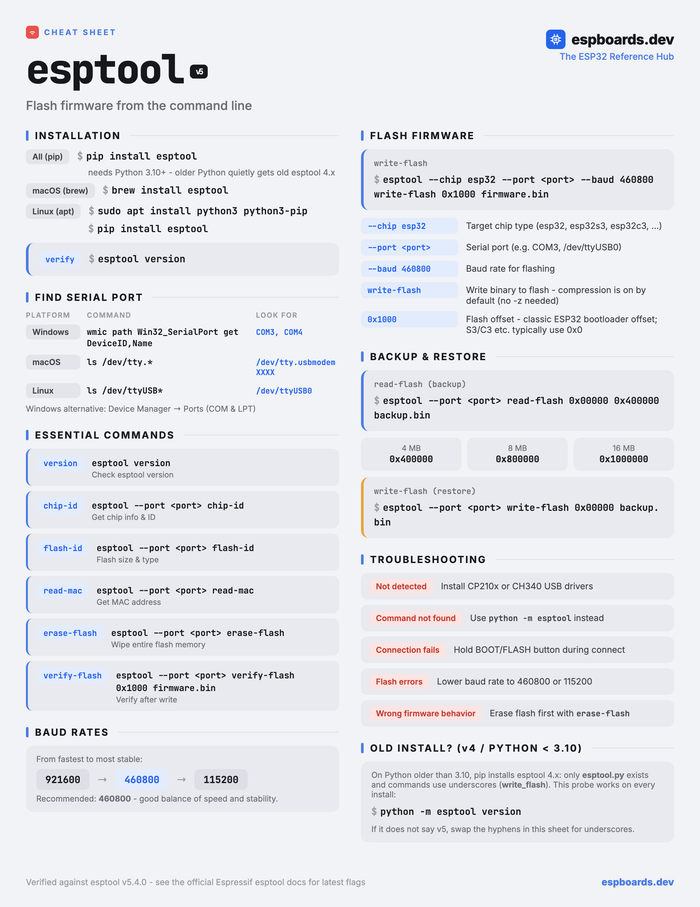
The commands below use the current (v5) hyphenated names. Every one of them still runs if you type the underscore version instead - you'll just see a one-line deprecation warning first.
version
esptool version
Prints the installed esptool version - no board connection needed.
chip-id
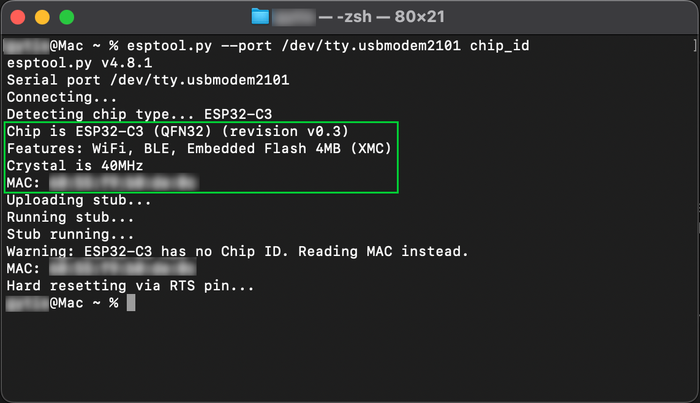
esptool --port <your-port> chip-id
Connects to the board and prints its chip type, revision, and MAC address.
flash-id
esptool --port <your-port> flash-id
Reads the flash chip's manufacturer, size, and speed.
erase-flash
esptool --port <your-port> erase-flash
Wipes the entire flash chip. Useful before flashing new firmware, or when a board is stuck in a bad state.
write-flash
esptool --chip esp32 --port <your-port> --baud 460800 write-flash 0x1000 firmware.bin
Writes a binary to flash at the given offset. See the flag reference above.
read-flash - backup and restore
Dump the entire flash chip to a file:
esptool --port <your-port> read-flash 0x00000 0x400000 backup.bin
Adjust 0x400000 to your board's flash size: 4MB is 0x400000, 8MB is 0x800000, 16MB is 0x1000000. Useful as a backup before major changes, or to dump firmware off an existing device.
Restore it later:
esptool --port <your-port> write-flash 0x00000 backup.bin
Baud rates
Fastest to most stable: 921600 → 460800 → 115200. 460800 is a reasonable default; drop to 115200 if flashing errors out on a particular board or cable.
esptool --port <your-port> --baud 921600 write-flash 0x1000 firmware.bin
Troubleshooting
Working through a stuck flash? Check these in order:
- USB drivers installed for your board's chip (CP210x or CH340, above)
- Correct serial port selected - it can change if you unplug/replug or swap USB ports
- Lower the baud rate to
460800or115200 - Hold the BOOT button while the command connects, if the chip doesn't respond
- Swap in a known-good USB data cable
See also: ESP32 USB-to-UART bridge guide.