ESP32 SHT20 Temperature and Humidity Sensor
Overview
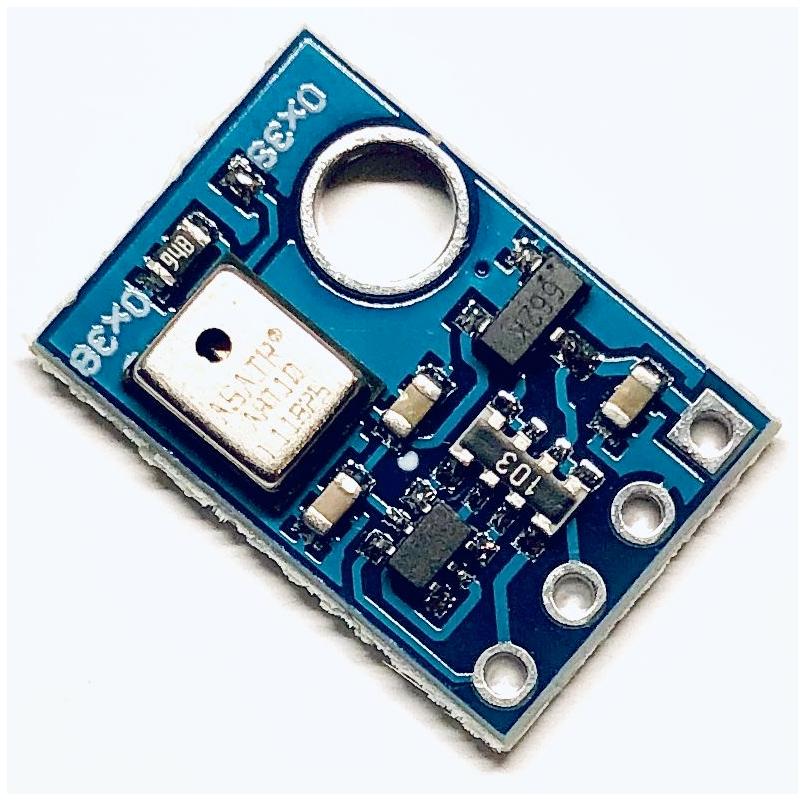
The SHT20 sensor is a digital temperature and humidity sensor that utilizes Sensirion's CMOSens® technology. It provides calibrated, linearized sensor signals in digital, I2C format, making it ideal for applications requiring accurate and reliable environmental measurements.


About SHT20 Temperature and Humidity Sensor
The SHT20, developed by Sensirion, is a cost-effective digital sensor designed for accurate temperature and humidity measurements. Known for its reliability, it is widely used in HVAC systems, data loggers, and consumer electronics.
⚡ Key Features
- High Accuracy & Stability – Delivers precise temperature and humidity readings.
- Digital Output – Communicates via I²C for seamless integration.
- Compact & Energy-Efficient – Ideal for battery-powered applications.
- Cost-Effective Solution – Affordable without compromising performance.
🔗 Looking for enhanced accuracy? Consider the SHT21 or SHT30 for improved features.
Where to Buy

Starting from
$5 per unit


Prices are subject to change. We earn from qualifying purchases as an Amazon Associate.
Technical Specifications
Pinout Configuration
The VCC pin is used to supply power to the sensor, and it typically requires 3.3V or 5V (refer to the datasheet for specific voltage requirements). The GND pin is the ground connection and must be connected to the ground of your ESP32.
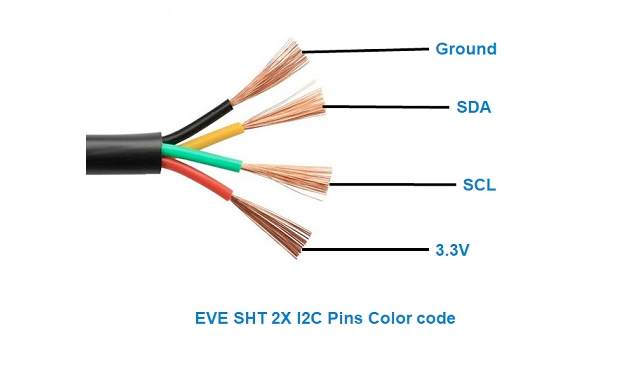
The SHT20 pinout is as follows:
- VCC: Power supply voltage (2.1V to 3.6V).
- GND: Ground.
- SDA: Serial Data Line for I2C communication.
- SCL: Serial Clock Line for I2C communication.
Wiring with ESP32
- Connect VCC to the 3.3V pin on the ESP32.
- Connect GND to the ground (GND) of the ESP32.
- Connect SDA to the ESP32's GPIO21 (default I2C data pin).
- Connect SCL to the ESP32's GPIO22 (default I2C clock pin).
- Place pull-up resistors (10kΩ) between SDA and VCC, and SCL and VCC, to ensure reliable communication.
Troubleshooting Guide
Common Issues
⚠️ Incorrect Temperature and Humidity Readings
Issue: The SHT20 sensor returns incorrect temperature and humidity values, such as 988 instead of the expected readings.
Possible causes include improper wiring, incorrect I2C address configuration, or sensor initialization issues.
Solution: Verify that the sensor is correctly wired to the microcontroller, ensuring proper connections for power, ground, and I2C data lines. Confirm that the correct I2C address (typically 0x40) is specified in your code. Ensure that the sensor is properly initialized in the software, and consider using a reliable library compatible with the SHT20 sensor.
❌ No Output on Serial Monitor
Issue: The serial monitor displays initial messages (e.g., SHT20 example) but does not show subsequent temperature or humidity readings.
Possible causes include issues with sensor communication, missing pull-up resistors on the I2C lines, or incorrect sensor initialization.
Solution: Ensure that the I2C communication lines (SDA and SCL) have appropriate pull-up resistors (typically 4.7kΩ). Verify that the sensor is properly connected and initialized in the code. Check for any loose connections or wiring errors that might impede communication between the sensor and the microcontroller.
💻 Compilation Errors with SHT20 Library
Issue: Compilation errors occur when using the SHT20 library with the Arduino IDE.
Possible causes include missing library files, incorrect library installation, or conflicts with other installed libraries.
Solution: Ensure that the SHT20 library is correctly installed in the Arduino IDE. Verify that there are no conflicting libraries that might interfere with the SHT20 library. If necessary, reinstall the library or try using an alternative library compatible with the SHT20 sensor.
⚡ Interference with Other I2C Devices
Issue: Connecting the SHT20 sensor alongside other I2C devices causes communication issues or device malfunctions.
Possible causes include I2C address conflicts or improper bus configuration.
Solution: Ensure that each device on the I2C bus has a unique address. The SHT20 sensor typically uses the address 0x40. Verify that no other devices share this address. If address conflicts exist, consider using an I2C multiplexer or modifying the setup to resolve the conflicts.
Debugging Tips
🔍 Serial Monitor
Use the Serial Monitor to check for error messages and verify the sensor's output. Add debug prints in your code to track the sensor's state.
⚡ Voltage Checks
Use a multimeter to verify voltage levels and check for continuity in your connections. Ensure the power supply is stable and within the sensor's requirements.
Additional Resources
Code Examples
Arduino Example
#include <Wire.h>
#include "DFRobot_SHT20.h"

DFRobot_SHT20 sht20;

void setup() {
  Serial.begin(115200);
  Wire.begin();
  sht20.initSHT20();
  delay(100);
  sht20.checkSHT20();
}

void loop() {
  float humidity = sht20.readHumidity();
  float temperature = sht20.readTemperature();
  Serial.print("Humidity: ");
  Serial.print(humidity);
  Serial.println(" %");
  Serial.print("Temperature: ");
  Serial.print(temperature);
  Serial.println(" °C");
  delay(2000);
}ESP-IDF Example
#include <stdio.h>
#include "freertos/FreeRTOS.h"
#include "freertos/task.h"
#include "driver/i2c.h"

#define I2C_MASTER_SCL_IO    22    /!< GPIO number used for I2C master clock /
#define I2C_MASTER_SDA_IO    21    /!< GPIO number used for I2C master data /
#define I2C_MASTER_NUM       I2C_NUM_0 /!< I2C master I2C port number /
#define I2C_MASTER_FREQ_HZ   100000     /!< I2C master clock frequency /
#define SHT20_SENSOR_ADDR    0x40       /!< SHT20 I2C address /

static esp_err_t i2c_master_init(void) {
    i2c_config_t conf = {
        .mode = I2C_MODE_MASTER,
        .sda_io_num = I2C_MASTER_SDA_IO,
        .scl_io_num = I2C_MASTER_SCL_IO,
        .sda_pullup_en = GPIO_PULLUP_ENABLE,
        .scl_pullup_en = GPIO_PULLUP_ENABLE,
        .master.clk_speed = I2C_MASTER_FREQ_HZ,
    };
    esp_err_t err = i2c_param_config(I2C_MASTER_NUM, &conf);
    if (err != ESP_OK) {
        return err;
    }
    return i2c_driver_install(I2C_MASTER_NUM, conf.mode, 0, 0, 0);
}

void read_sht20_sensor() {
    uint8_t data[3];
    uint8_t cmd = 0xF5; // Command for humidity measurement
    i2c_master_write_to_device(I2C_MASTER_NUM, SHT20_SENSOR_ADDR, &cmd, 1, pdMS_TO_TICKS(1000));
    vTaskDelay(pdMS_TO_TICKS(50));
    i2c_master_read_from_device(I2C_MASTER_NUM, SHT20_SENSOR_ADDR, data, 3, pdMS_TO_TICKS(1000));

    uint16_t raw_humidity = (data[0] << 8) | (data[1] & 0xFC);
    float humidity = -6.0 + 125.0  (raw_humidity / 65536.0);

    cmd = 0xF3; // Command for temperature measurement
    i2c_master_write_to_device(I2C_MASTER_NUM, SHT20_SENSOR_ADDR, &cmd, 1, pdMS_TO_TICKS(1000));
    vTaskDelay(pdMS_TO_TICKS(50));
    i2c_master_read_from_device(I2C_MASTER_NUM, SHT20_SENSOR_ADDR, data, 3, pdMS_TO_TICKS(1000));

    uint16_t raw_temperature = (data[0] << 8) | (data[1] & 0xFC);
    float temperature = -46.85 + 175.72  (raw_temperature / 65536.0);

    printf("Temperature: %.2f °C, Humidity: %.2f %%\n", temperature, humidity);
}

void app_main() {
    ESP_ERROR_CHECK(i2c_master_init());

    while (1) {
        read_sht20_sensor();
        vTaskDelay(pdMS_TO_TICKS(2000));
    }
}read_sht20_sensor() function reads raw temperature and humidity data by sending the appropriate commands to the sensor and processing the response. The results are converted into human-readable temperature (°C) and humidity (%) values and printed to the console every 2 seconds.ESPHome Example
sensor:
  - platform: sht3x
    address: 0x40
    temperature:
      name: "Room Temperature"
    humidity:
      name: "Room Humidity"
update_interval: 60ssht3x platform. The I2C address of the sensor is set to 0x40, and two sensor entities are created: one for temperature and one for humidity. The update_interval is set to 60 seconds, meaning the sensor readings will be updated every minute.PlatformIO Example
platformio.ini
[env:esp32dev]
platform = espressif32
board = esp32dev
framework = arduino
lib_deps =
    DFRobot/DFRobot_SHT20 @ ^1.0.0
monitor_speed = 115200
PlatformIO Example Code
#include <Wire.h>
#include "DFRobot_SHT20.h"

DFRobot_SHT20 sht20;

void setup() {
    Serial.begin(115200);
    Wire.begin();
    sht20.initSHT20();
    delay(100);
    sht20.checkSHT20();
}

void loop() {
    float humidity = sht20.readHumidity();
    float temperature = sht20.readTemperature();

    Serial.print("Temperature: ");
    Serial.print(temperature);
    Serial.println(" °C");

    Serial.print("Humidity: ");
    Serial.print(humidity);
    Serial.println(" %");

    delay(2000);
}MicroPython Example
from machine import Pin, I2C
from time import sleep

# Initialize I2C
i2c = I2C(0, scl=Pin(22), sda=Pin(21))
SHT20_ADDR = 0x40

# Function to read data from the SHT20
def read_sht20(cmd):
    i2c.writeto(SHT20_ADDR, bytearray([cmd]))
    sleep(0.05)
    data = i2c.readfrom(SHT20_ADDR, 3)
    raw = (data[0] << 8) | (data[1] & 0xFC)
    return raw

while True:
    # Read humidity
    raw_humidity = read_sht20(0xF5)
    humidity = -6.0 + 125.0  (raw_humidity / 65536.0)

    # Read temperature
    raw_temperature = read_sht20(0xF3)
    temperature = -46.85 + 175.72  (raw_temperature / 65536.0)

    print(f"Temperature: {temperature:.2f} °C, Humidity: {humidity:.2f} %")
sleep(2)Conclusion
The ESP32 SHT20 Temperature and Humidity Sensor is a powerful environment sensor that offers excellent performance and reliability. With support for multiple development platforms including Arduino, ESP-IDF, ESPHome, PlatformIO, and MicroPython, it's a versatile choice for your IoT projects.
For optimal performance, ensure proper wiring and follow the recommended configuration for your chosen development platform.
Always verify power supply requirements and pin connections before powering up your project to avoid potential damage.