

PlatformIO ESP32 Setup: Install in VSCode, Build & Upload
Install PlatformIO in VSCode, create an ESP32 project, understand platformio.ini, and build and upload your first program - plus the CLI for when you outgrow the buttons.
PlatformIO is a build system and IDE extension for embedded projects, and it runs inside Visual Studio Code. Instead of Arduino IDE's single sketch window, you get a real editor, per-project configuration, and a command line underneath it - useful once a project grows past one file, or once you want the same project buildable by hand or in CI. This guide covers installing PlatformIO in VSCode, creating an ESP32 project, understanding platformio.ini, and building and uploading a first program, both from the toolbar and from the CLI.
Why PlatformIO (and why not)
PlatformIO is not a strict upgrade over Arduino IDE - it trades away some of Arduino IDE's simplicity for structure that pays off on bigger projects. Worth knowing before you install it:
What you gain
A real editor. VSCode's autocomplete, jump-to-definition, and multi-file project view beat Arduino IDE's plain text box.
Per-project configuration. platformio.ini pins the exact platform, board, and library versions - a project built today still builds the same way next year.
A CLI underneath. pio run works the same in a terminal, a script, or CI - no GUI required.
What it costs
A steeper first hour. Arduino IDE's board manager and library manager are simpler than learning platformio.ini syntax and PlatformIO's own library registry.
Bigger first build. PlatformIO downloads its own toolchain and framework packages per platform, separate from anything Arduino IDE already installed.
Two library worlds. Most Arduino libraries work, but PlatformIO's registry and Arduino's Library Manager are not the same index - occasionally a library is easier to find in one than the other.
If you are making your first blink sketch, Arduino IDE is the faster path. If you already know you want VSCode, or you are about to start a project with more than one source file, PlatformIO is worth the setup.
1Install VSCode and the PlatformIO IDE extension
- Download and install Visual Studio Code for your OS, if you do not already have it.
- Open VSCode and go to the Extensions view (the square-icon tab in the left sidebar, or
Cmd/Ctrl+Shift+X). - Search for
platformio ideand install the official PlatformIO IDE extension. - Wait for the install to finish - PlatformIO's own Core tooling installs in the background the first time, which takes a few minutes.
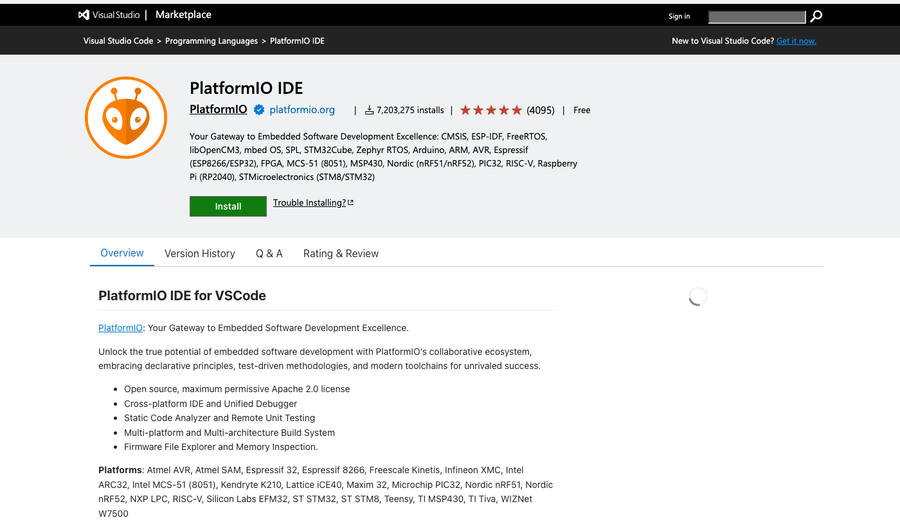
Per the official PlatformIO VSCode docs: install VSCode, open its Extensions view, search for the official platformio ide extension, and install it - PlatformIO Home then opens automatically, with a button in the toolbar to reopen it any time.
Nothing happens after install? Restart VSCode once. The extension adds a PlatformIO icon (an ant head) to the sidebar and a toolbar at the bottom of the window - if either is missing, a restart usually fixes it.
2Create a new ESP32 project
Open PIO Home (the house icon in the PlatformIO sidebar, or the toolbar's Home button), click New Project, and fill in the wizard:
- Name: anything - for example
esp32-blink. - Board: search for your board. Most classic 30-pin ESP32 devkits match Espressif ESP32 Dev Module; C3 and S3 boards have their own entries. Not sure which one is yours? Find your board among 270+ pages →
- Framework: Arduino - it gives you the same
digitalWrite/SerialAPI as Arduino IDE, just built by PlatformIO instead. - Click Finish and wait - PlatformIO creates the project folder and downloads the platform packages for that board.
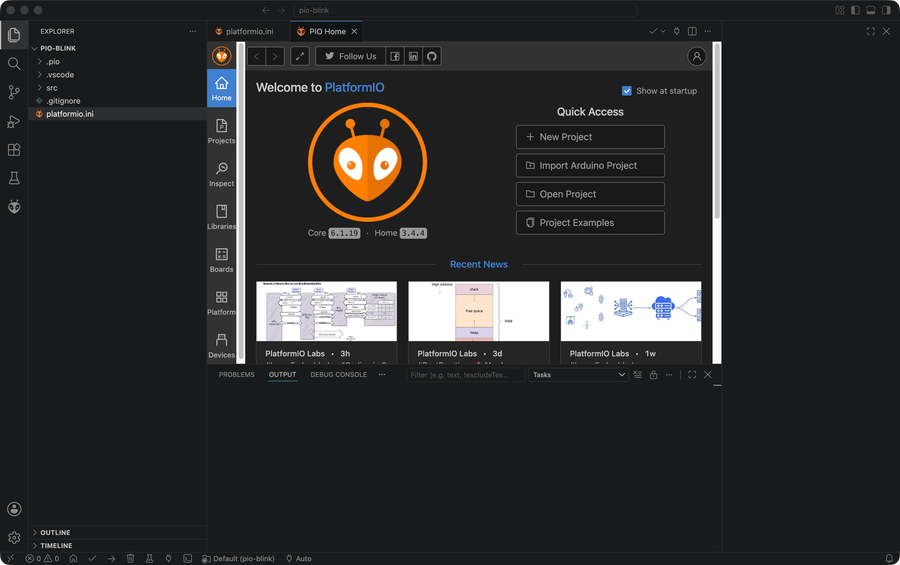
A new PlatformIO project has a fixed layout:
esp32-blink/
  platformio.ini   # project configuration - board, framework, settings
  src/
    main.cpp       # your program (setup()/loop(), same as a .ino)
  include/         # project-specific headers
  lib/             # project-specific libraries
  .pio/            # build output - generated, do not edit or commit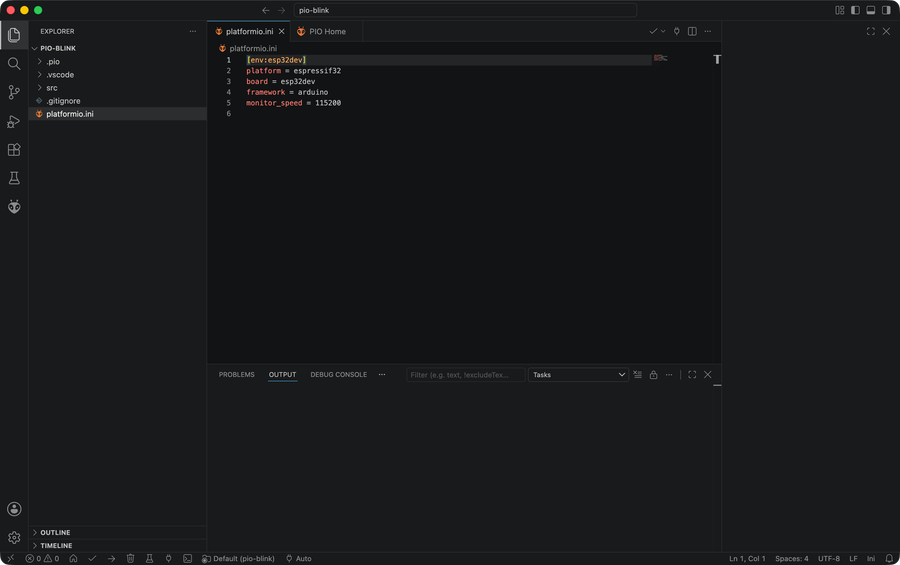
3Understand platformio.ini
Every PlatformIO project is defined by one file, platformio.ini, sitting at the project root. This is the version verified for this guide - one environment, targeting a classic ESP32 devkit with the Arduino framework:
[env:esp32dev]
platform = espressif32
board = esp32dev
framework = arduino
monitor_speed = 115200[env:esp32dev]- an environment name. A project can define several (different boards, different build flags) and build them independently.platform = espressif32- the Espressif 32 platform package: the toolchain, upload tool, and board definitions for every ESP32 variant.board = esp32dev- which of that platform's board definitions to build for. This is the "Espressif ESP32 Dev Module" entry from the New Project wizard; other boards use their own board ID (their page in the boards database lists it where relevant).framework = arduino- build against the Arduino core's APIs. PlatformIO also supportsespidfand mixedarduino, espidfsetups, but that is a separate guide - see ESP-IDF in VSCode.monitor_speed = 115200- the baud ratepio device monitoruses. It should match theSerial.begin()call in your code.
4Build, upload, and monitor
This blink sketch is the one verified for this guide - GPIO2 is the built-in LED on most classic ESP32 devkits. If your board uses a different pin, its board page has the right number.
#include <Arduino.h>

const int ledPin = 2;  // built-in LED on most classic ESP32 devkits

void setup() {
  pinMode(ledPin, OUTPUT);
  Serial.begin(115200);
}

void loop() {
  digitalWrite(ledPin, HIGH);
  Serial.println("LED on");
  delay(1000);
  digitalWrite(ledPin, LOW);
  Serial.println("LED off");
  delay(1000);
}
PlatformIO's bottom toolbar in VSCode has one button per action: a checkmark to build, a right-arrow to upload, and a plug icon to open the serial monitor.
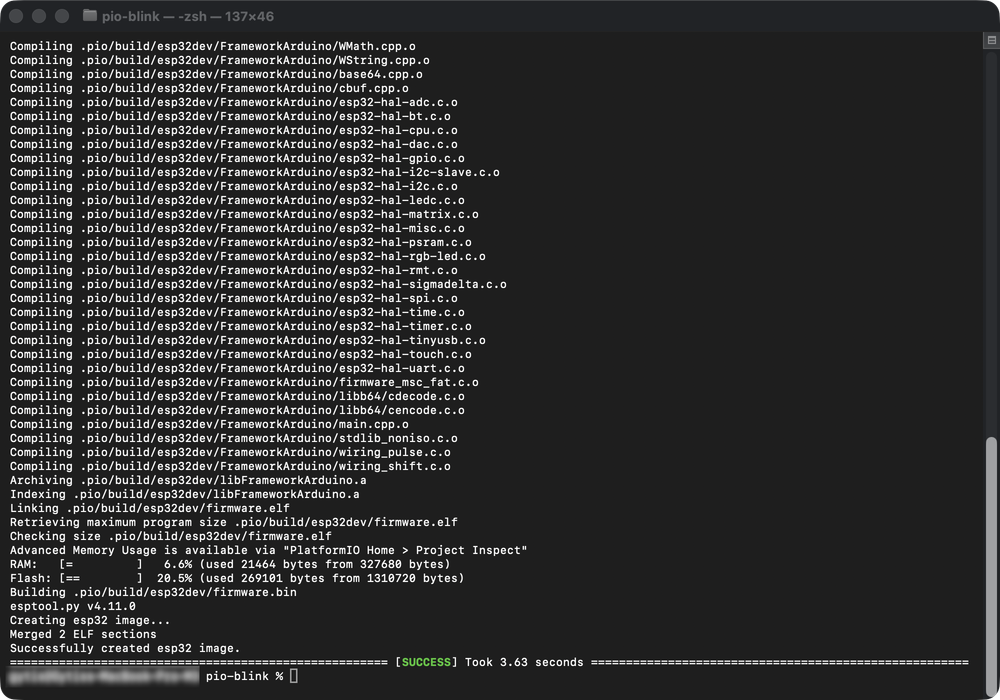
- Build: click the checkmark and wait for "SUCCESS".
- Upload: plug in your board over a USB data cable, then click the arrow and wait for "SUCCESS". This step needs a connected board - the checkmark alone (build) does not.
- Monitor: click the plug icon to open the serial terminal and watch the LED on/off lines print.

The same three actions are plain CLI commands, and they are what the toolbar buttons run underneath. Useful in a terminal, a script, or when the buttons are not visible for some reason:
pio run
pio run -t upload
pio device monitor
The build shown in platformio.ini and src/main.cpp above was verified with pio run (compile only, no board attached): PlatformIO Core 6.1.18, Espressif 32 platform 7.1.0, SUCCESS in a few seconds, using about 7% RAM and 21% flash on a classic ESP32. Uploading and monitoring need an actual board plugged in over USB - not something this compile-only check exercises.
Do not commit the .pio folder. It holds the full build output - toolchain artifacts, compiled objects, the works - and can run to hundreds of megabytes. PlatformIO's New Project wizard adds a .gitignore with .pio in it automatically; if you started the project another way, add .pio/ to .gitignore yourself before your first commit.