Getting Started with ESP32
There are several types of ESP32 boards. Pick the one you have, or browse the most common ones to get the right setup instructions.
1. Choose Your ESP32 Board
Select your board below to see setup instructions and hardware details.
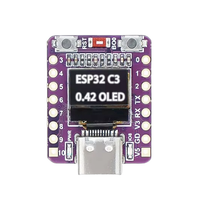
ESP32-C3 OLED 0.42" Display
ESP32-C3 development board with integrated 0.42" OLED display and RISC-V processor for compact IoT projects.
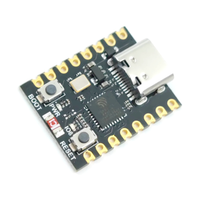
ESP32 C3 Super Mini
Ultra-compact ESP32-C3 board with Wi-Fi & BLE 5.0 - perfect for low-cost, low-power IoT projects and space-constrained...
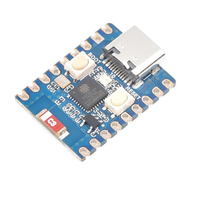
ESP32 C3 Zero
Minimalist ESP32-C3 board with Wi-Fi & BLE - ideal for simple, budget-friendly IoT builds in tight spaces.
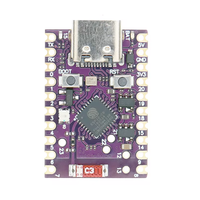
ESP32-C6 Super Mini
Tiny ESP32-C6 board with Wi-Fi 6, BLE 5.3, and Thread - perfect for future-proof, low-power IoT and Matter-enabled...
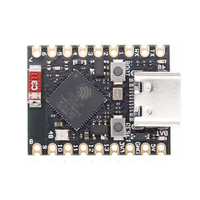
ESP32-S3 Super Mini
Compact ESP32-S3 board with Wi-Fi, BLE, and AI support - great for smart, space-saving IoT and edge AI applications.
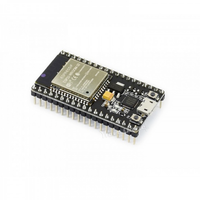
NodeMCU-32S
Breadboard-friendly ESP32 board with Wi-Fi and BLE - great for rapid prototyping, IoT applications, and Arduino-based...
2. Set Up Your Development Environment
Choose how you want to program your board. Each option offers a different workflow, from beginner-friendly to advanced.
Arduino IDE
The classic, beginner-friendly way to program ESP32 boards. Huge community, easy libraries.
Learn More →
Arduino + VSCode
The classic, beginner-friendly way to program ESP32 boards. Huge community, easy libraries.
Learn More →
ESPHome
No coding required! Integrate ESP32 with Home Assistant for smart home automation.
Learn More →
MicroPython
Write Python code directly for rapid prototyping and education.
Learn More →
ESP-IDF Advanced
Official Espressif SDK for advanced users. Full control, C/C++ development.
Learn More →
Esptool.py
Official Espressif Python Tool.
Learn More →3. Upload Your First Sketch
Let's make your ESP32 do something! Choose your preferred language and upload a simple "Blink" example to get started.
// Blink LED on ESP32 (Arduino)
#define LED_BUILTIN 2

void setup() {
  pinMode(LED_BUILTIN, OUTPUT);
}

void loop() {
  digitalWrite(LED_BUILTIN, HIGH);
  delay(500);
  digitalWrite(LED_BUILTIN, LOW);
  delay(500);
}How to Upload:
- 1 Connect your ESP32 board to your computer via USB.
- 2 Open your chosen development environment (Arduino IDE, Thonny, VSCode, etc.).
- 3 Copy the code above into a new project or file.
- 4 Select the correct board and port in your environment's settings.
- 5 Click "Upload" (or "Run" for MicroPython) to flash the code to your ESP32.
- 6 Wait for the upload to finish. The onboard LED should start blinking!
4. Troubleshooting
Encountering issues? Don't worry, we've got you covered. Check out our common troubleshooting tips below.
Upload Timeout Error
Learn how to resolve this common issue and get your project back on track.
Wi-Fi Connection Failure
Learn how to resolve this common issue and get your project back on track.
Brownout Reset Error
Learn how to resolve this common issue and get your project back on track.
Flash Read Error
Learn how to resolve this common issue and get your project back on track.
Port Not Detected
Learn how to resolve this common issue and get your project back on track.
Manual Boot Mode
Learn how to resolve this common issue and get your project back on track.
5. Add Sensors to Your Project
Ready to go further? Start connecting things. Here are some beginner-friendly sensors to try: